
We are influencers and brand affiliates. This post contains affiliate links, most which go to Amazon and are Geo-Affiliate links to nearest Amazon store.
Nowadays, we heavily rely on using e-mails instead of traditional paper mail. There are many advantages for this approach. Not only do they save more paper, but also it is faster and more accurate. The recipient can receive the information within a matter of seconds instead of days. However, there are so many techniques and skills that can optimize your email usage. In this series, we will show you how to become a Gmail Wizard.
-
Templates in gmail:
- Overview: In this section, we are going to show you how to create and use Templates in Gmail. In my experience, this is a nice technique if you are going to send a lot of emails with the same basic information. By having a template, you can save a lot of time from repeating the same amount of work over and over again. Therefore, you can spend your valuable time with higher priority tasks.
- Go to Settings icon, which is the Cog icon on the top right of your screen. Then, select See all settings.

- At this point, you will see another gmail screen. On this screen, there are multiple tabs with different options. Select the Advanced link.

- Then, you will need to scroll down to the Templates section. Make sure to select the circle marked Enable. Don’t forget to save your changes by clicking the “Save Changes” button at the bottom of your screen.

Now, with this feature enabled, you can create up to 50 different templates. For the next few steps, I will show you how to create and use them
-
- First of all, in order to create a template, click on the + Compose button as usual. This button should locate on the left side of your screen.

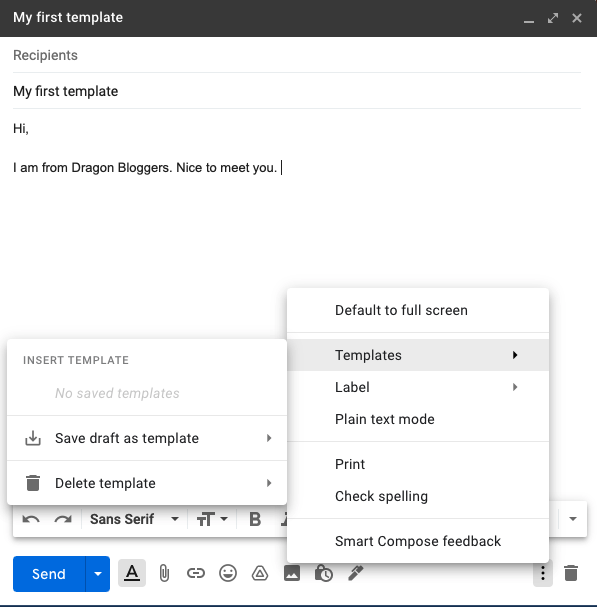
- Secondly, you will need to write your email as usual. Don’t forget to include the subject line. After you finish writing, navigate to the bottom right of your compose window. There is a three dot button. Select it and then select Templates. Another tool will show up, choose Save Draft as template. This option will ask you to create a new template or overwrite an existing one. If you create a new template, don’t forget a unique name for your template as well.

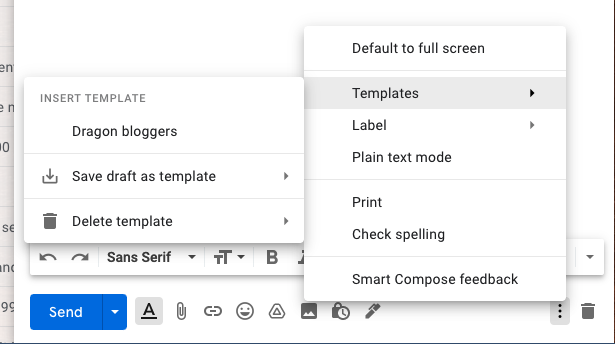
- Finally, now our templates are ready. As a result, you can easily insert it into your email when you need one. Then, select the three dot button again. Select Templates, then Select the templates that you want to use for this email draft.

- After selecting the templates you want, you will see all your pre-made information from the template shows up. And that’s how you utilize template magic from Gmail.
- First of all, in order to create a template, click on the + Compose button as usual. This button should locate on the left side of your screen.
-
The Label structure:
- Label is one of the most useful tools in Gmail app. Gmail uses it as a way to sort your email in certain categories. In other words, you can visualize label as a digital folders for your email. Once you have a label, you can easily search for that specific label in the search bar. From there, you can find all the emails belong to that specific label name. Gmail also support cross-referencing for your label. This feature allows your email to have two or more label at the same time.
- In order to label a specific email, first of all, you will need to open that email. Then, you click on Label icon, which is a tag icon.

- At this stage, you have multiple options. You can either select an existing label or you can even create a new one. If you have too many existing labels, you can just type in the shown box. It will filter out the label you are looking for.
- If you want the new label, type out the name and select it. Your email will have the newly created label.
What if you want to create a label without going to a specific email ? There is a solution for that as well.
-
- From your Inbox view, click the Settings cog, which is on the top right corner of your screen. Then, select See All Settings
- At this point, you will see another gmail screen. On this screen, there are multiple tabs with different options. Select the Labels link.

- From here, you will see all the settings related to Labels feature in Gmail. You can show, hide, remove or even add new labels. If you scroll down a little bit, you will see Create New Label section. This is where you can create new entity for your label.

- This also features the amount of emails belongs to certain label. You can totally check them out here.
- Under the Actions column, there are two links: remove and edit. Selecting Remove will remove the Label of the selected row. Don’t worry about your email. This action will only delete the label, not the email associated with them.

- From your Inbox view, click the Settings cog, which is on the top right corner of your screen. Then, select See All Settings
And that is it for today. In this article, we showed you how to utilize Label and Template feature in Gmail. Stay tuned for more useful techniques to increase your efficiency with Gmail.
We are influencers and brand affiliates. This post contains affiliate links, most which go to Amazon and are Geo-Affiliate links to nearest Amazon store.
If you can’t find me at the table coding, then you can find me at another table playing boardgames. I want to share the fun, the intense, the `ah-ha` moments, the sabotage, the nerve wracking experience … that Boardgames can offer to the community.