
We are influencers and brand affiliates. This post contains affiliate links, most which go to Amazon and are Geo-Affiliate links to nearest Amazon store.
From the Pixel 3, released in 2018, to the new Pixel 10 released this year (2025), these phones have an integrated astrophotography mode that allows you to take amazing photos of the stars and, in ideal conditions, even capture the Milky Way. While it is very easy to use, you may not have tried it yet, or maybe you know how but have not achieved the expected results.
In this article, we will explain how to activate this astrophotography mode and give you some useful tips so that your photos look so good that they seem taken with a professional camera.
The tests will be done using a Google Pixel 8 Pro, but as mentioned earlier, it is basically the same on any Pixel phone.
Some recommendations before taking the photo:
- Avoid light pollution. Fortunately, I do not live near big cities, but even so, street lighting negatively affects the final result when taking a photo with this mode. Therefore, I recommend that if you want a good photo, try to do it in a place with less light pollution, although even under those conditions it is possible to get a good photo.
- Keep in mind that you should not move the phone while the photo is being taken. It will take a few minutes; otherwise, the final image may be blurred.
- If you want to create a timelapse of several seconds, keep the phone in the same position throughout the process and capture the images consistently once each shot has finished. Each photo creates a 1-second timelapse; you can combine these short videos to get a timelapse showing how the stars move due to the Earth’s rotation.
1. Activate Night Sight Mode on the Camera
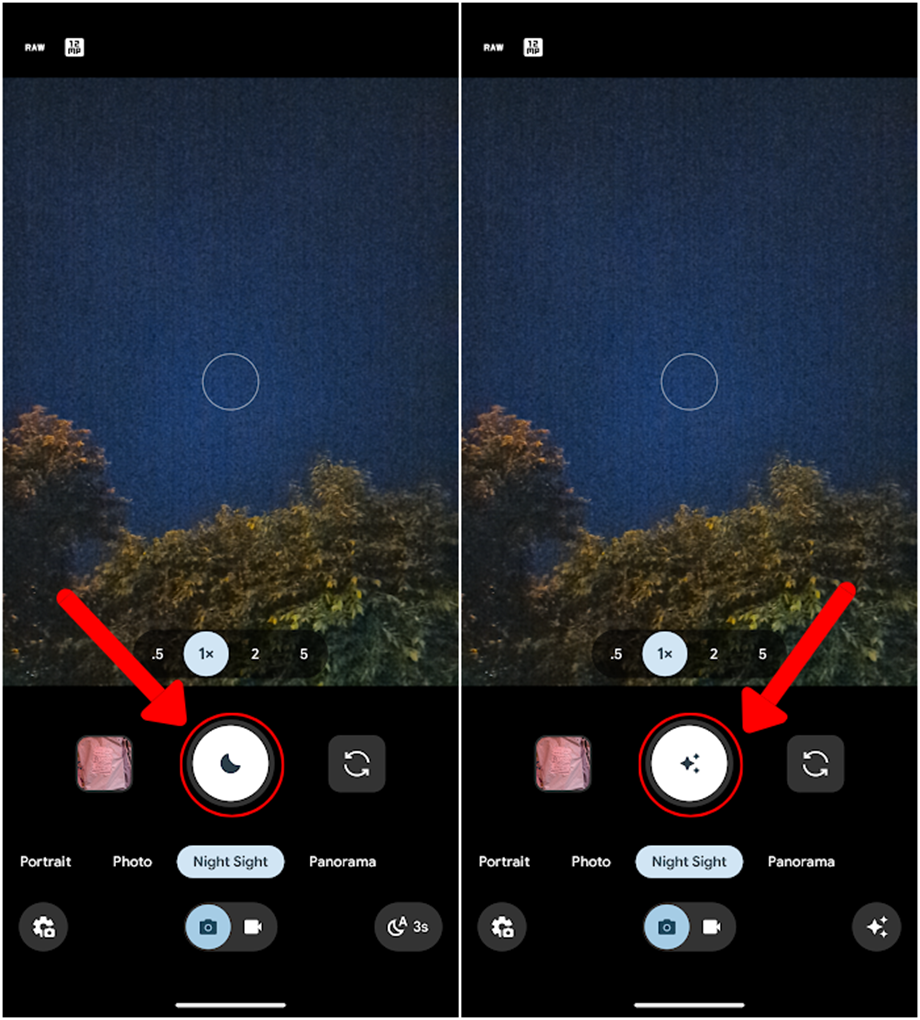
The first step to activate astrophotography mode is to turn on the night mode on your Pixel phone. Once done, you need to keep your phone as stable as possible; holding it in your hand is not enough. It is recommended to use a tripod or place the phone on a surface like rocks or something you have at home. The shutter icon will change from a moon to stars, which means the astrophotography mode is active, and you just need to press it to start taking the photo.
2. Wait up to 4 Minutes
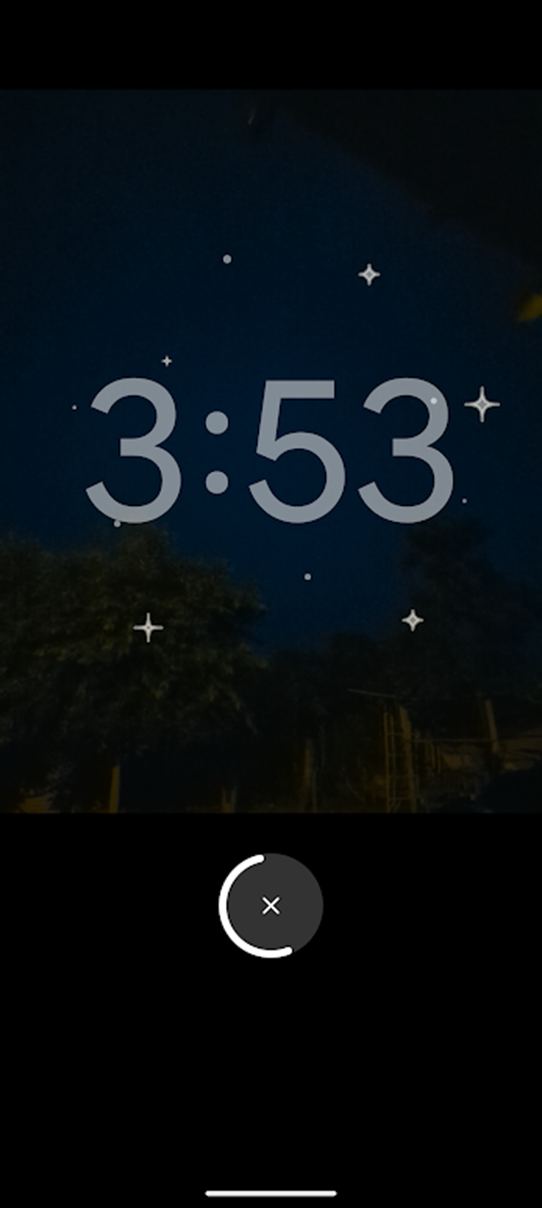
Once the photo starts being taken, you should wait up to 4 minutes for the camera to capture as much detail as possible. This means it will capture more stars. Again, for the best result, focus on the sky and try to see the stars with your eyes; this allows the phone to capture even more detail in this mode. Do not move the phone while taking the photo; the final result will be worth it.
3. Activate RAW Mode (if you have editing experience)
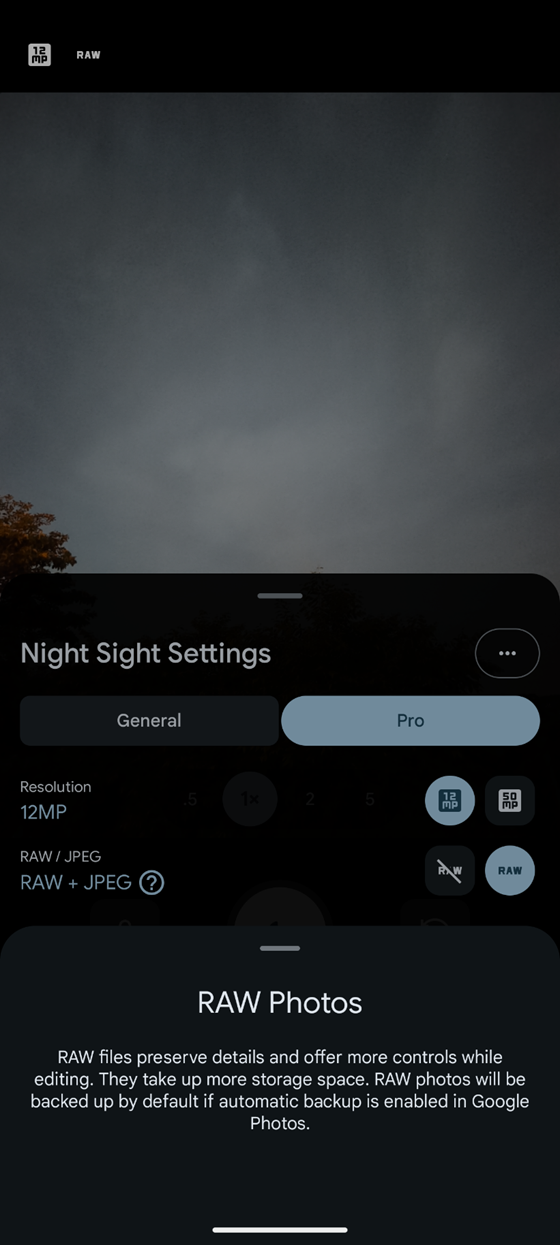
If you have experience editing photos, you will appreciate activating RAW mode, which allows the photo to capture more colors that you can later work with in an app or editing program. If you have no experience, it is not necessary; the photos already come out very well without editing. But if you plan to photograph the Milky Way, you might prefer greater editing flexibility. Keep in mind that if you activate the 50 MP or RAW option, the timelapse video will not be generated.
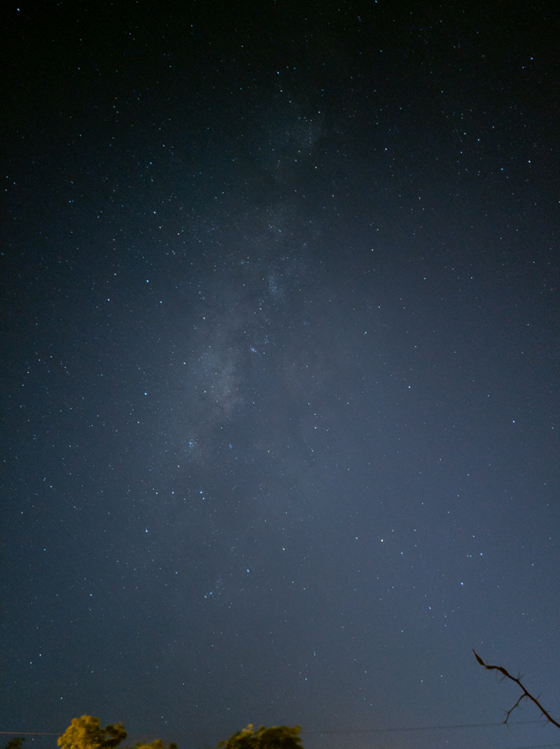
The following photos are real results taken with our test phone. None of these photos were edited; they are the original photos after each shot.
Are you interested in owning a Google-made phone? Get the new Pixel 10 Pro today on Amazon!
We are influencers and brand affiliates. This post contains affiliate links, most which go to Amazon and are Geo-Affiliate links to nearest Amazon store.
My name is Joel! I love to read, I go to university like most people my age.
In my free time I usually train boxing, I love music, I also know how to play the guitar and the harmonica.