
We are influencers and brand affiliates. This post contains affiliate links, most which go to Amazon and are Geo-Affiliate links to nearest Amazon store.
Resizing, watermarking and converting an image is not complicated. You can accomplish this task with numerous photo editing software. But what happens if you need to resize, watermark and convert 50 to 100 images in the same way? You can’t really go through them one by one. Well, theoretically you can, but that would truly become burdensome. In this case, you can save both time and energy by resorting to a tool able to automate the process.
There are various photo editors that support this batch processing feature. You can even use Photoshop for the task, but the truth of the matter is that Adobe’s software isn’t the most user-friendly. It comes with a certain learning curve, not to mention the monthly subscription cost. Instead you can opt for an easy-to-use image editor like BatchPhoto.
BatchPhoto is a tool for Windows and Mac particularly created to edit multiple photos at once. The program can effectively process hundreds of pictures simultaneously and, in comparison to other tools, it’s quite simple to use. This is all due to the intuitive, three-step interface. All you have to do is add your photos in Step 1, edit them as you please in Step 2 and choose the output format and the destination in Step 3. Afterwards simply hit the Process button.
Here’s how simple it is to batch edit images:
Step 1 – Add Photos

In the first step of the process load your images into the program. You can add files individually, add an entire folder with/without subfolders or simply use drag & drop.
Step 2 – Edit Photos
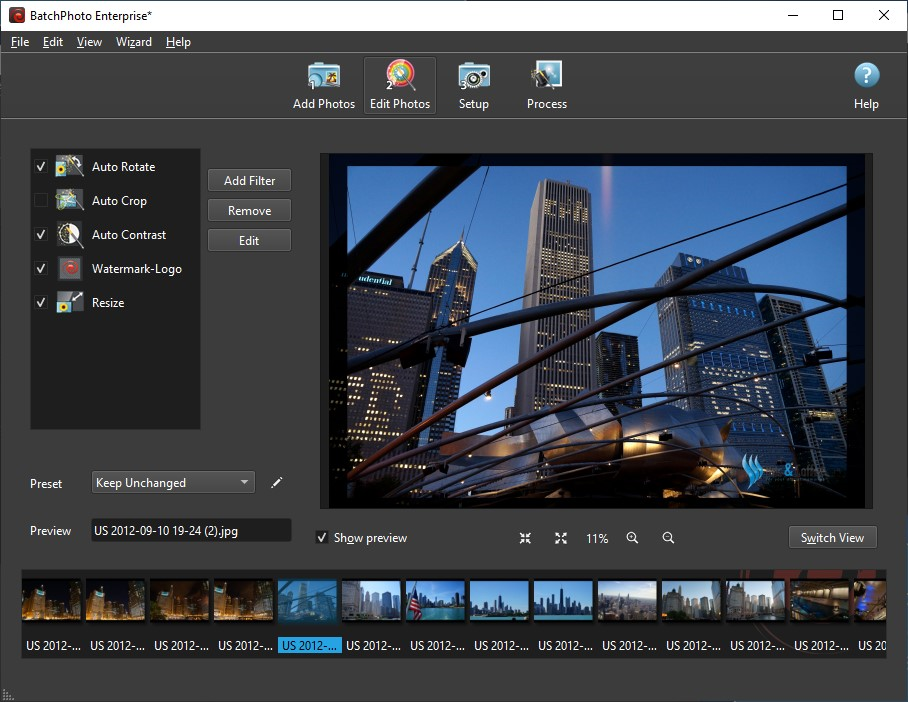
In the second step of the process you have the opportunity to edit your images as you want. Click on Add Filter and select the desired filter(s) from the 50 options available.
With BatchPhoto you can perform a wide range of operations to optimize and retouch your photos. The tool allows you to rename, resize, crop, rotate, watermark or add the date and time to your pictures. In the same session you can adjust the contrast, brightness and hue/saturation, apply artistic filters like sepia and black & white or add frames and borders to your photographs.
Step 3 – Setup
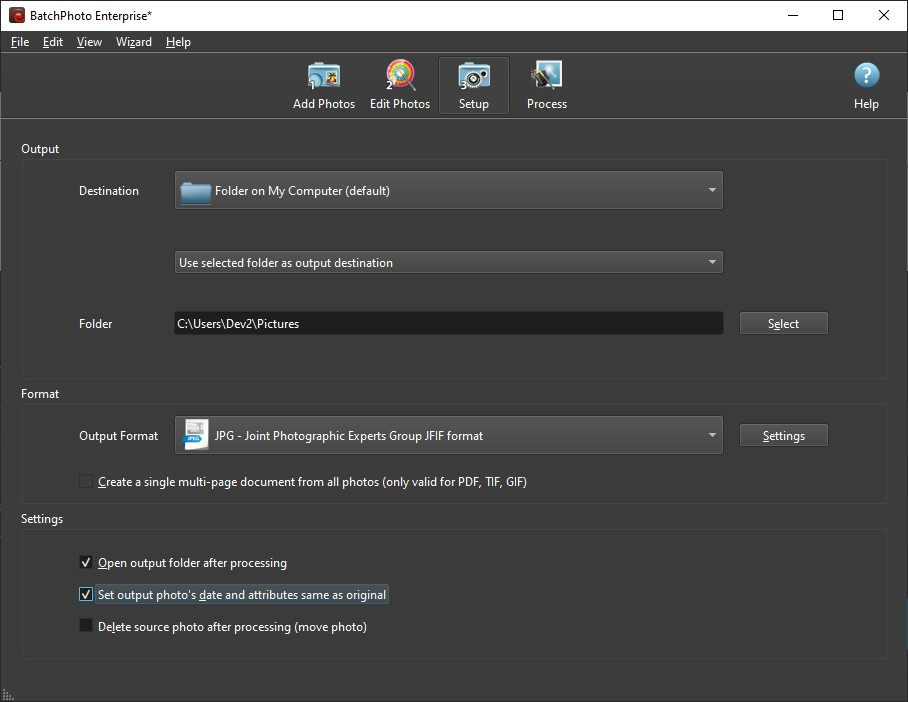
After you’ve applied your edits, you can move on to the third step and choose your configuration before processing the files. You can save your images on a local folder, upload them to a FTP server or send them via email. You can choose to keep the original image format or make the conversion to another one.
Once you’re done, all that’s left to do is click on the Process button.
Improve Your Productivity Even More
If you want to take your productivity to a different level, BatchPhoto offers additional features: Profiles and Folder Watch.
The tool lets you save your frequently-used operations as profiles and easily reuse them whenever you want. This means that you won’t have to go through the same editing steps each session.
At the same time, the Folder Watch feature makes it possible to completely automate your editing workflow. The program will monitor certain folders for newly added pictures and will apply preset edits to them. You just transfer the pictures to a monitored folder and BatchPhoto will automatically rename, resize, watermark or date stamp them.
Version 5 of BatchPhoto Is Out
Bits&Coffee has recently released BatchPhoto 5. The new version comes with various improvements to the interface, including a new thumbnails view in Step 2. As far as new features goes, you can now find support for SFTP for secure uploading and also support for new image formats like HEIC, WebP or AVIF. The program has also been updated to be fully compatible with the latest OS, such as Windows 11 and macOS 13 Ventura.
We are influencers and brand affiliates. This post contains affiliate links, most which go to Amazon and are Geo-Affiliate links to nearest Amazon store.

My name is Alice and I have been into gaming since I first got the Nintendo 64 in late 1996 and enjoy writing about all things relating to entertainment, gaming and streaming. Lately you can find me playing mostly MMO’s like WoW, FFXIV or Black Desert Online when I have time to game.