We are influencers and brand affiliates. This post contains affiliate links, most which go to Amazon and are Geo-Affiliate links to nearest Amazon store.
Camtasia is a wonderful application. I have used it for years and I love it. Let’s put it this way, I wouldn’t leave home without it (literally). I am also a video producer (in addition to my partner and husband being a video producer). That doesn’t mean that every video is ready for an award (or we would never leave our computer and video software). In other words, there is a time and a place for the right software for the job.
I am here today to sing the praises of Camtasia, specifically, as one of my personal favorites (you do NOT want to see how many video software programs I have on my main computer!).
Why Camtasia?
Ok, that is a really broad question. I hope that you will get an idea of why Camtasia may be the right software for you. Oh, did I mention? It is video software. You can create and edit videos with this software. Oh, there are a ton of things you can do with it! Oops.. I’m getting ahead of myself and babbling on too much. Let’s get back to basics, first.
So, I’m not here to give you an encyclopedia or overly-academic answer to “Why Camtasia?” One option, if you are the type that likes to dig in and just try it out for yourself, is to download a trial version. Since we are talking about the Mac version, here is your download link for Camtasia for Mac. But, I don’t want to leave out you Windows users, you can try out the more expensive Camtasia Studio for Windows. This is the link to request the trial license key. It has been awhile since I went through the process, so don’t quote me on it, but TechSmith is always kind and helpful and I have been using their products for Mac (and Windows) for years (decades?), so they should be able to walk you through the process of getting starting with a trial version.
P.S. I believe those download links may download the file right away. If you are having trouble, pop over to TechSmith for help :) (I guess that isn’t really a “P.S.” but I’m sure you get the idea…)
So, I’m not here to answer some sort of existential question on the “Why,” but rather, to demonstrate how this particular Camtasia for Mac version works perfectly for me. And, that is, works perfectly for the me that is ordinary and occasionally stops in at Starbucks for a cappuccino, not the video producer me.
With that, let’s look at some basics, within the context of an “ordinary person” with limited video producing experience (unlike some of us who have attended what is now the Los Angeles Film School #braggingAlert).
Camtasia’s Workspace
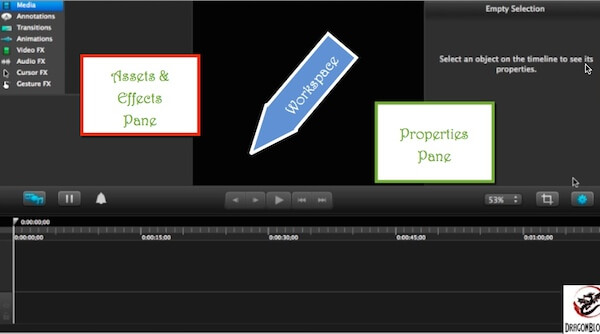
At the top of the Camtasia workspace, we are looking at three different areas. The one in the middle is where we will be previewing video as we work with it. It is also where have access to do things like cropping, etc. To the left of the video area, there is the “assets and effects pane” and to the left of the video area is the “properties pane” (settings).
Below those three “panes” is the fun area where we get to drag stuff around and see the affects in our video (more on that, later).
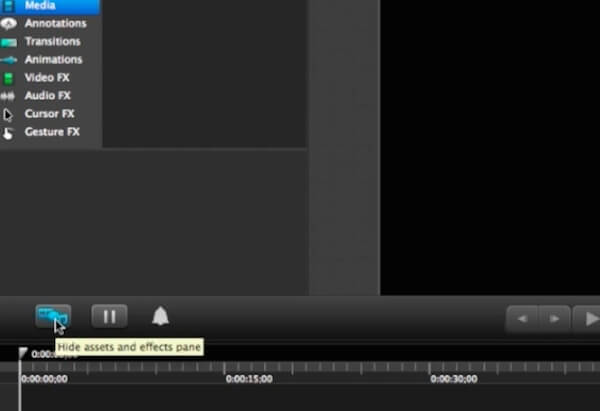
What we are looking at here (below) is just the left pane (assets and effects pane) and the viewing area (where we see the video). In the video (above), we go through the different features of the assets and effects pane, including:
- Media – the actual footage (etc.) added to the project.
- Annotations – text, cartoon bubbles, text boxes, etc.
- Transitions – transitions (i.e. fading) between media clips.
- Animations – other fun effects to add to the project (like animated smiley faces).
- Video FX – effects (similar to transitions) that can be added in the middle of a film clip.
- Audio FX – making autio easy (no over-thinking involved).
- Cursor FX and Gesture FX – things like adding mouse trails and highlights to cursor movements for webinar features.
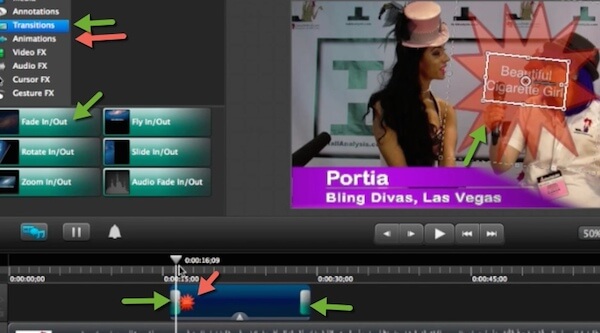
In the video example (above), a “fade” transition is demonstrated. Transitions are very important. One of the things that amateurs miss is those subtle transitions. The absence of transitions says “amateur.” However, a subtle transition says “professional,” or at least, headed that way. Sometimes it is all about the length of the transition. In other words, how long it takes for an object to fade “in” or fade “out.” Fortunately, there is a demonstration of how to cut that time span, in the video (above).
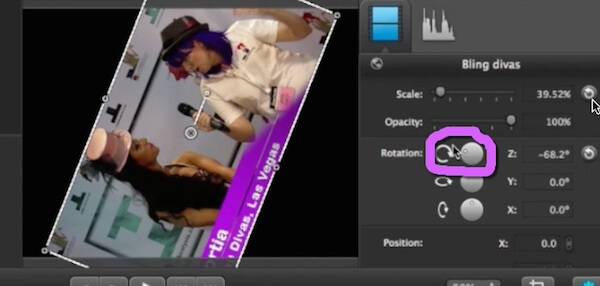
Things like rotation (and cropping) are accomplished using the “properties” panel (right). It is also easy enough to do within the view window by grabbing the movie and rotating it. If you want the rotation to change, you should clip the video at different places. On a Mac, clipping occurs when you choose commande-T to slice the move into clips. In that way, you can choose (highlight) one clip and rotate it. It creates a cool effect when used in the overall project.
Another aspect that can be managed within the view panel is the crop. In this example, shown below, we are cropping the view to only show Portia, and excluding the rest of the view. This cropping ability allows you to zoom into the feature that you want to be the primary focal point of your video. Also, in the video example (above), you will see that we are actually hiding the microphone (green pointer, below).

Through the color adjustments, you can change the coloring of the video. You can choose black and white, or sepia, or any other option. You can also choose the option that is often called “green screen.” The reason it is called green screen is that generally the screen behind the subject is green and then, through color adjustment, the green can be manipulated to be transparent. You can also use other colors. Another popular color that is used is the color blue. In this case, the video was filmed in front of a backdrop and was not filmed in preparation for “green screen,” and so that option would not work (or at least not work well). However, if you were to film the subject in front of a green screen (or another selected color) that would be an option, to make the background transparent. Once the background is transparent, you can drag another film strip into the project to function as the “backdrop” behind the subject (or any other sort of combination that you can dream up and implement). In this case, we are illustrating a simple color hue illustration.

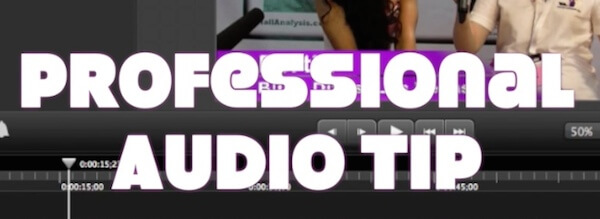
Professional Audio Tip
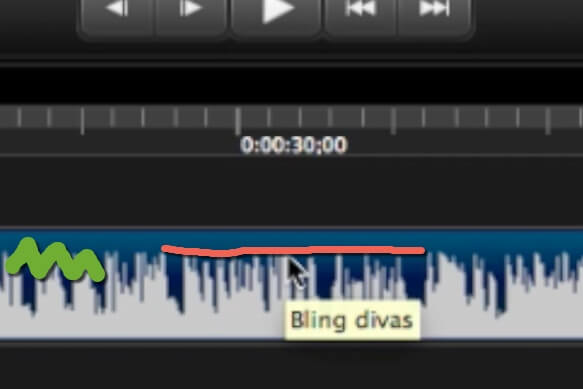
The audio in this film strip is not ideal. The video was recorded amongst excessive noise. Ideally, you want to record in an environment that is 100% free of noise. However, when faced with catching it on film or not catching it on film, there are compromises that are made. In this case, we can show you how the sound file looks, to demonstrate what is NOT ideal.
Do you see how the film strip is like a plateau at the top? That is an unnatural sound file. It shows that it is overdriven. You can help to alleviate the irritating sound (i.e too loud), by bringing the overall volume down (demonstrated in the video), but once it is recorded, you cannot change the fact that it is not the ideal sound file. In this case, with the Pub Con conference going on, we expect it, so we will let it go (other than a volume adjustment). But, if at all possible, try to manage the environment as much as possible so you do not have a sound file that looks like a plateau. It should look like a series of mountains with peaks and valleys, for a natural sound.


Sound Engineering
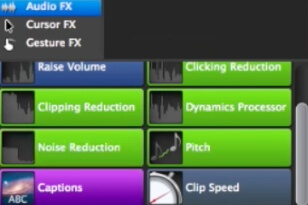
Camtasia comes with built-in features for sound manipulation. I suggest that you use them. I am a trained sound engineer and there is more to sound engineering than I could explain in one article. That is why I am so thrilled that Camtasia has some built-ins that work well for any project. You can use the “properties panel” (on the right) to manage things like volume, but definitely play with some of the controls on the “assets and effects panel” (left) to control sound (dragging it to the film strip or the audio strip). For clarification, if the audio strip is part of the video strip (default) drag the audio effects to the film strip (which includes the audio strip). If they are detached (discussed in next section), drag it to the audio strip.
To Detach or Not to Detach
If you are a beginning, I *highly* recommend that you do NOT detach the audio from the video. However, if you are moving to the next steps, or you are advanced, or that tracking between the audio and video is so “off” it is like fingernails on a chalkboard, then maybe you want to detach the two. Then, after detaching the audio, you can slide it to align with the video, to correct an out-of-sync video. Again, this is more of an advanced topic and if you are just starting out, stick with the easy method of moving it around all intact (audio and video together). You can detach the audio by right-clicking and choosing that option.
Saving Your Work
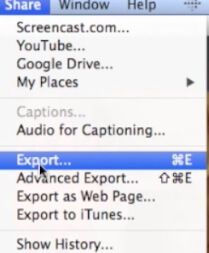
If you choose “File > Save,” you are saving the Camtasia “project file” on your Mac. That is a great thing, and it is recommended, but it does not mean that it is ready for prime time on YouTube. Instead, you need to “export” the movie file out of the Camtasia project file. Go ahead and save the Camtasia file. You may want to refer back to it and create different versions of the video or edit it. However, a Camtasia file cannot be natively imported/uploaded to YouTube or any other streaming video provider.
Speaking of YouTube, there are a couple of different ways to do it. The easiest way is to export to YouTube (there are also other options for exporting, as well). When exporting, you simply enter your credentials and you are all set. If it is a small file, that is probably fine.
Personally, I actually export to my hard drive (i.e. desktop) and upload to YouTube. In that way, if there is a “hiccup,” I may still have a chance to salvage the video. For example, if the problem is not with my computer, but it is with the internet connection or YouTube, I will still be able to export my video file and then upload later. If I used the YouTube option and there was a problem with the internet connection or YouTube, I would have nothing and I would have to start all over.
However, there is something to be said about the simplicity of uploading directly (especially when time is limited). If you have limited space on your laptop, you can upload directly to YouTube and not affect your hard disk space. If you do do that, you should download an archive copy of your video file later, just for your own sake, even though you have uploaded directly to youtube.
So, the choice is yours. Exporting directly to another location or service provider is very convenient. But, there is also something to be said about the control of having the file on your laptop or computer.
In Summary
Like I mentioned at the beginning of the video, I have been using Camtasia for years and love it. I have been using it even longer than Final Cut Pro, and in fact, I have used it to fix some rendering errors that came out of Final Cut Pro. You see, each software comes with its pros and cons and the ideal thing about Camtasia is that it hits right in the middle.
Camtasia is not “too much” for the novice and it is not “too little” for the pro.
See, I can’t take all my pro equipment with me on the road for that impromptu interview. However, I can pack a few lights, mic, and my Camtasia. And, the perfect thing is that Camtasia for Mac fits on the Mac that fits in my purse. So, I still look fashionable walking down Rodeo Drive (Beverly Hills), ready for the next interview!
We are influencers and brand affiliates. This post contains affiliate links, most which go to Amazon and are Geo-Affiliate links to nearest Amazon store.
Deborah wears many hats, from professional sound engineer, to marrying a professional sound engineer and recording a Jazz album that put her and kept her on the RN Jazz charts in Los Angeles, for a year. From that experience, she learned how to make it work with social media marketing. She traded in her position as Chief Technology Officer in the financial industry to help small businesses to realize their success online.
