
We are influencers and brand affiliates. This post contains affiliate links, most which go to Amazon and are Geo-Affiliate links to nearest Amazon store.
Have you ever wondered about how to capture your screen activities and then make them into a movie? Well, it isn’t very difficult if you have the right application to do so. These applications aren’t very hard to get and you can easily find one on the internet. Some come free and some have a little price. But the only problem with most of them is that they are a bit complicated.
So, for a new user or even a regular one, complicated things take up more time and thus become a waste. You can have a very easy to use and simple such application if you use the Movavi screen capture studio. Using this you can make a screen capture video even. Such videos can be educational or for fun or just to record some videos that are live. Did you know you can even use VLC as a screen capture tool as well.
Movavi is an awesome application to do so as it has about every feature there you might expect in a recorder. To top it all, you can also edit the video you have made by capturing screen records and save it in the format of your choice. This simple application makes your life easier by letting you record your favorite show or the instructions to some something.
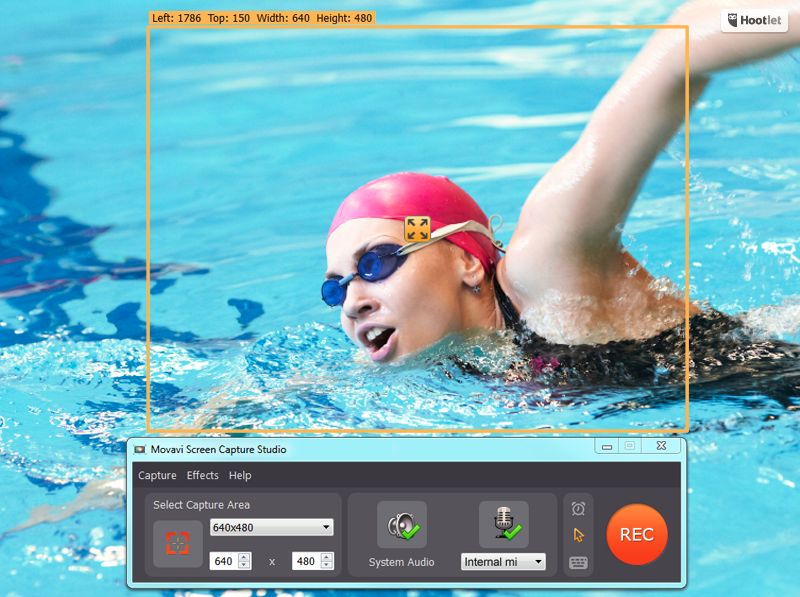
So, get the application from the website and get started. Run the installation file in the computer and get it installed first. Then, open the application and start working with it. Using this application has a distinct advantage as you are the one who sets the parameters for recording. This process helps you get rid of the unwanted image from the first. Then you can also select the frame rate and the audio also can be captured if you want to. This audio can be from both the input sources and the output.
Even though you will be recording, you can still take screenshots of the thing playing on the PC. The hot-key present helps in the capturing process too. Along with all this the other very useful thing is the timer. Using the timer, you can have a set time for which you want to record and after the time runs out, the whole recording process will end automatically. You can use this process if you want to take a break while the recording takes place all by itself.
Once the recording is done, you can stop it yourself if you are doing it manually or it will stop all by itself if on timer. Then you can preview it in the preview window and edit something using the editor. When all is done, click on save by choosing your preferred format and enjoy the video.
We are influencers and brand affiliates. This post contains affiliate links, most which go to Amazon and are Geo-Affiliate links to nearest Amazon store.
This is the Dragon Blogger Guest Bloggers account for author’s who want to submit articles and only have credit in the post instead of having to manage their own WordPress profile.