
We are influencers and brand affiliates. This post contains affiliate links, most which go to Amazon and are Geo-Affiliate links to nearest Amazon store.
Recently we did a review on an old fashioned RAM by Corsair that was based on green PCB which you can check here, but now on the test bench we have a not so old RAM stick, by that I mean released in late 2014. This is the Kingston HyperX Savage DDR3 RAMs. The Savage lineup of RAMs were introduced as a refresh to their predecessor, HyperX Genesis that has been on the market for a few years already and has had some decent reviews and performance results.
Just a few notes about the RAM before we get into the review, the new Savage line up have a better looking (at least to me) yet identical low profile heat spreader to that of the Fury line by Kingston. But the Savage RAMs are available in speed/frequency ranging from 1600MHz all the way up to 2400MHz where as Fury line up ends at 1866MHz. In terms of capacity, these RAMs are available in 4GB to 32GB with dual/quad channeling.
Company’s take on the product:
Attack the competition with HyperX® Savage memory. Its unique, asymmetrical red heat spreader is made from high-quality aluminium and has a black PCB and a diamond cut finish to make your game shine and help you stand out in the crowd. The heat spreader dissipates heat so that your system stays cool and reliable and its low profile fits under oversized CPU coolers. Built-in, hand-tuned XMP profiles mean that even noobs can overclock their platforms with simple adjustments in BIOS.
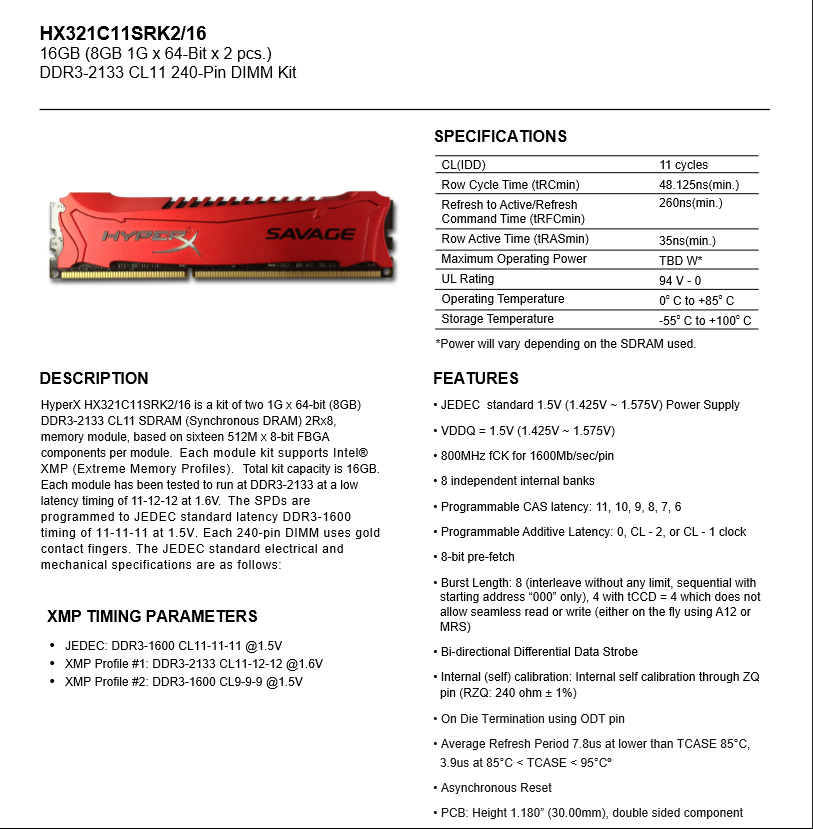
Specification:
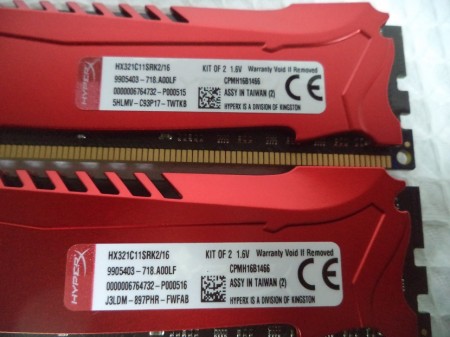
The specific model that we have up for review today is HyperX Savage HX321C11SRK2/16 which is a 16GB (2x8GB) kit that runs at a speed of 2133MHz at CL11 timings.
Unboxing:
So starting of the review in the traditional way, let’s take a look at the packaging. The RAMs came in a transparent plastic container that is sealed by a red tape with something written over it. Just like the Vengeance review, we have some unknown (to me at least) language written that I don’t know what it means, but I guess these words means “Warranty” or “Guarantee”. We also have the brand HyperX logo on the front, whereas the parent company Kingston is nowhere to be found written on the package. Then we have the capacity, timings, model number and assembly information, all written over the red tape. We can clearly see Savage and HyperX written over the RAM through the container.
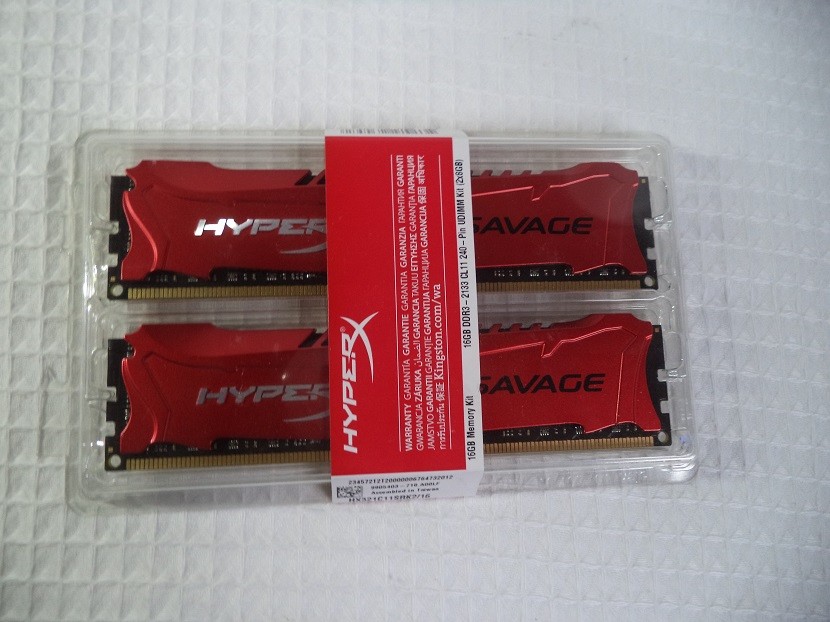
There’s not much to mention about the back since there’s just the back of the ram; we can also see the container has two more things inside it.
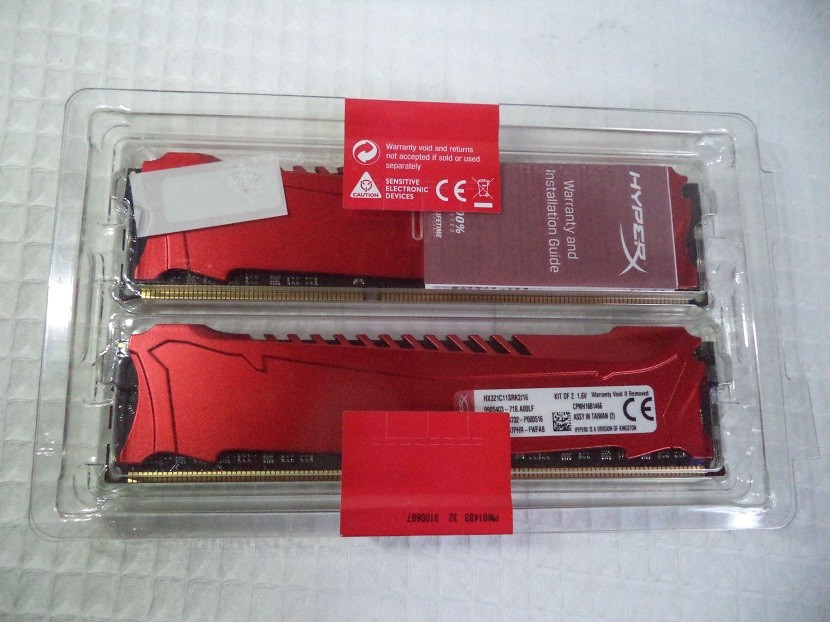
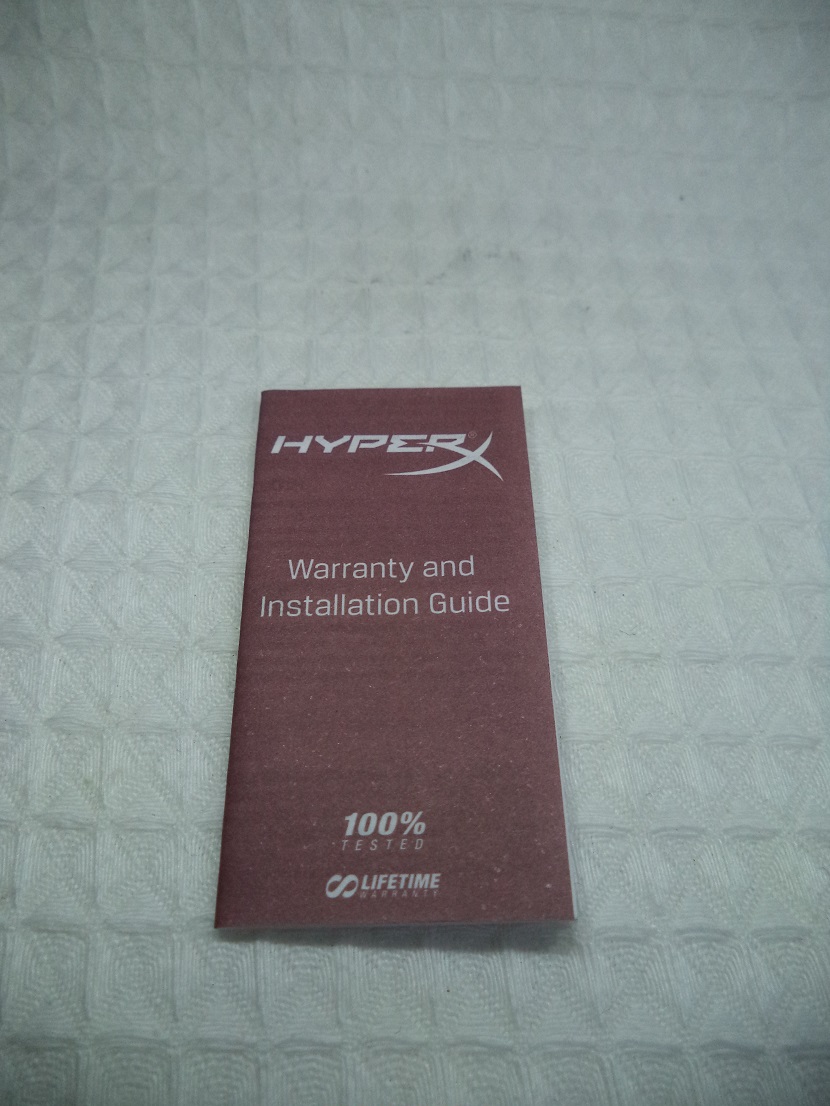
So inside the container we have these two contents, one is the warranty and installation guide, while the other is the HyperX case sticker.


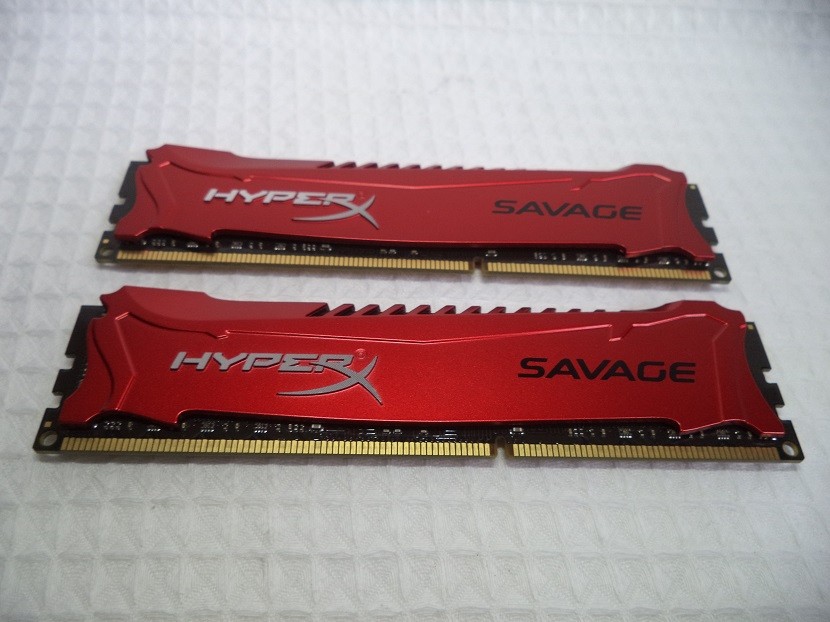
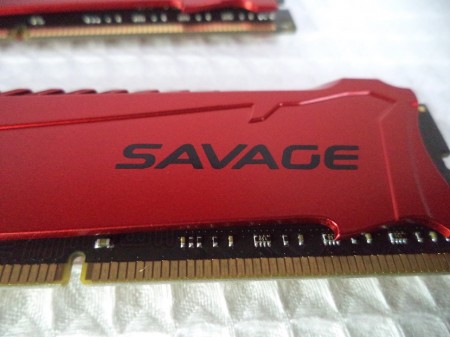
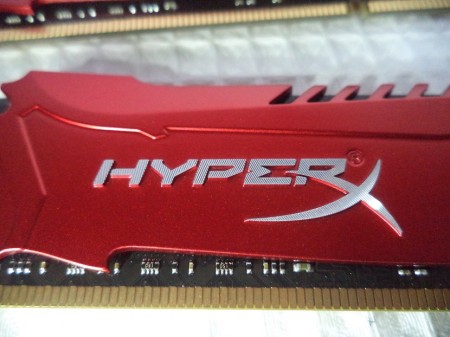
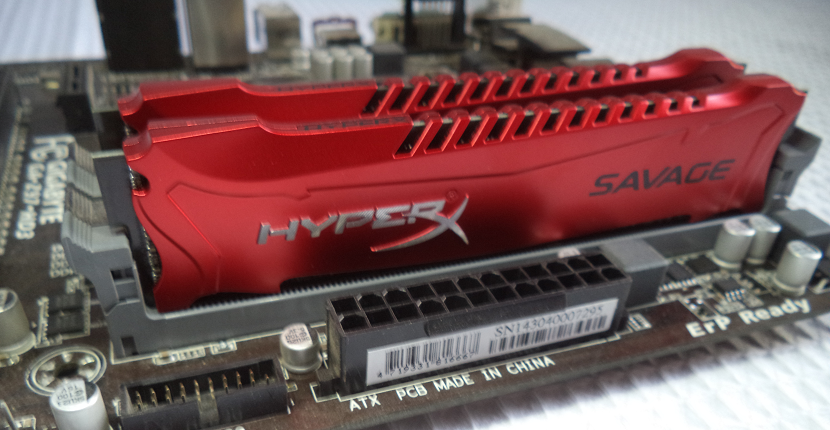
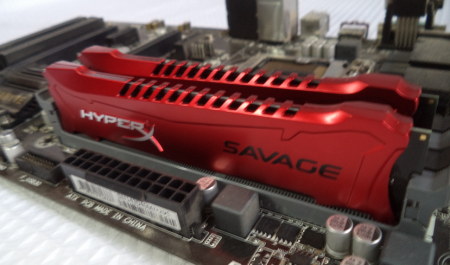
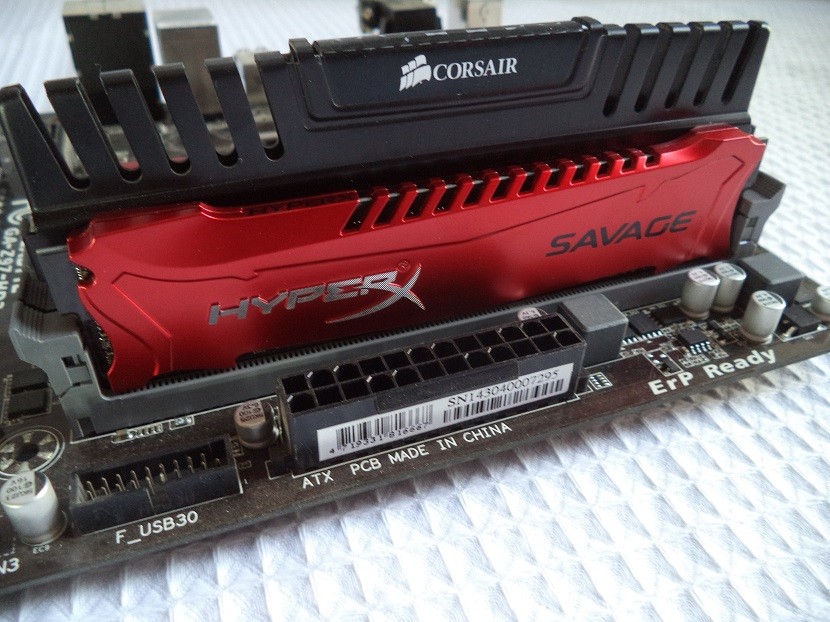
Now getting back to the main product, we have the RAMs in its full red glory. As was also visible from the container, we have the text “Savage” written on the heat spreader in black color, but the HyperX logo is actually written over the rams, you can actually feel it over the rams.
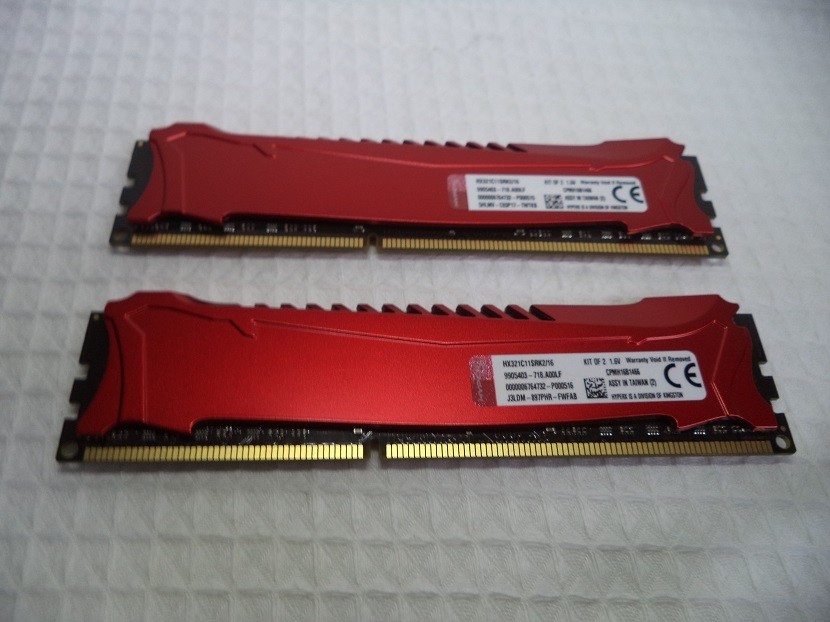
The back of the RAM sticks don’t have anything special except the information sticker that details the made, volt, part number etc.
On top of the RAMs we have some fancy designing; there are some cut-troughs present on the top of aluminum heat spreader at a certain angel making the black PCB of the rams visible. And just beside that we have the “HyperX” Text written.
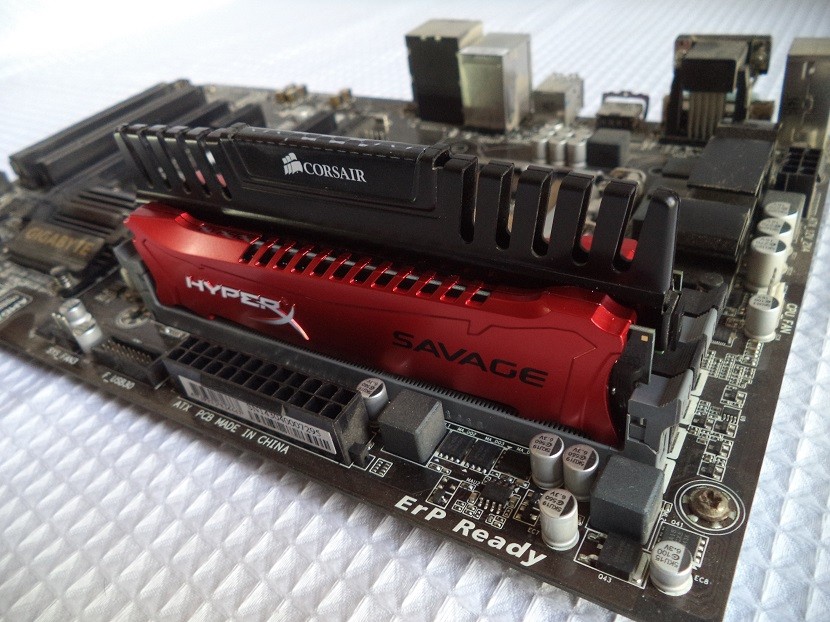
Here’s a comparison picture between the size of heat spreader of Corsair Vengeance and HyperX Savage. It’s easily noticeable that the Savage won’t have any at all problem even with the big CPU coolers, though that also depends on the distance between your RAM slots and CPU socket.
In the below picture we can see that the RAMs are using now-standard black PCB.

Enough with the pictures, now let’s get into some benchmarking and overclocking.
| CPU | Intel i5 4690k @4.2GHz |
| Motherboard | Gigabyte Z97-HD3 |
| RAMs | HyperX Savage 16GB (2x8GB) 2133MHz DDR3 |
| GPU | MSI R9 280X 3G |
| CPU Cooler | Deepcool GAMMAX S40 |
| PSU | Chieftec Nitro 80+ Bronze 1200W |
| SSD | PNY Optima 120GB |
| HDD | Seagate Barracude 1TB 7200RPM |
| Cases | None, open air. |
| OS | Windows 8.1 Pro 64Bit |
As mentioned in our previous RAM review, that we might be upgrading some hardware in the next review, and we did. We now have the Intel Core i5 4690K Devil’s Canyon that’s a Haswell refresh CPU, and over that, it’s an unlocked CPU so we can have better results by overclocking it. Also we now have a PNY Optima SDD for the OS and benchmarking tools for best results.
Methodology:
We are going to run the RAM through some tests like MaxxMem, Aida64 Extreme Memory and Cache test, 3DMark etc. Then we are going to check the RAM’s overclocking sweet spot by increasing the multiplier and leave everything on auto until it refuse to run. Then we are going to manually play with the RAM and find it’s true sweet spot for overclocking; run the same tests against the stock and compare.
Hitting the power button once the RAMs were installed in the test rig, we booted through the POST without any problem after the BIOS configured the RAMs on auto. By default the RAMs were running at 1600MHz with the XMP profile disabled, so in order to achieve the promised performance from the RAMs we have to play with the bios a little bit. And just by enabling the XMP Profile 1, we were running the RAMs at its promised 2133MHz speed at CL11 timing on 1.6V. Also there are two XMP profiles in total, one which sets the ram at 2133MHz at CL11 timings at 1.6V while other which sets the RAMs at 1600MHz at CL9 timing at 1.5V.
Test on XMP Profile 1 – 2133MHz @11-12-12-30-2T @1.6V:

As we can see, the RAMs on XMP profile 1 have around 51.6ns latency on MaxxMeM and 50.6ns on Aida Cache & Memory Benchmark. But the memory read/write is showing some massive improvement over our previous RAM review which was only around 16-17GB/s on read/write speed even when OCed to 2200MHz, while here on stock speed we have around 31.25GB/s read while 32.53GB/s write speed as found in Aida Extreme Edition Memory & Cache test.
So moving forward to next step, we will be overclocking the RAM, but there’s a catch here. The HyperX Savage doesn’t have a huge headroom for overclocking like our previous RAM. The only OC that was possible without touching the timings or the voltage was 2200MHz, and that’s only about 67MHz increase from the stock. So this time instead of including the performance for 2200MHz because of the minimal improvement we’ll gain, we went down the road of manual overclocking straight ahead.
Overclock 1 – 2400MHz @11-13-13-34-2T @1.66V
After a few fail attempts, we landed on the sweet spot of 2400Mhz at CL11 timings (11-13-13-34-2T) at 1.66V. Going beyond that was kind of dangerous, even with 1.8V we weren’t able to reach 2666MHz and didn’t wanted to harm the product. On auto at 2400Mhz at 1.66V, the timings were 11-16-16-38, so we tightened them to 11-13-13-34 for best performance and you can see the results in picture below.

Coming from 2133Mhz to 2400Mhz, we didn’t saw really that giant of an increase in the performance. The RAM latency has decreased around 3ns as we can see in the Aida test and there’s about 2.5GB/s – 3GB/s increase in read/write speed of the memory.
Well, was the overclock stable? Yes it was. Those who have read the previous RAM review knows that I can’t really run a 24/7 stability test because of the power situation we have here, but still we have to make sure it’s stable. So I ran the Aida System Stability test in background and started browsing internet, listening songs and stuff for maximum stress. And eventually I totally forgot that I was running Stability test, and started playing Counter Strike: Global Offensive with my friends. Since I didn’t noticed any stutters while gaming, I never had a second thought about I was doing a review. And by the time we were done from gaming, the Stability Test had already passed around 5 hours. That pretty much tells that the OC was stable enough to run 24/7.
More Benchmarks:
3D Mark Firestrike:

Bioshock Infinite – 1600×900 – UltraDX11_DDOF:
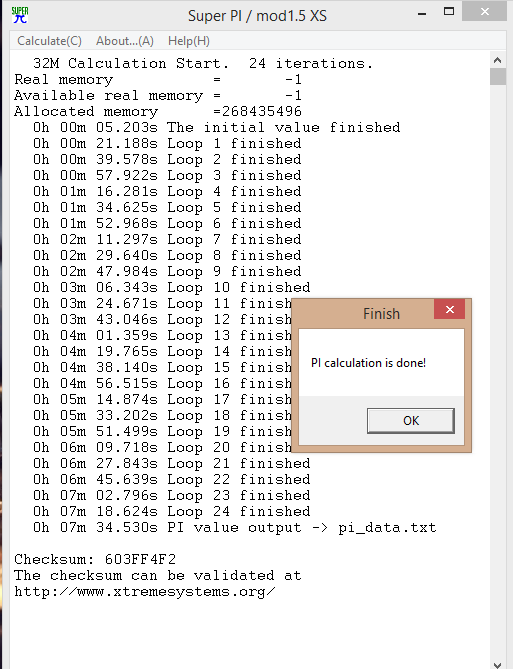
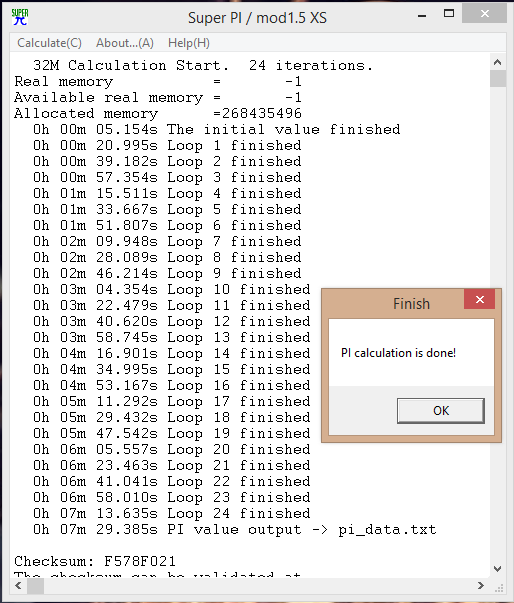
Super Pi Mod 1.5 XS – 32M Test:
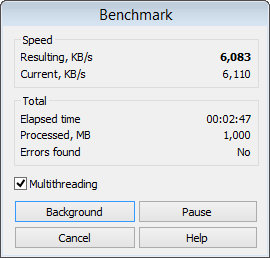
Winrar Benchmark – 1GB Compression:

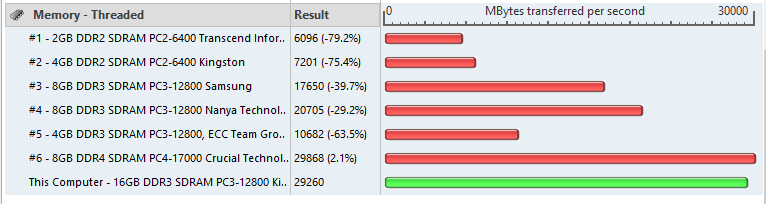
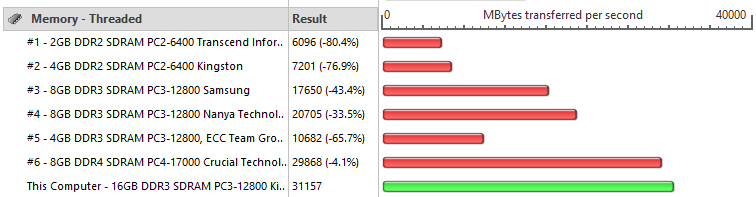
PassMark Performance Test 8 – Memory Mark – Threaded:
Conclusion:
Talking about the looks, the Savage kit sure does looks eye catching, but there isn’t really much difference in the looks of both Savage and Fury kit by same company. The first time I saw the RAMs, I thought about Fury at first, until I saw the name Savage over it. Also They are only available in Red color yet, so if you’re looking for a theme matching RAMs other than red, Savage might not be the thing for you.
But if you’re looking for great performance right out of the box, you might have to consider the Savage line up as a great deal. I found the RAMs very promising out of the box with noticeable difference in programs that consume RAM usage, over my previous RAM. The only flaw that I found out about the RAM was it’s overclocking ability. There sure are cheap rams that can pull the speed of 2133MHz or even 2400MHz as a result of OC. For example, the Fury line up from the same company that I was talking about before, can pull out 2133Mhz speed as a result of OC. So if you’re looking for a little cheaper RAMs and know how to OC, the Fury might be right up to your alley which a little cheaper, otherwise Savage is a good choice as well.
We are influencers and brand affiliates. This post contains affiliate links, most which go to Amazon and are Geo-Affiliate links to nearest Amazon store.
Hi, I’m Ahmed Kazim and I’ve been a gaming freak since like 7-8. I’m also a geek-o-nerd who keeps looking around for latest development in hardware/tech/gadget industries so expect some quick news from me. I’m also interested in anime (Japanese animation) and can’t stand a day without music and gaming.