
We are influencers and brand affiliates. This post contains affiliate links, most which go to Amazon and are Geo-Affiliate links to nearest Amazon store.
If you’re venturing into the world of laser engraving or looking to add a versatile compact engraver to your toolkit, the ACMER S1 may just be the game-changer you’re looking for. With a Class 4 laser and a 6000mW output, this portable device punches far above its weight in terms of performance, versatility, and ease of use. In this review, I’ll break down my hands-on experience with the S1, including how it performs on various materials, useful configuration tips for different engraving effects, and project ideas to help you get started.
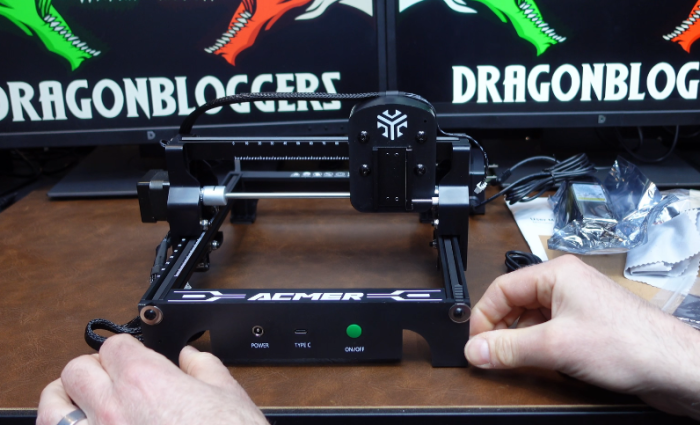
Compact, Yet Highly Capable
One of the first things you’ll notice about the ACMER S1 is its form factor. It’s remarkably compact, lightweight, and doesn’t require any complicated assembly—an ideal setup for beginners or space-conscious makers. It has a 5.1 x 5.1 inch (130 x 130mm) engraving area, which is ample for most small-to-medium projects like coasters, phone cases, bookmarks, and decorative panels.
Despite its small size, the engraver is equipped with a 0.04 x 0.04mm ultra-fine laser spot. This means you can achieve high-resolution, photo-realistic engravings, particularly noticeable when working with grayscale images or detailed logos.
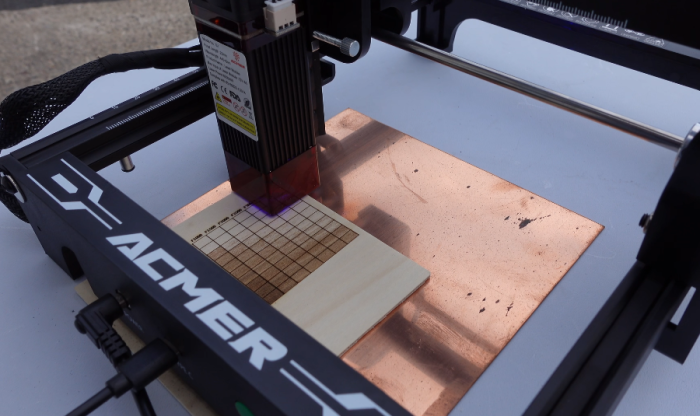
Performance Across Materials
The ACMER S1 handles a wide range of materials impressively well. Here’s a breakdown of how it performed across some common surfaces:
- Wood (Basswood, Pine, Birch Plywood): Wood is where this machine shines. For lighter engravings like logos or calligraphy, I used a speed of 6000mm/min at 40% power. For deeper burns or shading effects, dropping the speed to around 3000mm/min at 80% power produced beautiful, dark contrasts.
- Acrylic (Black & Clear): On black acrylic, I achieved strong contrast using 3500mm/min at full power. Clear acrylic doesn’t engrave directly with diode lasers, but if you paint it with a thin layer of black tempera or masking spray, the laser performs quite well.
- Leather: Genuine and faux leather produced excellent results, especially for monograms or wallet patterns. Go with 4000mm/min at 50–60% power for crisp lines without scorching the material.
- Glass: You’ll need to prep the surface with a coating (like white tempera paint) to absorb the laser energy. At 2500mm/min, 90% power, and one pass, I engraved names on glass tumblers with remarkable precision.
- Cardboard and Paperboard: Ideal for prototyping and stencil-making. Use lower power (20–30%) to avoid burning through and faster speeds around 7000mm/min.
Tuning Your Engravings: Light vs. Dark Effects
Dialing in the right settings depends on your material and the visual outcome you’re targeting:
- For lighter engravings, reduce the laser power and increase the speed. This minimizes heat absorption and limits burn depth.
- For darker or deeper engravings, slow down the speed and increase power. Doing multiple passes at mid-range power (60–70%) can also yield more consistent results without charring.
Here’s a general guideline I use when experimenting:
| Material | Light Engrave | Dark Engrave |
|---|---|---|
| Wood | 6000mm/min @ 40% power | 3000mm/min @ 80% power |
| Leather | 5000mm/min @ 50% power | 3000mm/min @ 70% power |
| Acrylic (black) | 4000mm/min @ 70% power | 2500mm/min @ 100% power |
Always do a test burn on a scrap piece first. The results can vary depending on the brand and thickness of the material.
Project Ideas to Get You Inspired
The ACMER S1 is perfect for creative projects. Here are a few I’ve personally done that you might want to try:
- Custom Wooden Coasters: Great for gifting or Etsy shops. Try engraving mandalas or initials.
- Engraved Leather Wallets: Add a personal touch with names or meaningful quotes.
- Glass Etched Drinkware: Mark special occasions with dates or messages on wine glasses.
- Personalized Keychains: Use layered acrylics or wood for vibrant key fobs.
- Engraved QR Code Tags: Make scannable business cards or pet tags.
The engraver’s compatibility with LightBurn and LaserGRBL makes it easy to import SVGs, bitmaps, and photos for intricate projects.
Final Thoughts
The ACMER S1 delivers impressive performance in a compact, beginner-friendly package. Whether you’re personalizing leather goods, cutting stencils, or crafting gifts, it strikes a solid balance of portability, precision, and power. Add in excellent documentation, goggles for safety, and responsive support, and you’ve got a machine that’s not only welcoming to beginners but satisfying for experienced engravers too.
If you’re ready to explore the art of laser engraving without the bulk or steep learning curve, the ACMER S1 is a brilliant place to start.
Pick up the ACMER S1 Laser Engraver and start creating today!
We are influencers and brand affiliates. This post contains affiliate links, most which go to Amazon and are Geo-Affiliate links to nearest Amazon store.
I have been obsessed with computers, tech, gadgets and games since the early 1980’s having grown up on the Commodore 64 and Amiga computers.
By day I work in the IT Security Industry and have been in IT for over 20 years. On my spare time I am a Vlogger, Blogger, Streamer, Gadget Reviewer, affiliate marketer, influencer and entertainer. I am also an avid movie fan, TV Show fan, Anime fan, video game fan and fan of trying anything and everything new.