
We are influencers and brand affiliates. This post contains affiliate links, most which go to Amazon and are Geo-Affiliate links to nearest Amazon store.
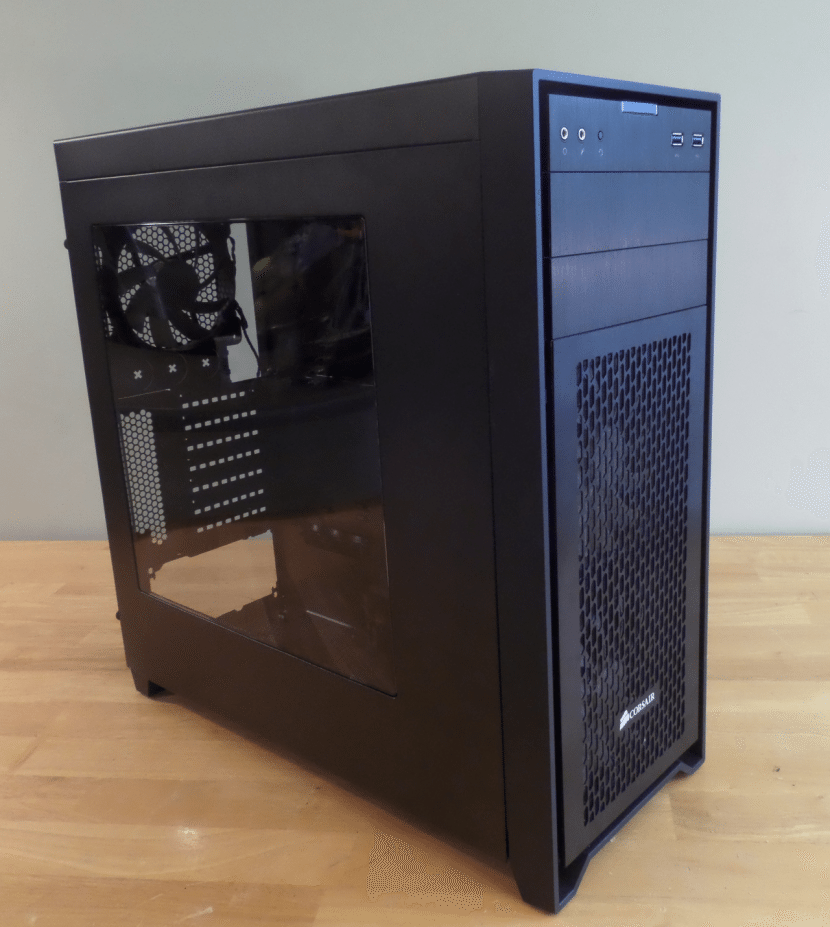
There are billions of computer cases, or chassis out there, and I have tested many but today I have the pleasure of bringing you one of the best I have tested which is the Corsair Obsidian 450D. This case has so many features, fan combinations, plenty of room, USB3 and so many more, but what are the bad parts?
As mentioned, the Obsidian Series 450D Mid-Tower PC case which is by Corsair offers a ton, check out the specs:
- Motherboard Support: Mini-ITX, Micro ATX, ATX, E-ATX
- Maximum GPU Length: 430MM (16.9in)
- Maximum CPU Cooler Height: 165mm (6.496in)
- Maximum PSI Length: 200mm (7.87in)
- 7 Expansion slots
- Drive Bays:
- 2 x 5.25in
- 2 x 2.5in
- 3 x Combo 3.5in / 2.5in
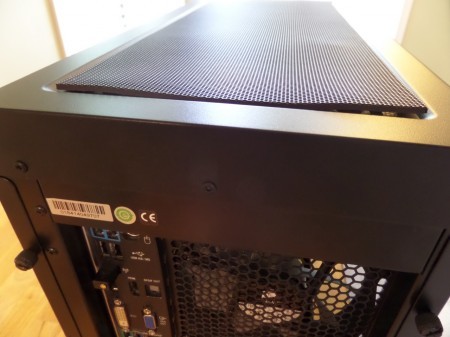
- External Connections:
- 2 x USB3.0
- 1 x Headphone Port
- 1 x Microphone Port
- Fan Mount Locations:
- Front: 2 x 120 2 x 140mm
- Top: 3 x 120mm or 2 x 140mm
- Rear: 120mm
- Bottom: 2 x 120mm
- Includes 2 x Front 140mm and 1 Rear 120mm fans
- 2 year Warranty
- Weight: 7kg (15.4lbs)
- Dimensions: 494mm x 210mm x 497mm
Check out my unboxing video of the Corsair Obsidian Series 450D Mid-Tower PC Case
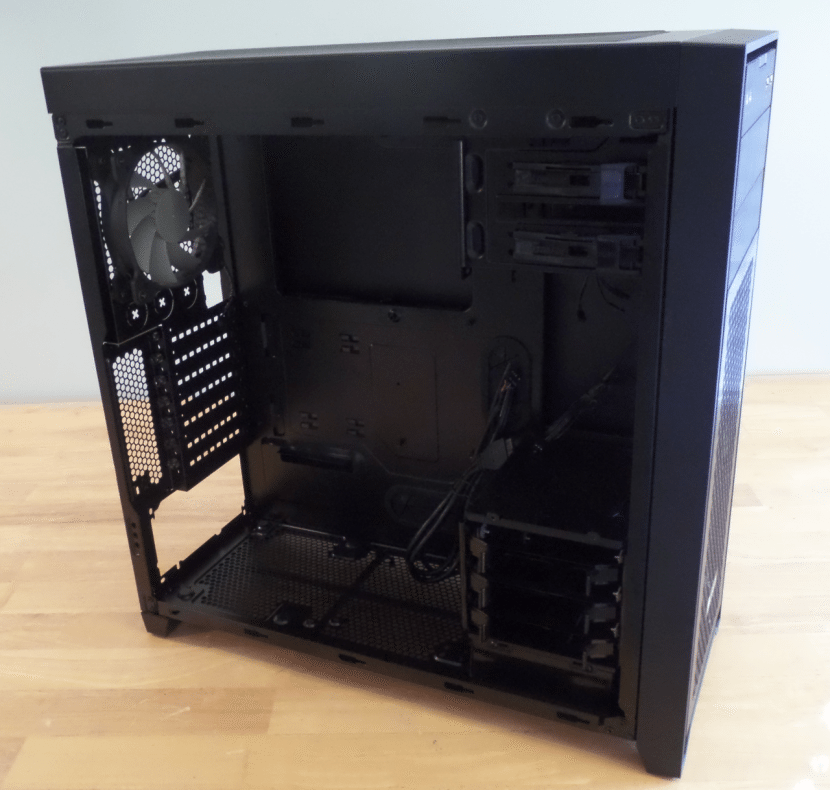
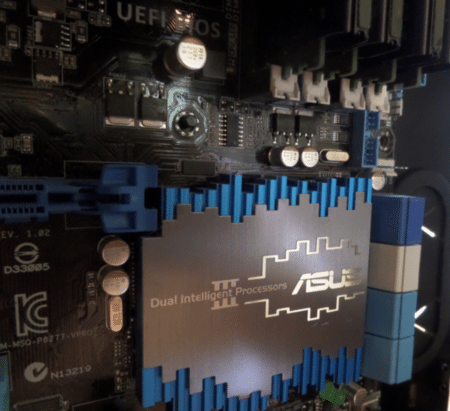
Like the specs say, the Corsair Obsidian Series 450D Mid-Tower PC Case can pretty much hold any motherboard, the board I installed in here was the Asus P87ZZ-V Pro. I just came from a Lian-LI case, which was a decent case a few years ago, but with all these newer cases coming out, it was just to hard to not want something new, and Corsair came to the rescue.
Check out my older case.
So you can see, the case just had no room to grow and the drives in the front blocked the airflow. Now I don’t have any of these problems anymore.
Here is a video of everything I have torn out from my older case, the audio got a little low but it picks up. This is not only going to be a review of this case, but it will be a build video as well, so you can learn a bit on how to build a computer in this case. This is not a beginner’s video since I do not go into amazing details, I didn’t want to take up too much time.
So here the Corsair Obsidian Series 450D Mid-Tower PC Case is being prepped to be installed,
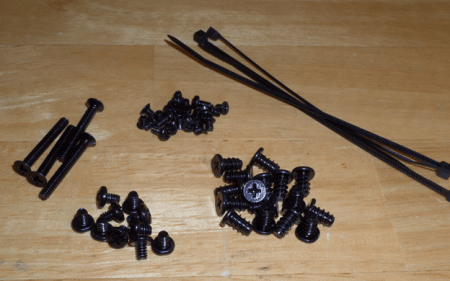
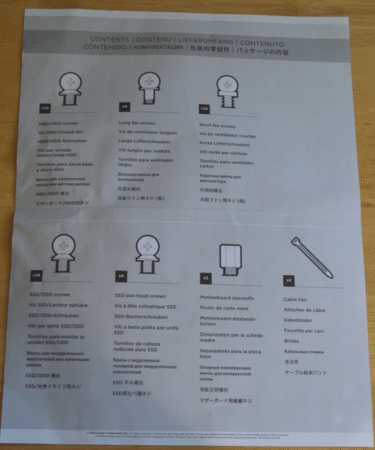
The 450D comes with a nice assortment of screws.
- 10 x Motherboard or HDD Screws
- 4 x Long fan screws
- 16 x short fan screws
- 16 SSD, Optical Disc drive
- 4 x SSD pan head screens
- 1 x Motherboard stand-Off screw
- 4 x Cable ties, they call them, I call them zip ties.
Here they are, I took them out of their baggies, but I like these. I am used to the silver ones, a nice change of pace here with the black ones.
While the “Do not Contact the retailer” warning paper looks like it came out of a fortune cookie, it did not, this 2 wear included in a baggie. The warranty mainly covers manufactures defects

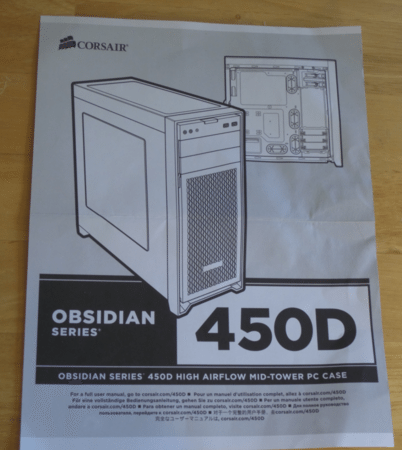
Here is the user’s manual for the Obsidian 450D, I would have loved to say that I was the one that drew up the pictures of the screws I listed above, but they came from here. Each screw Diagram
Want to learn how to install a CPU? Well here you can learn how to remove a CPU and how to install a CPU and an Artic Cooling Freezer 7 Pro Rev 2 CPU Fan Heatsink. I also show you how I add thermal paste, this is the way I apply my thermal paste. Also, this board has 2 plugs for CPU fan, 1 is labelled CPU Fan and the other is labelled CPU Opt, I couldn’t really tell when I was looking through the camera but you will want to install the CPU Fan on the “CPU Fan” connection.
This next video shows you how to install the motherboard into the case, as well as the opticals, hard drives and memory. This video really outlines a lot of the thought Corsair put into this case. The reversed standoff, reversed hard drive trays, SSD placement, optical installation, rear board accessibility for easy CPU back plate access, cable pass through management and more, it just is a great case to build in. By this point I have only needed my screw driver one time, to install the motherboard screws, 8 screws. Remember, I have already installed the opticals and the hard drives, on many cases and that would have been a minimum of 31 screws only 8 here so far.
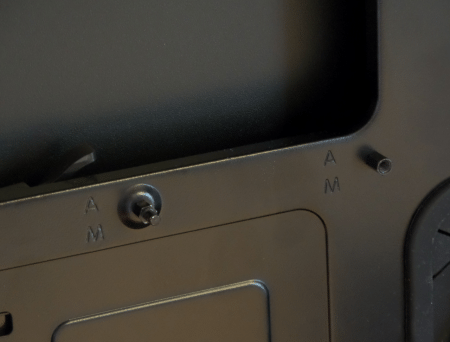
Installing the power supply, you are given the option of installing it with the fan facing into the case, or face out, I chose facing out as to not potentially have anything fall in and then also to not interrupt the air flow inside of the case. After installing the power supply, we are at 12 screws instead of 35 screws for other cases.
There are 1 inch feet holding this case up high from scrapping the ground. This allows for a decent amount of air to coming from the fan and a decent amount of air to come in from the power supply.

This is the standoff to rule them all before the motherboard
This is the standoff to rule them all with the motherboard and no other screw. It gets pretty lonely without a screw…
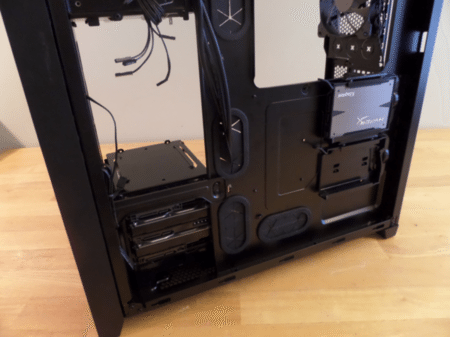
This next 2 videos show you how to cable within the 450D. There is so much room in this case, not only for long cards and direct airflow but for proper cabling. The cable pass through holes in the case help cable management tons here, most of the cables fit through the back easily. This case also gives you room behind the motherboard tray to hide wires, and then to also place 2 SSD’s, another great design idea. Before the videos though, there is what the SSD trays look like behind the motherboard tray.
I warn you, these 2 videos are about 8 minutes long each. If you are not worried about making the inside of your computer look nice, not worried about thermals and don’t mind rats living inside of your computer, then you don’t want to watch. If you like your PC running nice and cool, cables out of the way so that you can actually see inside and use the Windows for what it’s made for and prefer animals not living inside your case, you will want to watch.
So aside from cabling nicely to help more air flow through your system and allowing your parts to be seen in all their glory another advantage of cabling nicely is to be able to take apart and put back together your machine in record time.
To be honest, after unboxing this case, I got a little too excited and forgot to take pictures. So after creating all of the videos and editing them I went back down stairs took her apart and took pictures all over again. Taking her apart took about 10 minutes, putting her back together took about 20 minutes. To top it off, I made her look a little better.
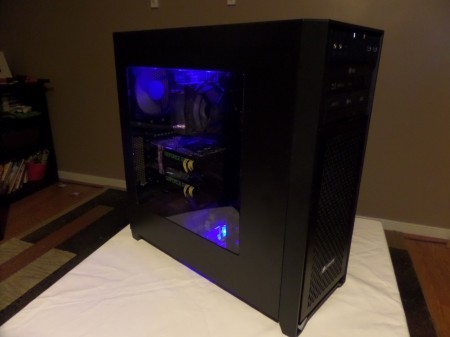
I opted to add a fan on the top and one on the bottom of the case since there was room and I have a bunch of low flow low noise fans lying around. The bottom fan is to suck air from under the case up into the case and the top is to suck hot air out of the case. Since this case has filters both on the top and the bottom of the case, I don’t have to worry too much about dust. Another reason I chose these fans is because they glow blue and I like blue lights. The case itself does not bring any lights, too many people would be annoyed because everyone has their own taste and you may not like the same color I do.
Here is the newer build, basically the same, but with a fan on the top and bottom.

Once I put the fan on the top using their screws I noticed the top filter did not lay down flush any more, but really it’s on the back, how many times do you look back there?
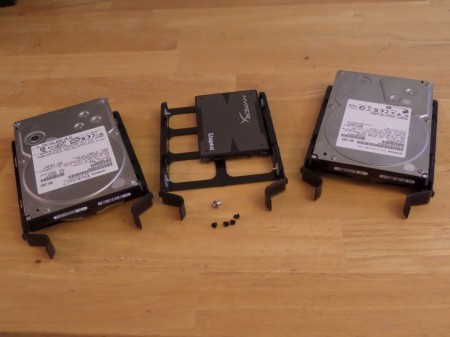
Here are the hard drives with the trays; you can install 3.5in drives, 2.5in drives or a combo of both, but only a total of 3 drives.
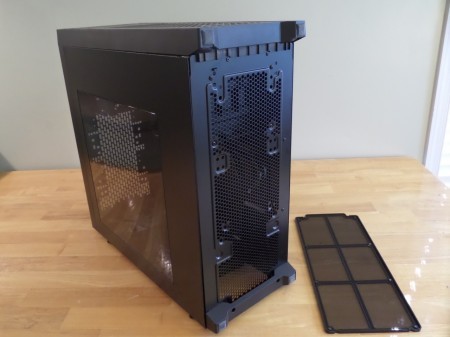
This is the bottom of the case, with its filter keeping out all those dust bunnies that replicate so much.
This is how my baby looks like in low light, very nice
While I am not a fan of liquid cooling, it can be a good thing if done right. Corsair has done the work for you in chosing liquid cooling units, these are the units certified to work with this case
As much as I love this case, I can’t say it was a 5.
- Pros: Nice material felt sturdy, very spacious, great SSD placement, almost tool less. Great fan placement and ability to expand on fan assortment
- Cons: Only 2 x Front Panel 3.0 USB ports, could have had 2 x USB 2.0 ports as well for a total of 4 ports. While not a huge issue, the top filter was not flush when a fan was installed even using provided screws. The power supply screws were very weak.
So that’s about it guys, I hope I showed you some good stuff and hope you have a better understanding of this case. If you are in the market to buy this case, I say go for this one, it is a beast of a case. You can fit a n NVIDIA Titan-Z at 10.5 inches (or 2) or an AMD Radeon 295XT with its liquid cooling unit, even 2 of them in this beast of a case and have some room to spare.
That’s one of the big problems I had with my older case, now my only problem is finding a better card to put into this system. AMD or NVIDIA, are you guys watching this?
There are tons of Pro’s (more than I listed) and very few Cons that made any difference. I highly suggest you getting this case. Great job Corsair
We are influencers and brand affiliates. This post contains affiliate links, most which go to Amazon and are Geo-Affiliate links to nearest Amazon store.
I have spent many years in the PC boutique name space as Product Development Engineer for Alienware and later Dell through Alienware’s acquisition and finally Velocity Micro. During these years I spent my time developing new configurations, products and technologies with companies such as AMD, Asus, Intel, Microsoft, NVIDIA and more. The Arts, Gaming, New & Old technologies drive my interests and passion. Now as my day job, I am an IT Manager but doing reviews on my time and my dime.