
We are influencers and brand affiliates. This post contains affiliate links, most which go to Amazon and are Geo-Affiliate links to nearest Amazon store.
Do you know that being able to remove the background from an image can be extremely useful in a number of different situations? Essentially if you’re able to delete the background while keeping the subject and any other foreground elements, you could create a transparency, or even replace a background that doesn’t look good with something better.
Odds are you may already be able to think of several photos of yours that could benefit from having their background removed, and if so – give Movavi Photo Editor a try. As a versatile photo editor it can easily act as a background remover, and more importantly it will simplify the task of removing backgrounds so that it can be performed almost effortlessly.
To start editing a photo in Movavi Photo Editor, the first thing you need to do is launch it and click on the ‘Browse for Images’ button to select and add the photo to the software. Another way to do so is by dragging and dropping the file into the central working area, which will open it as well.
Next you will want to open up the ‘Background Removal’ tab that contains the tools you need. It can be found in the upper part of Movavi Photo Editor’s interface, and when you click on it a sidebar will open up on the right that has several tools.
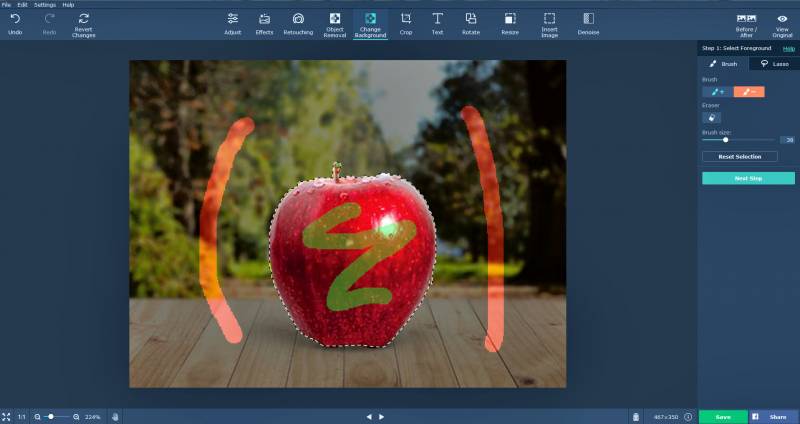
Initially you should use the red-colored ‘Background Brush’ as well as the green-colored ‘Foreground Brush’ to mark the background that you want to remove and foreground elements that you want to keep. While you’re marking them, Movavi Photo Editor will eventually display a yellow-colored line that denotes the selection.
Assuming the selection is correct, you can click on the ‘Set New Background’ button and Movavi Photo Editor will delete the background. Alternatively you can clear your selection and alter it by using the ‘Selection Eraser’ tool.
Once you’ve removed the background, it will be transparent – and if you want you can click ‘Apply’ then ‘Save As’ to save it then and there. If you want to create a transparency using Movavi Photo Editor you should do this, and be sure to select PNG or GIF as the format – as they support transparent backgrounds.
If you’d like to replace the background with a new image however, you should instead click on the ‘Add Image’ button. When you do Movavi Photo Editor will open a new window, and you can either select one of the built-in backgrounds or click ‘Upload’ to use your own image file.
In any case when you’re done you can click ‘Apply’ then ‘Save As’ to save the image you’ve created. Before that however you should make it a point to try out some of the other features in Movavi Photo Editor and use them to enhance the image quality, fix common issues, apply filters, add captions, remove unwanted elements, touch up portraits, apply digital makeup, and so on.
Of course if all you really want to do is remove or replace the background from an image – you now know exactly what needs to be done to carry that task out using Movavi Photo Editor. Assuming you have a few minutes to spare you should try it out, so you can see how easy it is.
We are influencers and brand affiliates. This post contains affiliate links, most which go to Amazon and are Geo-Affiliate links to nearest Amazon store.
I have been obsessed with computers, tech, gadgets and games since the early 1980’s having grown up on the Commodore 64 and Amiga computers.
By day I work in the IT Security Industry and have been in IT for over 20 years. On my spare time I am a Vlogger, Blogger, Streamer, Gadget Reviewer, affiliate marketer, influencer and entertainer. I am also an avid movie fan, TV Show fan, Anime fan, video game fan and fan of trying anything and everything new.