
We are influencers and brand affiliates. This post contains affiliate links, most which go to Amazon and are Geo-Affiliate links to nearest Amazon store.
Running an Unturned Server from your own Windows PC takes a couple of moments to setup but is the ideal way to play with your friends where you can keep the play group small. To setup Unturned as a server on your own PC you will need to do 2 things, the first is run Unturned 3 as a server, the other is setup your router so the game server ports forward to your PC so that others on the Internet can connect to your Unturned server. This article will show you how to do both, but is focused on Unturned 3 and used with Unturned Version 3.15 as a server.
Step 1 – Create Unturned Server Shortcut
To run Unturned as a server you really only need to create a customized shortcut to the game that has some flags that make it run in server mode. To do this you need to open the Steam folder which is typically C:\Program Files (x86)\Steam\Steamapps\Common\Unturned
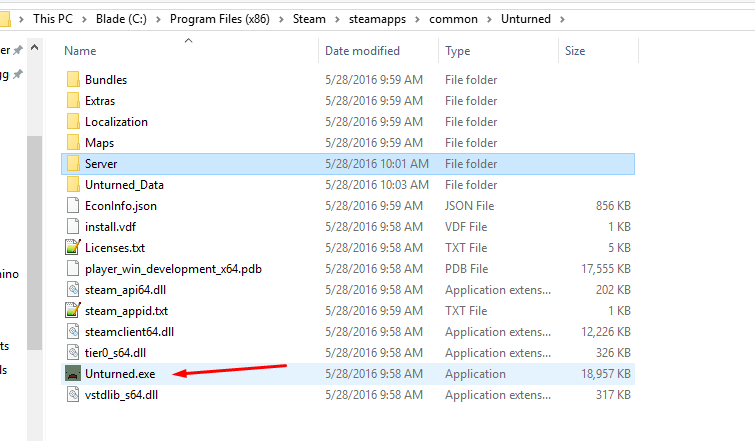
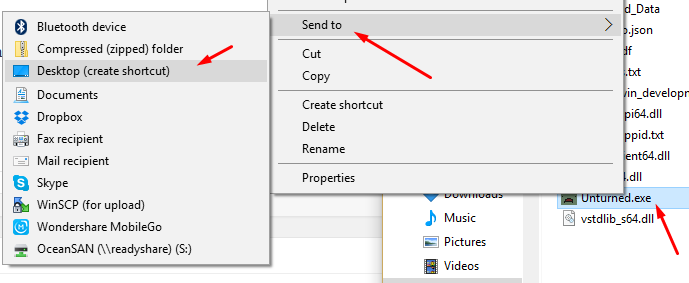
Right click on Unturned.exe and click “Send to Desktop (Create Shortcut)”
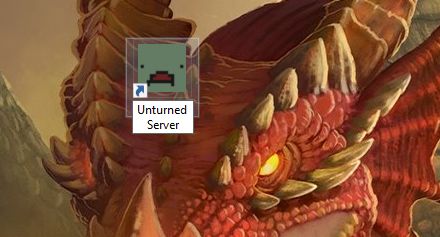
Now you will see the Unturned Shortcut (a 2nd one if you have one already) on your Desktop. You are going to want to go ahead and rename the shortcut to something like “Unturned Server” so you can distinguish it against your other shortcut.
Right click on the Unturned Server shortcut (or whatever you named it to) and click properties. The only line you will be altering here is the option for Target:
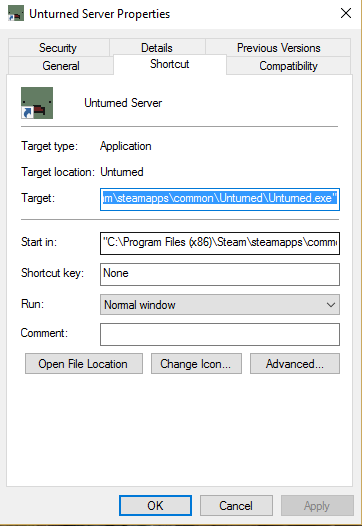
The entire path should already be enclosed in quotes, but if it isn’t make sure quotes surround the entire path. You will want to add the flags below after the quotes. Note you can change dragonblogger after the / to be any servername you want to call the server.
-nographics -batchmode +lanserver/dragonblogger
Alternatively, if you want to create a password protected server you can make it +secureserver instead of +lanserver as an option.
-nographics -batchmode +secureserver/dragonblogger
Your entire path should look like this:
“C:\Program Files (x86)\Steam\steamapps\common\Unturned\Unturned.exe” –nographics –batchmode +lanserver/dragonblogger
or
“C:\Program Files (x86)\Steam\steamapps\common\Unturned\Unturned.exe” -nographics -batchmode +secureserver/dragonblogger
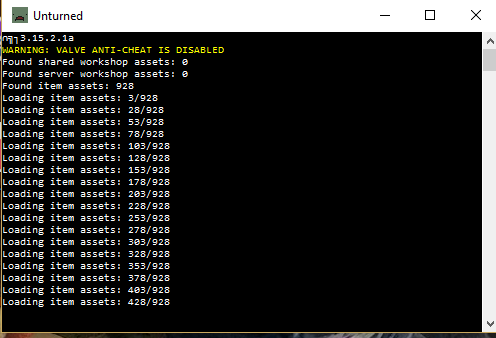
After you run the new shortcut you created, you should see a DOS prompt open showing the server starting. Leave this window open all the time while you are playing, now you can open your other Unturned shortcut and load Unturned and connect to your server.
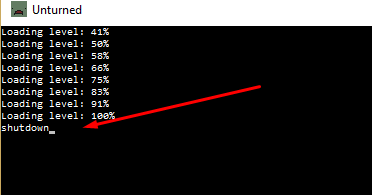
If you used +secureserver instead of +lanserver and want to set a server password, or if you want to configure custom Unturned Server options, then go ahead and shutdown your unturned server by typing shutdown in command prompt window that is open.
Note you have to start your Steam Server once so that it creates the server folder and appropriate config files for you to edit them.
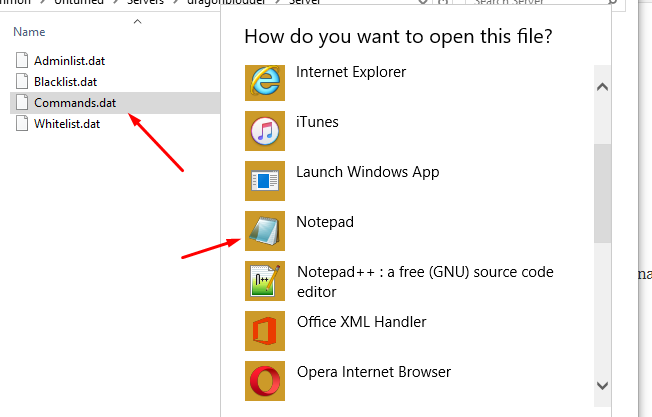
Now go back into your Steam Unturned folder, and you should see a Servers folder, under the Servers folder will be a folder with the server name you created. Then go into the Server subfolder.
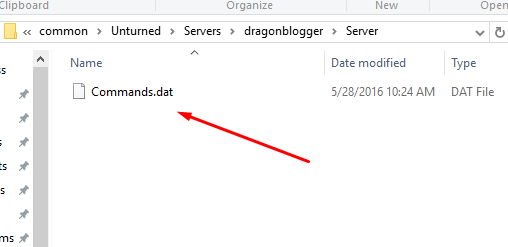
Right click on the Commands.dat file and use Notepad or another text editor.
I am going to list the commands you can enter, and this was reprinted from the Unturned Wikia
Commands For Server Setup
- Bind – Binds your internal IP to the socket. (Internal IP is the network adapter IP of the adapter you use)
- Chatrate – Assigns the minimum amount of time between chat messages in order to prevent spam.
- Cycle – Assigns the day/night cycle in seconds.
- Decay – Assigns the amount of time a player, or their group members, can be offline before their structures can be removed by anyone. Default is 604800. (7 days)
- Filter – Enables the old name filter.
- Loadout – Assigns what all players spawn with. The first number value in the loadout is the Skillset ID. (Example: Loadout 255/15/15/81/81/18/20/20/121 – Gives all skillsets 2 Medkits, 2 MREs, a Timberwolf, 2 Timberwolf Magazines, and a Military Knife.)
- Log – Enables/Disables chat/join andleave/death messages. (Y = Yes, N = No) (i.e. Log Y/Y/Y)
- Map – Sets the map that will be used for the server. If you want to use a workshop map, the workshop map folder must be placed in the Workshop folder of the server, otherwise it will fail to load the map.
- MaxPlayers – Sets the max amount of players the server will allow.
- Mode – Sets the difficulty mode. (Easy, Normal, Hard, Gold) Gold servers will only be accessible by players who have purchased the Gold membership.
- Name – Sets the server’s name. (i.e. Nelson’s Server)
- Owner – Sets the server’s owner, which gives them administrator commands and fully sets up the server. (Requires your Steam 64 ID.)
- Password – Sets a password to the server to keep out unwanted guests, making the server more private.
- Perspective – Assigns the perspective views. (First, Third, Both.) First allows only first-person, third allows only third-person, and both allows changing between both views freely.
- Port – Sets the server’s port. The default server port is 27015. (Whatever you set the server port to must be port forwarded on your router or nobody will be able to connect.)
- PvE – Sets the server to only allow Players VS Environment combat.
- PvP – Sets the server to allow combat between players.
- Storm – Enables rain.
- Sync – Syncs player data between servers using the same key.
- Timeout – Sets the max Ping for players before they time out. (400~600 is recommended)
- Welcome – Sets the welcome message. (i.e. Welcome Welcome to Nelson’s Server!)
Once you are finished, save the Commands.dat file and start your Unturned Server again.
Step 2 – Setup Port Forwarding for Unturned 3 Server
So this is pretty much the same instructions to setup port forwarding to any game that runs on Steam more or less. You will use the same port ranges and make sure they point to your local IP.
In this example I am using a Netgear Nighthawk X6 configuration menu to setup port forwarding, but it may be different in your own router, so find the equivalent in your own router which may be called “Advanced Forwarding, Port Forwarding or any other related options”.
You will want to set ports 27015 – 27019 and make sure they are TCP/UDP.
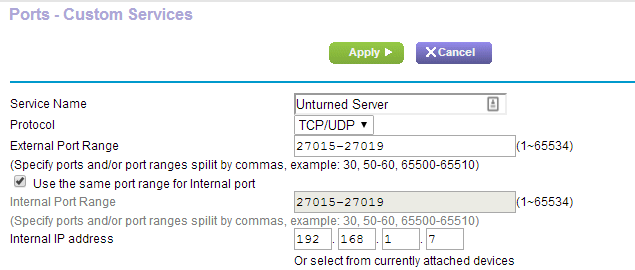
Then you will make sure you put in the internal IP of the computer you are hosting the server from, to get this just click on your Windows + r and type command, then type ipconfig and it will show you what your desktop internal IP is that is assigned from your router.
Once this is set, your router will then forward any incoming requests on those ports to your PC. All you need to do is share your public facing IP with your friends and ask them to connect to your Unturned Server. Just type WhatsMyIP in Google or Bing and you should easily see what your public IP is that you can share with your friends.
We are influencers and brand affiliates. This post contains affiliate links, most which go to Amazon and are Geo-Affiliate links to nearest Amazon store.
I have been obsessed with computers, tech, gadgets and games since the early 1980’s having grown up on the Commodore 64 and Amiga computers.
By day I work in the IT Security Industry and have been in IT for over 20 years. On my spare time I am a Vlogger, Blogger, Streamer, Gadget Reviewer, affiliate marketer, influencer and entertainer. I am also an avid movie fan, TV Show fan, Anime fan, video game fan and fan of trying anything and everything new.