
We are influencers and brand affiliates. This post contains affiliate links, most which go to Amazon and are Geo-Affiliate links to nearest Amazon store.
Many different video editing solutions have come and gone. Very few survive today’s ever growing and demanding needs out of a video editing suite, though it looks like Wondershare’s Filmora might do the trick as it has stood the test of time. Let’s take a look at what it offers and see if it really is worth it.
There are a TON of features here, and I used many of them, but not all of them. I mention that because I will not go over every feature, but I will go over many.
I will start off by stating that yes, it is compatible with Apple Mac’s, though I am not testing the Mac version; I am testing the PC version.
OK, before we even start using it, let’s see what formats Wondershare’s Filmora supports and what kind of basic system requirements we will need to run this.
PC System Requirements
- Supported OS’: Windows 7, Windows 8 and Windows 10 (32/64bit)
- Supported Processors: Intel or AMD 1GHz or above
- RAM: 512MB and above
Mac System Requirements
- Supported OS’: OSX 10.7 or later (Full compatible with Mac OS X 10.10 (Yosemite))
- Supported Processors: 1Ghz or above Intel processor
- RAM: 512MB and above
Format Support
Since this software will support both PC and Mac, there are different formats supported and I will mention them all here. Before I show them to you, please take note that their website is not always updated very well, so sometimes they might actually support more formats than what is listed here.
PC Support Input Formats
- PC Video Formats: AVI, DV, DIF, NUT, H261, H264, NSV, FLV, MKV, MP4, M4V, PSP, 3GP, MOV, MPG, MPEG, VOB, DAT, EVO, RM, RMVB, TS, TP, TRP, M2TS, WMV, ASF, DVR-MS
- PC Audio Formats: AAC, AC3, APE, AOF, AIFF, FLAC, APE, CUE, AU, AMR, OGG, WAV, DPE, MKA, M4V, M4A, MPA, MP2, MP3, RA, WMA
- PC Photo Formats: JPG, JPEG, BMP, PNG, JPE, GIF, DIB, JFIF, TIF, TIFF
- From Webcam, PC Screen and Voiceover
PC Supported Output Formats HD and SD
- PC Video Formats: WMV, AVI, MOV, FLV, MKV, MP4 Video (AVC), MP4 Video (Xvid), MP4 Video(MC), ASF, M4V, Xvid, DV, MPEG-1 NTSC, MPEG-1 PAL, MPEG-1 SECAM, MPEG-2 NTSC, MPEG-2 PAL, MPEG-2 SECAM, DVD-Video NTSC, DVD-Video PAL, HTML5, DVD-Video SECAM, MP3, TS, TRP, MPG, WMV, MOV
- Supported Devices: iPhone’s, iPod nano, iPod touch, iPod Classic, iPad’s, HTC, Galaxy S II, PSP, PS3, PS4, Wii, Xbox 360, Xbox One, Zune, Zem Archos and many many more.
- DVD Formats: DVD disc, DVD folder, ISO Image file
MAC Supported Input Formats
- Mac Video Formats: MP4, FLV, AVI, VOB, 3GP, ASF, MOV, F4V, M4V, MPG, TS, TRP, M2TS, MTS, TP, DAT, WMV, MKV, DV, MOD, TOD and EVO.
- Mac Audio Formats: AAC, AC3, AIF, AIFF, APE, AU, FLAC, M4A, MKA, MP2, MP3, OGG, WAV and WMA
- Mac Picture Formats: BMP, JPG, PNG, GIF, TIF, ICO
MAC Supported Output Formats
-
- Video Formats: MOV, M4V, MP4, MP4 5.1 Surround, AVI, MKV, FV4, WMV, MPEG-2 Movie NTSC, MPEG installation2 Movie PAL, FLV, 3GP, TS, TRP, HD, MOV, HD, MP4
- Supported Devices: iPhone’s, iPod Touches, iPad’s, PSP, Archos Player, Creative Zen Player, Zune and many many more.
- DVD Formats: DVD disc, .dvdmedia, ISO, DVD Folder
ne
Ok, so it looks like it can take just about any format and output to any format and device, as you would expect a decent video editor would do. Now that we are through with that, let’s get back into the software itself.
[nextpage title=”Installation”]
Before we discuss too much more, let me show you the installation process.
Let’s download the trial software from here: http://filmora.wondershare.com/video-editor/
Once it has downloaded, lets double click on what was just downloaded and you will be prompted with the following screen.
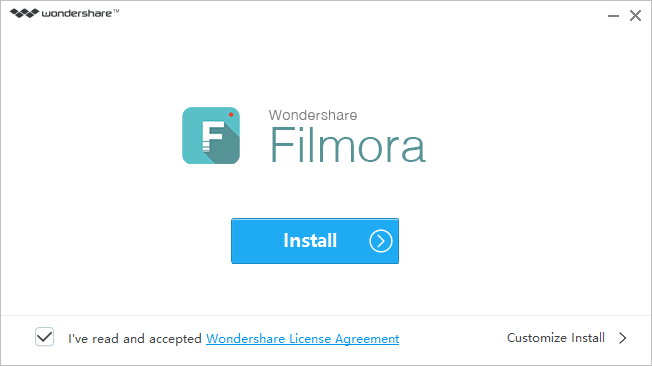
If you want to install to the default drive, click “Install” but if you want to change its install path, go ahead and click “Customize Install” and change your ”Installation Path”.
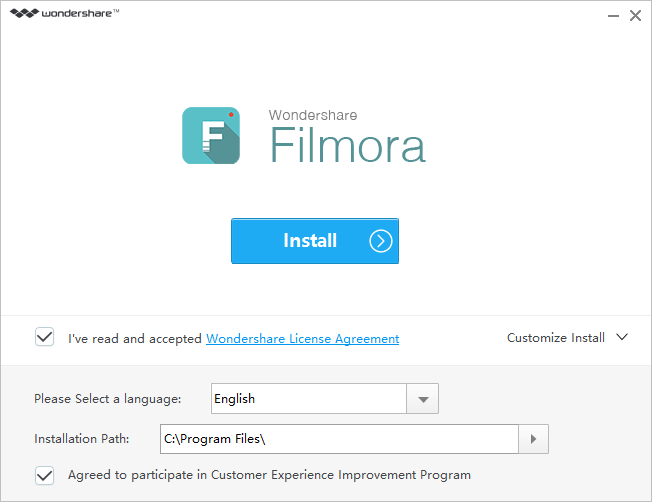
Normally I don’t agree to participate in programs for improvement, but it is actually worth it and I will show you a bit later why. When you are ready, click “Install” and you will sit through the quick install procedure.

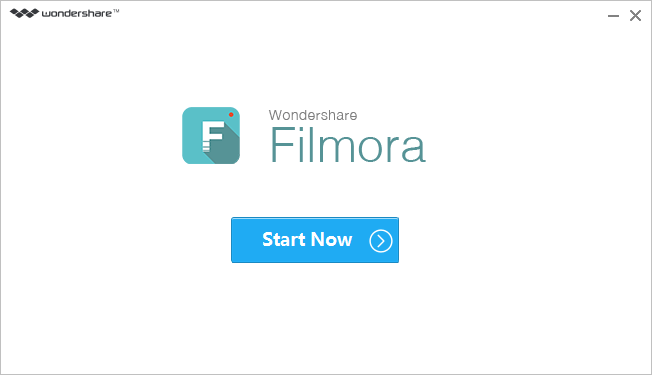
After a few seconds pass, you will happily be greeted with a “Start Now” button, go ahead and click it. It is a quick install.
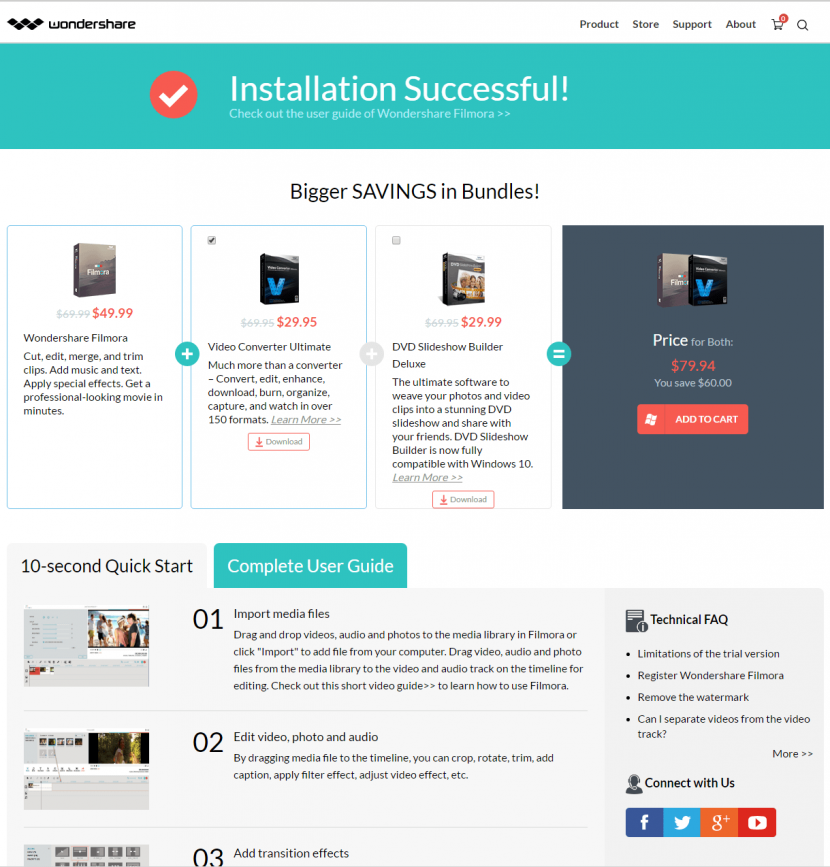
Once it starts, it will open up a Web page letting you know that the installation was a success and also check to see if you want to buy a few things, though the program open’s up over it. I will also mention, aside from the sales pitch, this webpage also provides tips and even a Complete Users Guide which I myself found very handy.
Here is the program itself
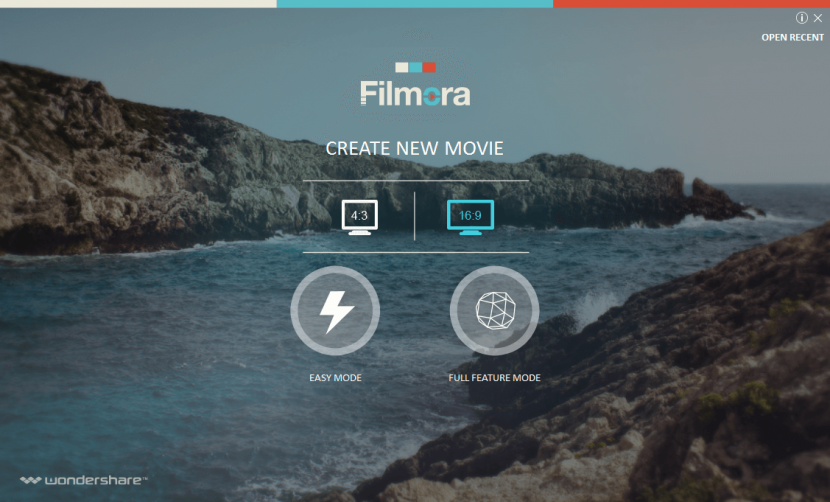
From here, you can select either a 4:3 or 16:9 aspect ratios. Just in case you are not sure what an aspect ratio is, I wasn’t quite so sure some time ago, it is the relationship of the width of a video image compared to its height. What do they mean?
Well, a 4:3 aspect ratio is more for a box framed TV or Monitor and with that usually not HD and not Widescreen. A 16:9 aspect ratio is a widescreen format standard and while it does support SD formats (Standard Definition) it most definitely supports HD Standards (High Definition). Mind you, they will all have exceptions to the rule, but a standard generally means that is how they all work for all.
Secondly, you are able to select either an “Easy Mode” or a “Full Feature Mode” type of interface.
Filmora Easy Mode looks like this:
It has a sort of Windows Media Player look and feel; surely it would have all the features, but it feels too stripped down to me, hence the Easy Mode naming. For the entirety of this review, I will stick to the “Full Feature Mode” interface.
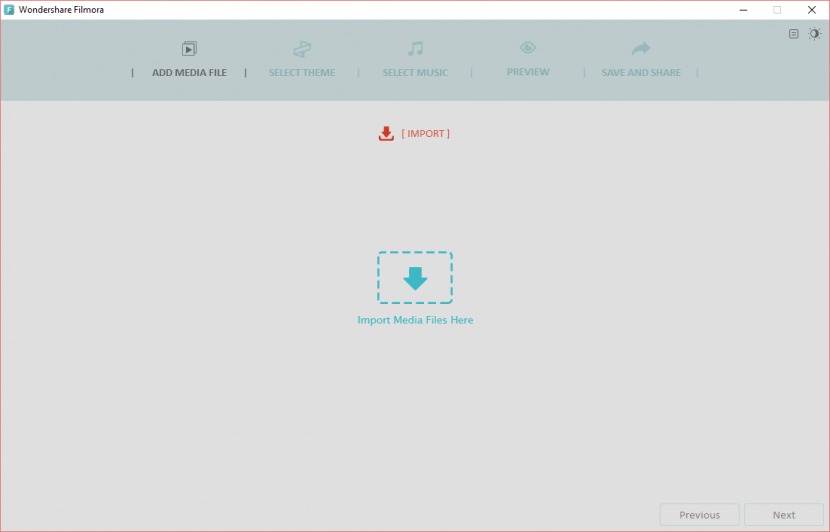
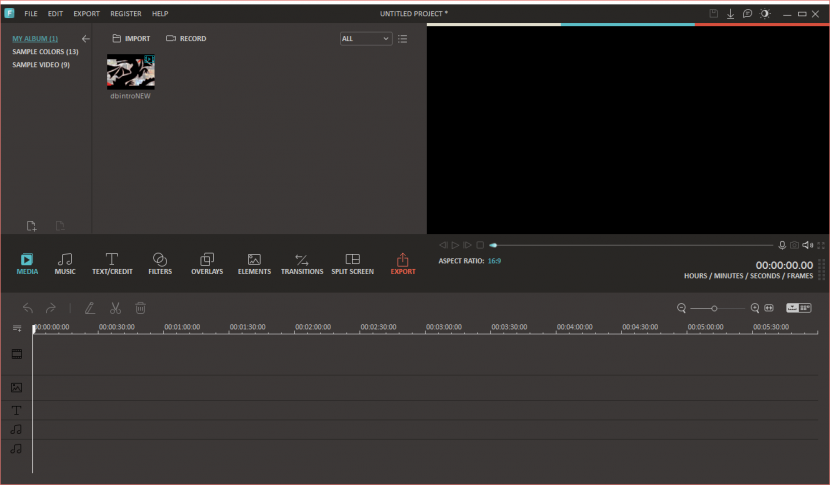
Clicking on the “Full Feature Mode” will present you with this screen:
This is more like it; you can see that they give you quite a few features, though right now many of them are hidden. Towards the center of the screen, they also give you a “Message Center” that you should keep an eye on. I will discuss this and more a bit later on in this review.
Don’t be afraid with the fact that we are in Full Feature Mode, this software is very easy to learn and use and if anything stumps you, they actually have a decent support site that I found many answers in.
[nextpage title=”Exploring Filmora”]
Go grab something to drink, maybe a snack, this section is a long one.
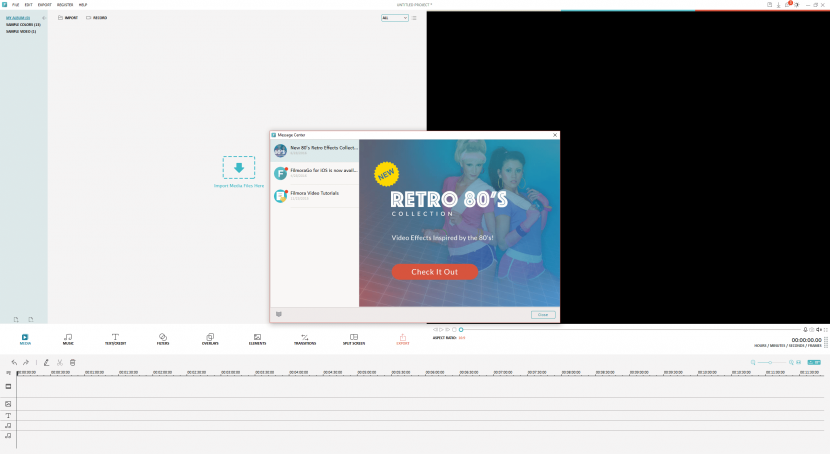
Closing out of the ads for now, we are at the base of Filmora, looks pretty basic.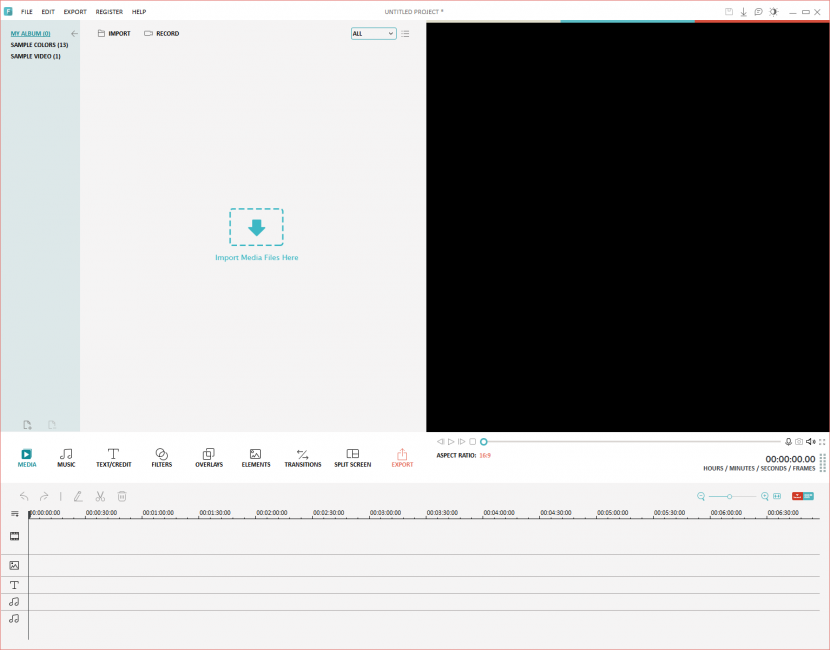
That all changes when we click “Music”
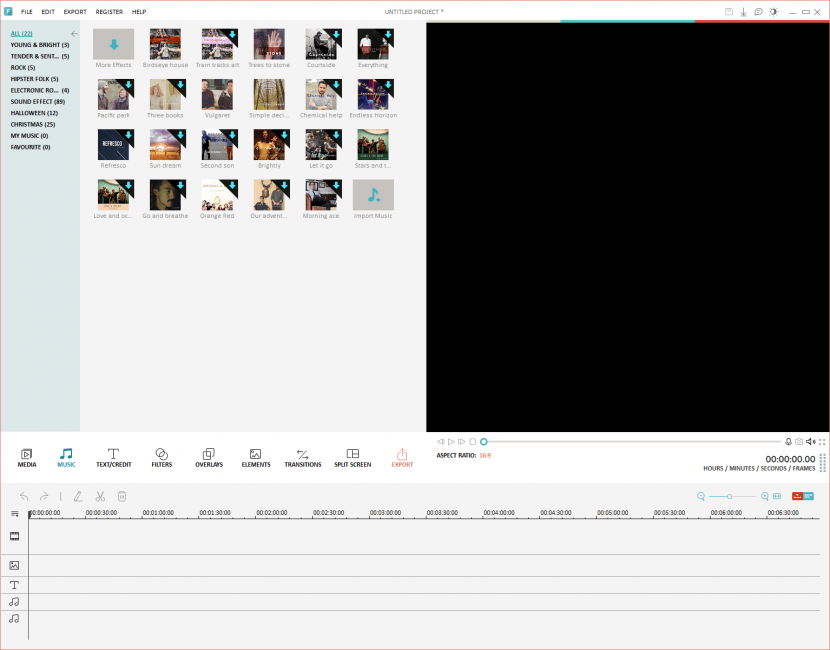
Clicking on Music shows you all the songs and sound effects you can use, but let me focus in on that.
Coming in closer we can see that it comes with 22 free songs,
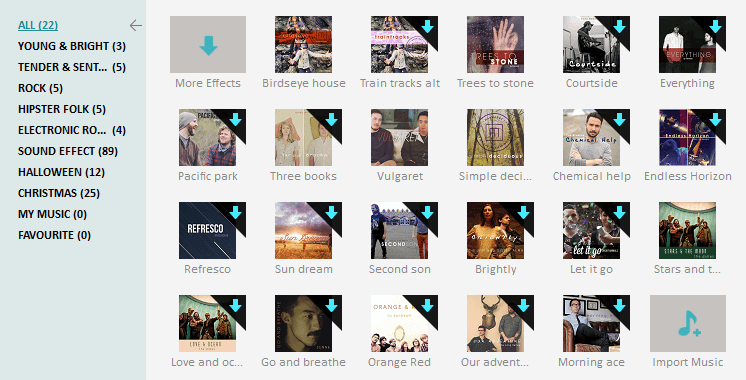
89 Sound Effects and more:
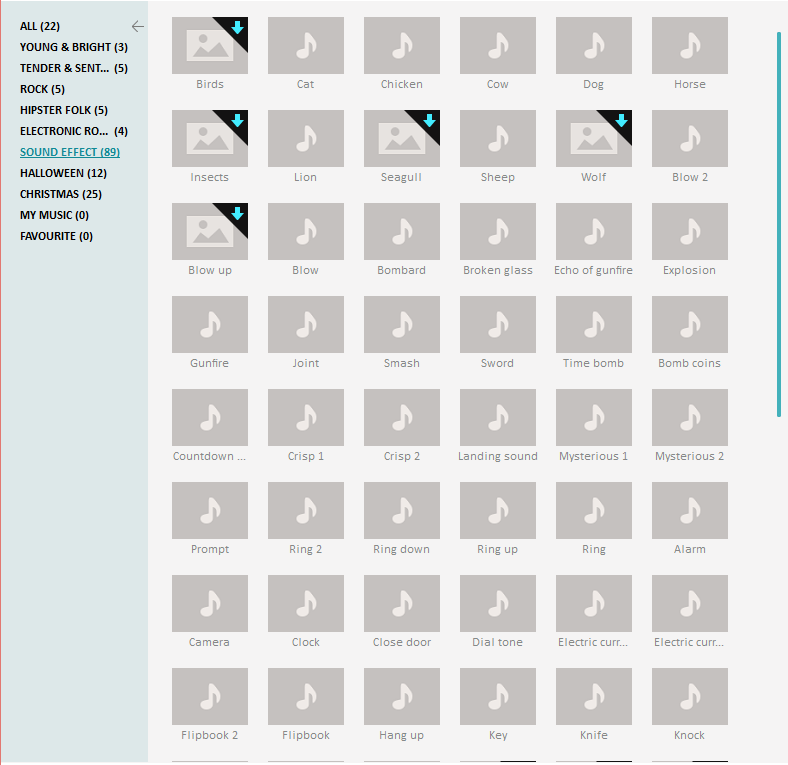
When you see that blue arrow point down, that means that it is not included in the install, but when you click on the track, it will download it for free.

Clicking on the “Text/Credit” tab shows you all of the different text and credit effect’s you have access to, either already installed or available free by a single click.

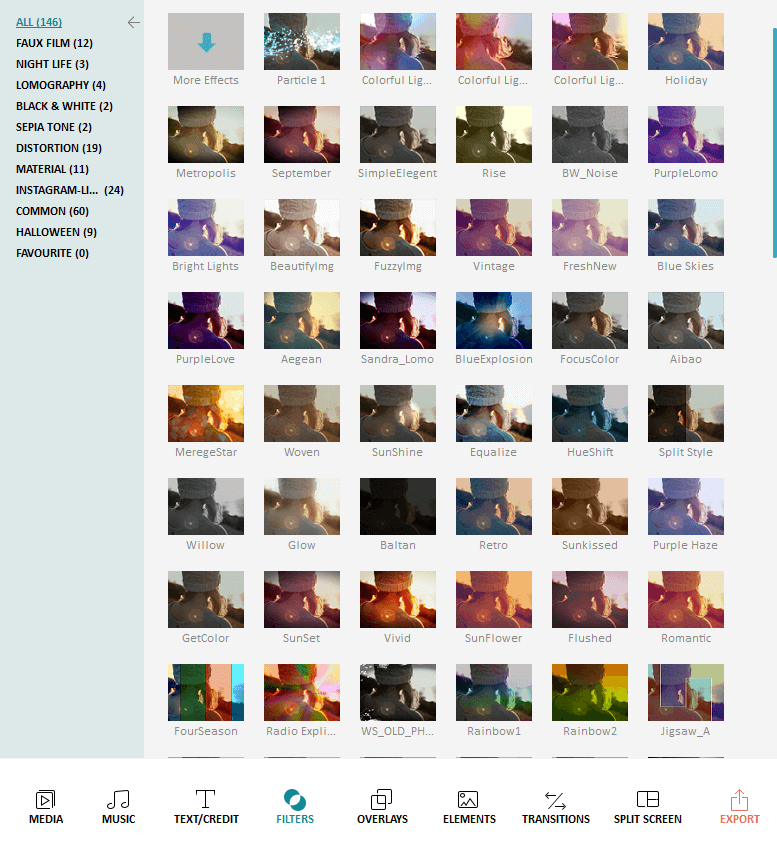
The Filters tab, shows you likewise all of the “Filters” available again either on the install or downloadable.
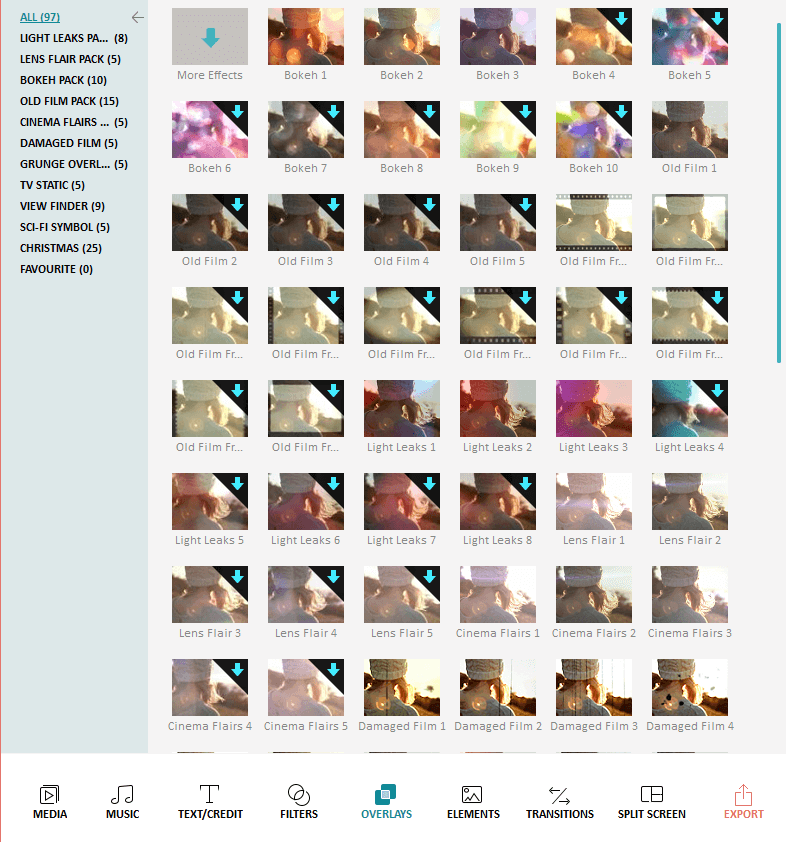
Overlays:
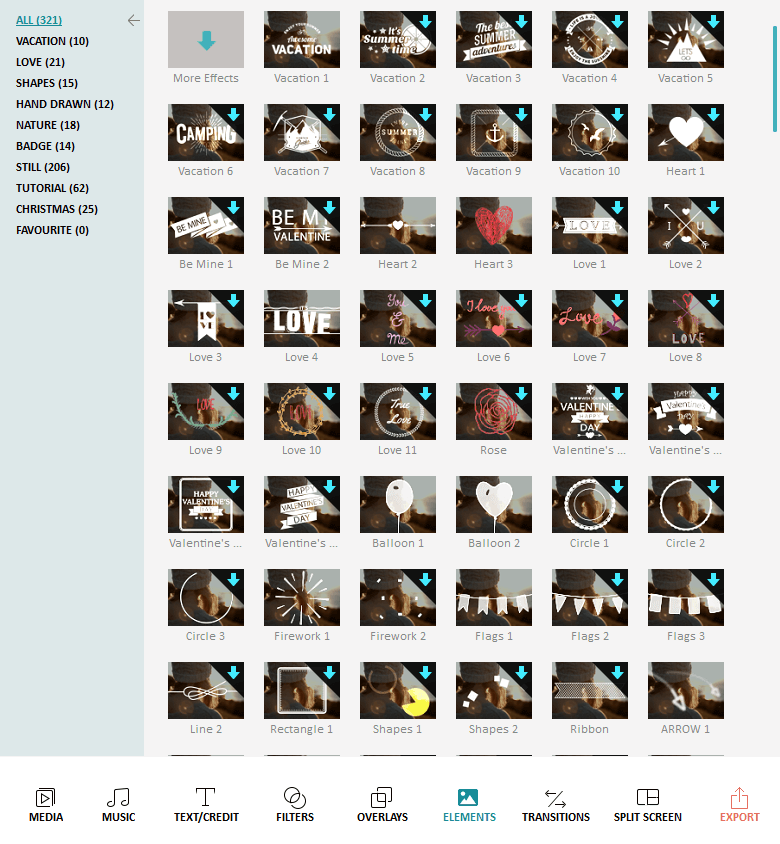
Elements:
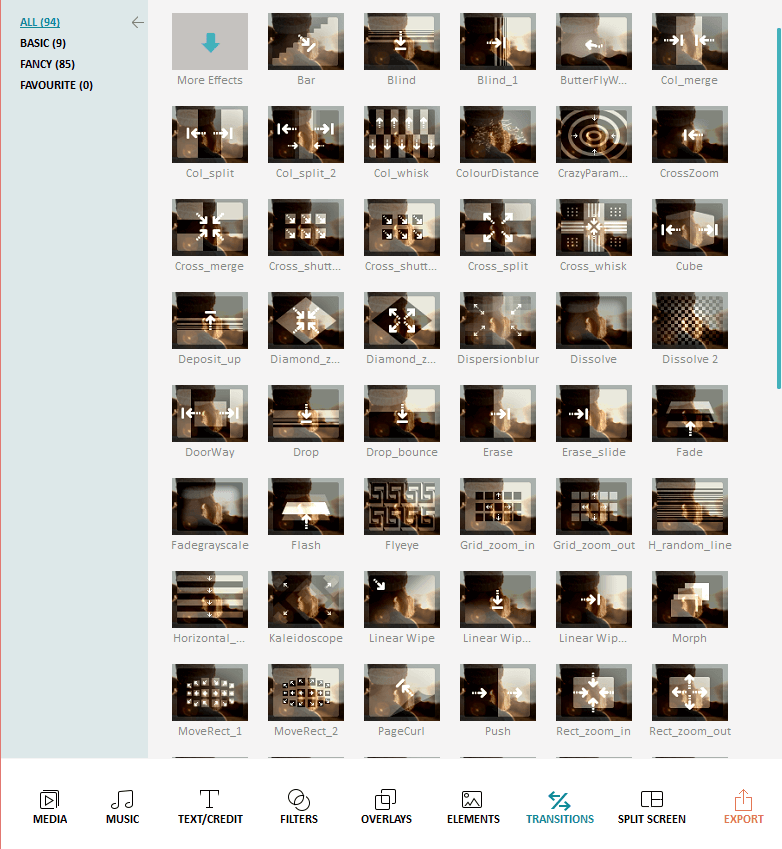
Transitions:
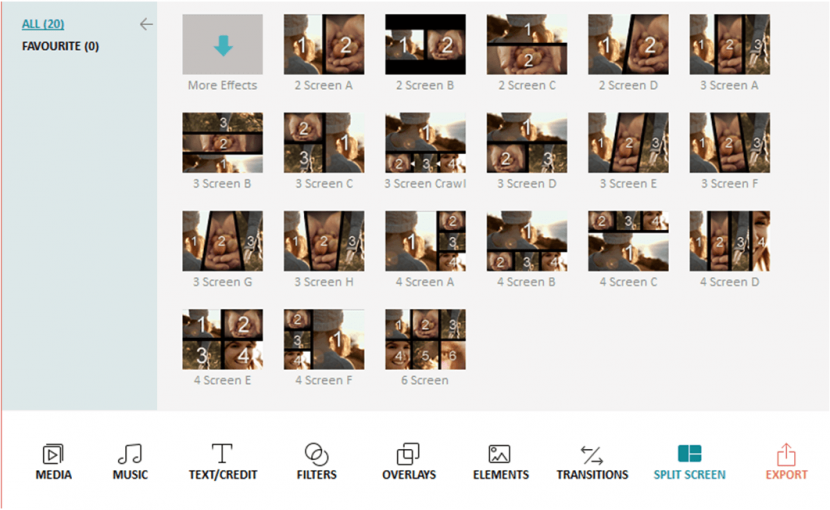
And even Split Screen effects:
Of course, when you’re done with everything you would Export your Project. As I showed you in the “Format and Support” section, you have a ton of options when exporting.
Format:
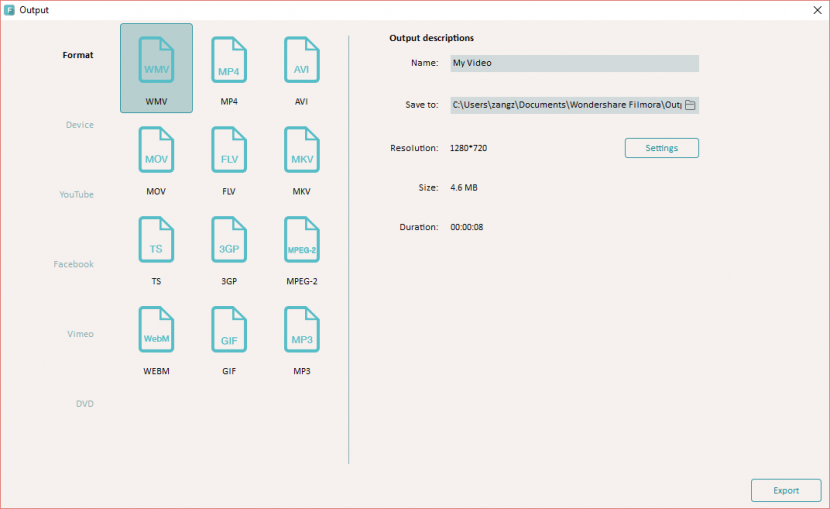
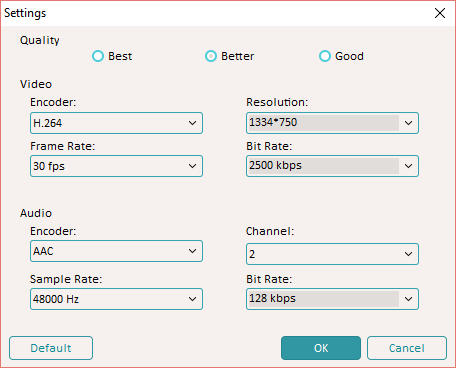
And then more when you click Settings:

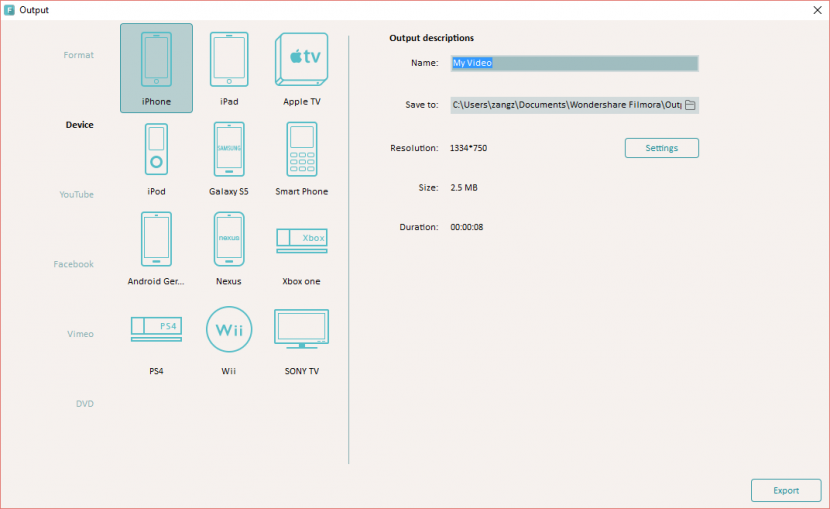
Device:
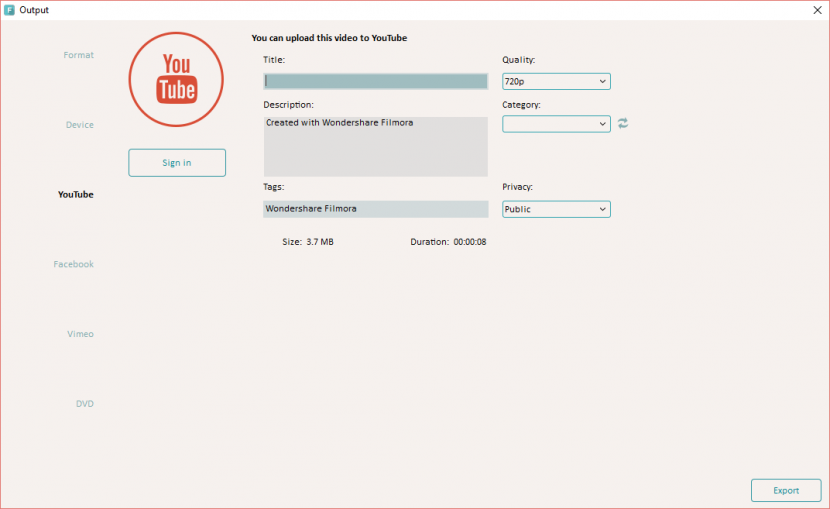
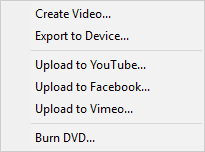
You can even export/upload to Youtube, Facebook, Vimeo directly into Filmora or just back them up to your PC.


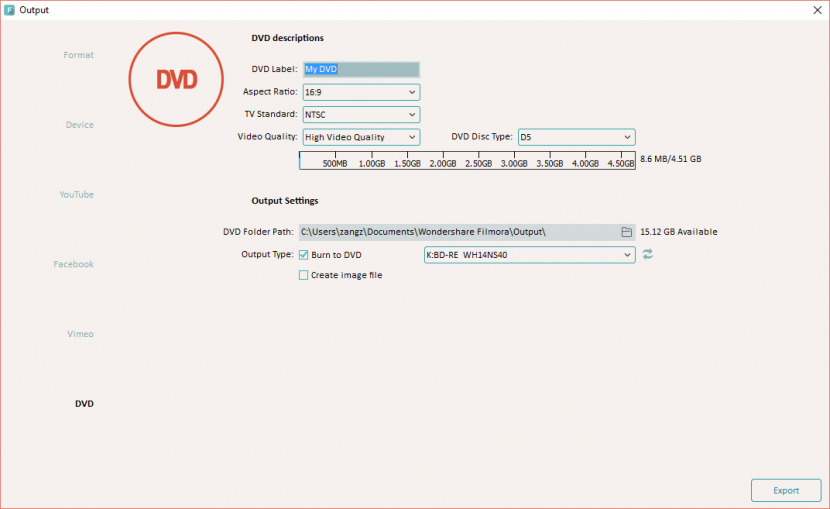
And as I mentioned before, to DVD:
The Title bar even has a few hidden gems.
![]()
File provides you with:
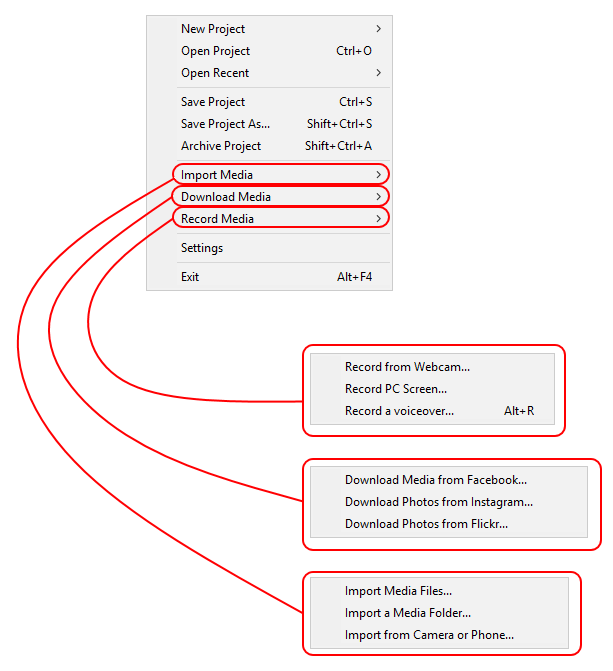
I don’t personally own a webcam, but I did use the “Record PC Screen” feature, it works very well.
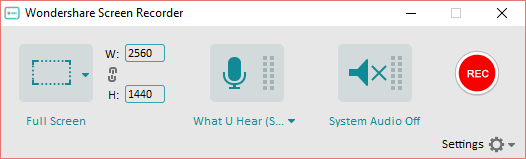
This allows you just how much of the screen you prefer, where the audio would play from and if it would record system audio. This is a great addition, while you do need to start up Filmora to use it, once it is up, you can close Filmora and continue using it. Later in this review I will give you an example of where I used this.
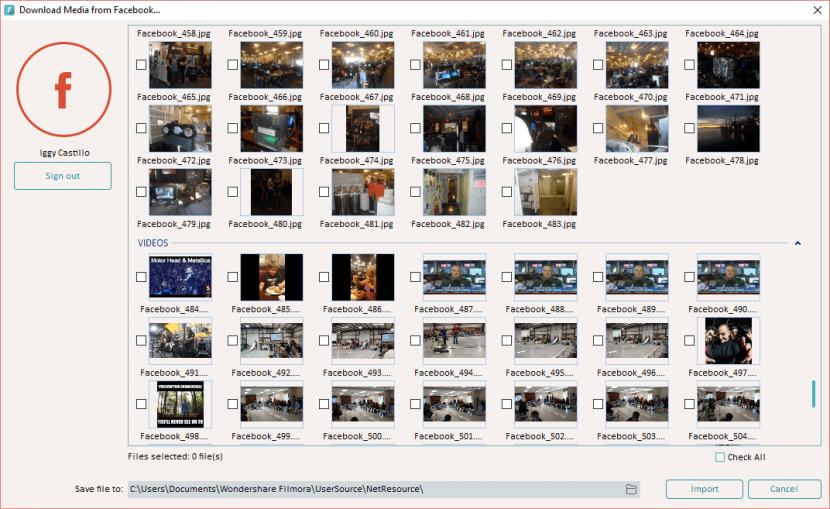
The Media/Photos/Videos from Facebook, Instagram and Flickr is also a very nice feature. This allows you to download media that you have uploaded to these social sites. The reason I say this is cool because for example, many times you go on a vacation for example and take a bunch of pictures and videos and upload them to facebook and maybe you phone gets stolen, lost or dropped in water. Filmora allows you to import these uploaded pictures and videos directly into Filmora or just back them up to your PC or Mac.
Usually that will mean the pics/videos you have taken are gone from the phone, and now you have to one by one download them from these social sites if you want them back, with this, you can select all and import them to a predefined directory, have everything back in your hands. It will also come in handy if you want to close your accounts on these sites, rather that wasting weeks to retrieve them one by one, you can have them in minutes or maybe even hours but then you can close the account.
Going into Settings, we find some customization’s you may want to take note of.

First off are the Youtube and Captured folders. If you are installing onto a smaller drive, you want to make sure that this is redirected to a larger drive to avoid some nightmare with capacity.
Of course the Language, but the next is “Auto Update”. I am also the type of person that does not like to have a program scan the web for me to look for updates, but in this case, I feel that it is a good feature. In the time I have been using the program, I have actually had 2 updates applied. They are constantly working to improve the performance and experience I have come to find.
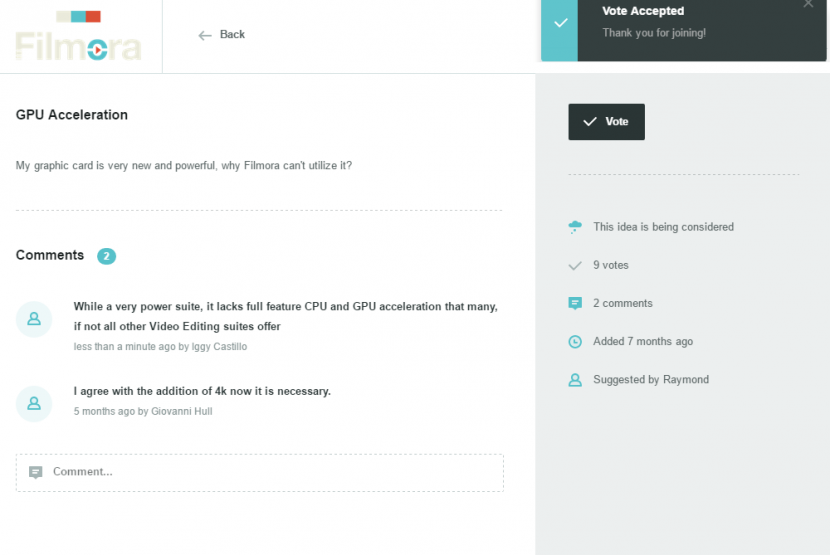
Trying to keep that in mind, I found the GPU Acceleration feature, take note that I found it off. I have a Sapphire Radeon R9 390 8GB card, one would think that this would surely be able to take care of some nice GPU acceleration with OpenCL or NVIDIA based cards with CUDA, but there is a bit of a catch. They only support till a card version, not a driver version as much.
Now at first I was very surprised, but then I thought about it a little more and figured it might actually be a good thing. If you do a little Googling for GPU Acceleration you will find that many programs like Adobe Premiere and even Camtasia run into issues with GPU Acceleration running into program instabilities. Rather than Wondershare just joining the bandwagon, they took the high road and individually certify the video card, remember a card is not just software, there can be many differences between hardware from model to model, but I still want my GPU Acceleration.
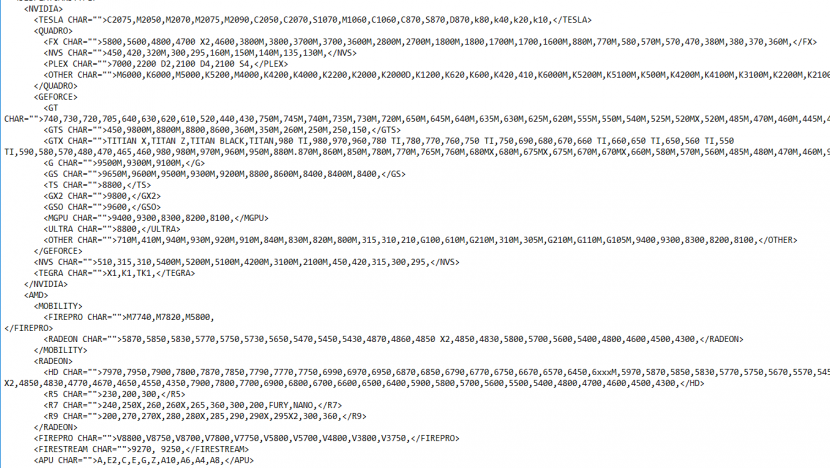
If you already have Wondershare Filmora Installed, you can actually see what cards are supported in file named Dll_Info_Config, located in the Filmora folder, here is an example of what the file hold, this is not the complete list of supported cards though. I found also that I received now benefit from my Intel Core i7 5930K processor as the cores did not max out when encoding the videos.
The exporting will still work, but it will take a bit longer to complete. While it potentially adds to the programs stability, when GPU Acceleration works in programs, it works well and it really is a feature they should focus on as it could potentially benefit all of their current and future customers and surely it will aid in the decision for potential customers.
The export tab, will give you much of the same features.
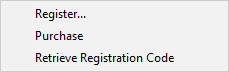
Register will give you the obvious choices.
And I will let you guess what Help provides.
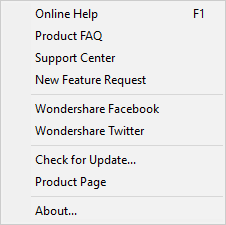
I will say, I do like the fact they offer you right within the app the ability to request a new feature, with the “New Feature Request” option. I think I will request better and wider GPU Acceleration options, and I did. I wasn’t the first though.
Whoops, meant to write “powerful suite”, but surely they will get the gist.
On the right side of the app, we find a few other options

![]()
Save Project
![]() Download more effects from Filmora Resource Center
Download more effects from Filmora Resource Center
![]()
Message Center (Will have a red blip in it with a number to inform you of new features and options)
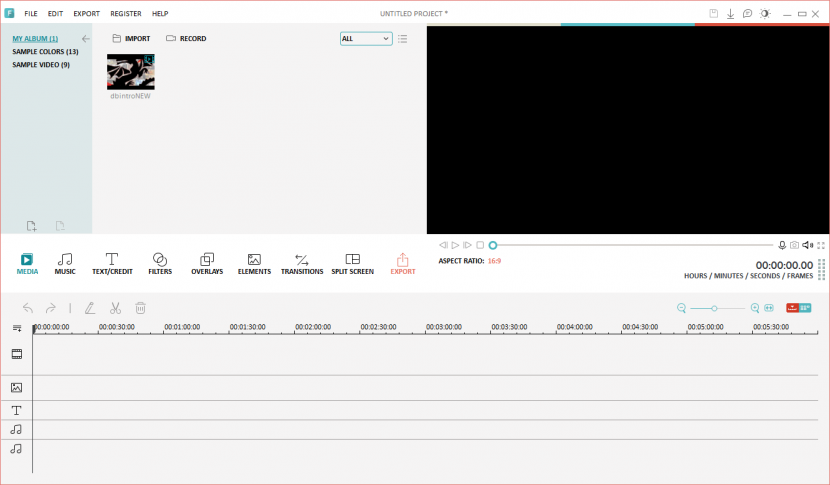
![]() Change Skin (Allows you to change the Filmora Skin)
Change Skin (Allows you to change the Filmora Skin)
[nextpage title=”Features in Use”]
While there are a ton of features, there are a few others that are not noticeable until you start using the application. I will go over some of them here.
In this first shot, we can see I simply dragged and dropped 2 pieces of media into the Media Library and then from there I dragged and dropped “SAM_3487” into the timeline where I can start editing. The video then shows on the Video Preview screen, this is a video I recorded used in the “Unboxing of the AVerMedia AEGIS Gaming Voice Chat Microphone (GM310)” review I created. I fast forwarded to the 00:06:26:23 time frame using the slider right under the video preview pane.
You can of course do a more manual import by either clicking File/Import, or by clicking “Import” in the Media Library section in the center to import video. Dragging and dropping is just so much quicker though.

Here I show you how I split the video in my time line, selected one portion of the split, then clicked “Audio Detach” to detach the audio from the video. From there, I can delete the audio, add a different piece of Audio or edit the audio. You can even Mute the audio all together.

Here I show you a little of what you can do when you edit the audio by simply right clicking on the detached audio and clicking “Edit”

You can adjust the speed, volume, add a Fade In or a Fade out and even adjust the pitch; my kids got a kick out of that one. If you don’t like what you did though, you can reset it back to default.
Right clicking again on the video in the timeline and clicking Edit gives you a few more features.

You can rotate, flip horizontally, flip vertically, change the Contrast, Saturation, Brightness, Huge, Enhance the video (I use this every time), change the speed of the clip and even play the video clip in reverse. Camtasia, a very nice piece of software that I have used for quite some time which does cost considerably more does not offer you the ability to change the Contrast, Saturation, Brightness or Hue. After finding these features in Filmora, I started liking this software much more.
You can also change the same audio options by clicking “Audio” of this pane. Since this audio is attached to the video, you cannot change the speed, makes sense. You can also enhance the video just by right clicking and selecting “Auto Enhance”


A very cool feature is the “Power Tool” feature that can be accessed by again right clicking on the video in the timeline and selecting “Power Tool”.


Tilt Shift is a nice feature that lets you focus in on one portion of the video, blurring out the rest.

In this video I focus on the AEGIS and blur out everything else. In a regular video though, you would not see the circle with the plus symbol and white lines of course, this is used to select where you like the Tilt Shift to appear.
Mosaic allows you to artistically blur out an exact portion in a video. Their might be a video you might want to get out, but to protect your identify, you can use mosaic to blur your face out.

Face Off, a funny little feature allows you to use faces already in the “Face Off” tab to change your own face.

Flash and Hold allows you to split the selected portion of your video to add a pause of the video, completely fade in the fade out then back to the regular film. This has many uses, though mainly used for suspense purposes.


I will skip Delete, because well,… it’s pretty self-explanatory.
Just above the timeline, you have many of the same features, shortcuts if anything.

![]() Undo (Ctrl+Z)
Undo (Ctrl+Z)
![]() Redo (Ctrl+Y)
Redo (Ctrl+Y)
![]() Edit (Alt+E)
Edit (Alt+E)
![]() Split (Ctrl+B)
Split (Ctrl+B)
![]() Delete (DEL)
Delete (DEL)
![]() Crop (Alt+C)
Crop (Alt+C)
![]() Flash and hold
Flash and hold
![]() Power Tool (Ctrl+P)
Power Tool (Ctrl+P)
![]() Track Manager: Allows you to change all of the location of the individual tracks.
Track Manager: Allows you to change all of the location of the individual tracks.

To the right of that, we have a few other features.

The slider bar is incredibly useful, it allows you to contract or expand the video on the time line to make editing a trillion times easier.
![]() This is an example with the slider bar slid all the way to the left, very difficult to edit but moving the slider bar gradually to the right makes it easier to select certain parts of the clip.
This is an example with the slider bar slid all the way to the left, very difficult to edit but moving the slider bar gradually to the right makes it easier to select certain parts of the clip.

![]() This is with the slider bar slid all the way to the right, extending the clip so that you can edit the video in fractions of a second allowing for tighter control of editing the video.
This is with the slider bar slid all the way to the right, extending the clip so that you can edit the video in fractions of a second allowing for tighter control of editing the video.

![]() Zoom to Fit to Time Line (Shift+Z)
Zoom to Fit to Time Line (Shift+Z)
Another very useful tool to bring the entire clip in the timeline down to one single frame so that you don’t have to slide to the right or left to find that one edit.

![]() Timeline View (Alt+T)
Timeline View (Alt+T)
Allows the time line to look like it has so far in this review
![]() Storyboard View (Alt+S)
Storyboard View (Alt+S)
Allows you to break the video into increments, seems a little like the Easy Mode view

Just above that, we find a few more controls. These are for the Video Preview.

![]() Previous Frame (Left): Allows you to rewind to the previous frame in the video preview.
Previous Frame (Left): Allows you to rewind to the previous frame in the video preview.
![]() Play (Space): Allows you to play the video in the video preview so that you can see the edits you have made without committing to them. Some of us have commitment issues, but this makes it OK.
Play (Space): Allows you to play the video in the video preview so that you can see the edits you have made without committing to them. Some of us have commitment issues, but this makes it OK.
![]() Next Frame (Right): Allows you to fast forward to the next frame in the video Preview.
Next Frame (Right): Allows you to fast forward to the next frame in the video Preview.
![]() Stop (Ctrl+/) : Stops the video in the video preview from playing.
Stop (Ctrl+/) : Stops the video in the video preview from playing.
![]() Record a Voiceover (Alt + R): Allows you to record a recorded audio clip into your timeline. It opens up this interface.
Record a Voiceover (Alt + R): Allows you to record a recorded audio clip into your timeline. It opens up this interface.

![]() Snapshot (Ctrl + Alt + S) Takes a snapshot (screenshot) of the video in the video preview window and saves it onto the Media Library for later use.
Snapshot (Ctrl + Alt + S) Takes a snapshot (screenshot) of the video in the video preview window and saves it onto the Media Library for later use.
![]() Volume: Allows you to edit the volume on the selected clip
Volume: Allows you to edit the volume on the selected clip
![]()
![]() Full Screen (Alt + Enter): Maximizes the video in the preview window to a full screen
Full Screen (Alt + Enter): Maximizes the video in the preview window to a full screen
![]() Shows you what Aspect Ratio you are editing in.
Shows you what Aspect Ratio you are editing in.
![]() Pretty self-explanatory, but it displays what time in the timeline
Pretty self-explanatory, but it displays what time in the timeline
![]() This sound bar displays how the high the audio is while the video is playing and moves up and down with the volume in the video.
This sound bar displays how the high the audio is while the video is playing and moves up and down with the volume in the video.
![]()
At the very bottom, displays a slider bar which allows you to slide the timeline allowing you to more easily find a certain point in the timeline.
While describing in detail what every single button does, some get a better understanding of what each does by watching it. Well I have put together a few video to do just that.
[nextpage title=”Filmora in Action”]
So here, I go over many of the features Filmora offers, not all of them though but enough to give you a decent idea of what Filmora can do.
I made a few videos before this one, but this short silent film shows you many of the features of Filmora.
So in order, you can see the Dragonblogger logo coming in, I attached that to the main video. I bring up a banner reading “Examples of Wondershare Filmora”, a Text/Credit effect named “Modern Ribbon 2 Lower 3rd” and I drag and drop the dragon blogger jpg into the black screen then I fade in another Text and Credit effect name “Walking Dead” reading “Father and Son”

I start waking up to a music effect named “Birdseye house” and to an effect in Overlays name “Light Leaks 4”. I come out of my room and run down the stairs with the “Bokeh 4” overlay very excited to see my son. I find him bored playing at the table with a plush cat and the “Light Leaks 7” overlay. We start talking to each other with the “Shadow” filter then in a “Canvas” filter, “Color Sketch” filter, “Textile” filter then things turn for the worse.
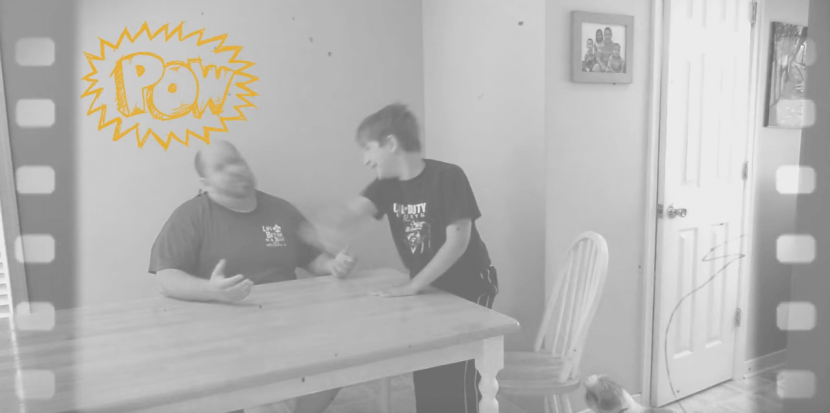
Apparently, I said something that upset him and he throws his cat through a windows heard with the “Broken Glass” music effect. Things get worse as we get thrown into an “Ash” filter inside of an “Old Film Frame 4” then my son punches me in the face and you hear the “Blow” music effect and see the “Boom_5” elements pow and I pass out. Afterwards, he gets up and starts cheering with the “cheer” music effect then feels like he dominated with the “glasses02” and “crown” elements.

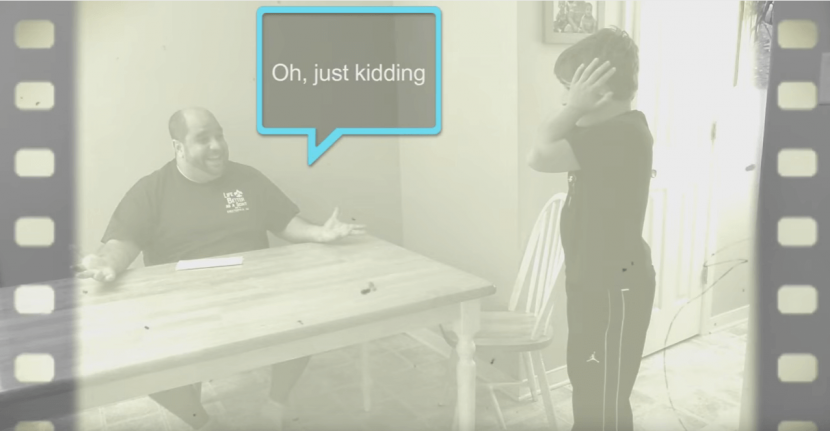
A few seconds later he realized what he had done, panicked and uses the “screams” music effect. Oh oh, I start coming to life as you hear the “heartbeat” music effect, but wait, am I alive, it’s the “Zombie voices 1” music effect. Xavier starts talking with the “Callout 6” element realizing I am now a zombie and screams with the “Female Scream 1”. I then sit up laughing with the “Laugh” music effect and I also start talking with the “Callout 6” element.
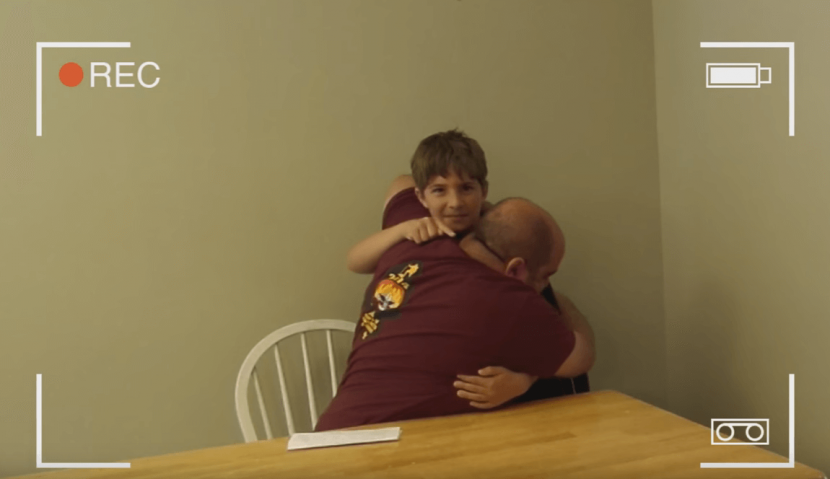
Things start turning for the better as I forgive him with a huge and the music changes to “Trees to stone” music effect. The screen turns back to normal and then turns to the “camcorder” overlay and Xavier looks at the camera and signs a knife cutting my neck and you hear the “knife” music effect.
The video fades gets cut and then I add the dragonblogger outro video, detaching the audio. I love Justin and all, but this is my video, I don’t want to hear him here. I also show that all the work was done in Filmora with the “Modern 1” Text/Credit effect. Easy right?
Well yes it is, but I never really show you how I put it together. I spoke about what I used, but talk is cheap. This next video shows you how to actually use some of the features, though It was not made on the previous video.
So you saw me put together the video, here is the finished product in my “Showcasing the Cougar Attack X3 Gaming Mechanical Keyboard”
Another cool feature that Filmora brings to the table, which may excite quite a few of you is the Greenscreen feature. You know, how Hollywood puts together many exciting effects, for example in Marvel’s “The Avengers”, Captain America, Black Widow and Thor are involved in a huge explosion but in real life did nothing but act in front of a bunch of pieces of non-reflective green material and lots of light.
I show you how this works here, but mind you, I don’t have much of a budget so I had to reply on lightly colored green walls in my house, with poor lighting.
Pretty cool right? Mind you, I gave a poor video to Filmora and it did the best it could do with what it had. For proper greenscreen effects, you need a proper green screen that is not reflective, proper lighting and lots of it and Filmora, it can take care of it.
So I have completely walked you through installing the software, one by one described what every feature and button is (maybe I missed a few), shown you some of the videos I put together and even have shown you how I made a video, what’s left? The Conclusion of course.
[nextpage title=”Final Thoughts and Conclusion”]
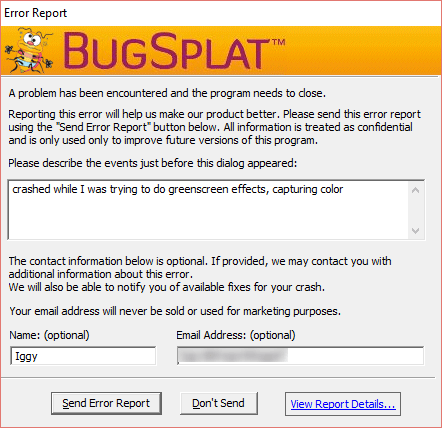
It was a great experience but it was not perfect, I did actually have the program crash once while I was working with the greenscreen software. Because I am a part of the Customer Improvement Program by simply leaving the check mark in the box, I am presented with a “BUGSPLAT” Error report when the program crashed and recovered, where I describe my issue, leave my name and my email address and it goes off to Wondershare to analyze.
To add to that, and to defend Wondershare, I have run into tons of issues with Adobe Premiere and Camtasia so it does not matter how expensive or how inexpensive the software is, issues will occur. I also ran into the GPU Acceleration card support, or lack thereof. While it does support GPU Acceleration, it seems like they do not certify immediately after or while the cards are released, it takes some time.
Another thing to take note of, even though I slightly did was the fact that when the program crashed, it came back up and offered me to recover my project. To make it more clear, it did not ask me to load a save point, which any software can do, it asked me to actually restore where I was last at, even bit of audio, video and picture with all its edits was brought back to the point it crashed, I lost nothing.
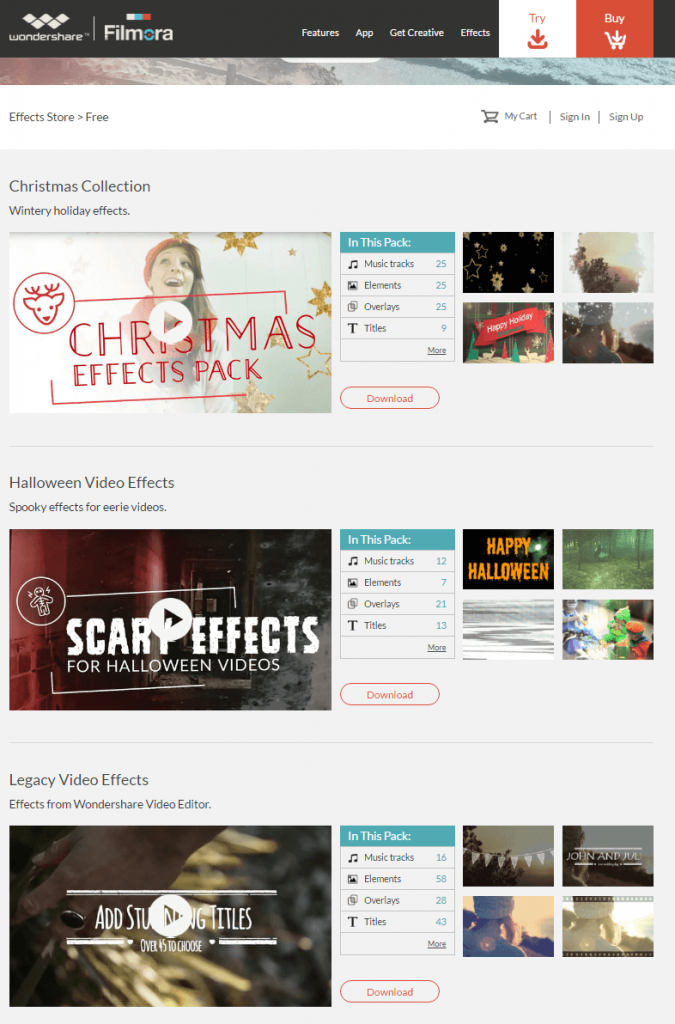
The software does offer automatic updates and freebies as you can see below and actually while you use the software, they show up as free downloads, you can just click on them. While other companies might offer freebies, you have to know to go to their website and look in the most obscure out of reach places. Here are 3 Freebies, offering many Music tracks, Elements, Overlays and Titles, not just one thing, but a bundle of things.
So here is my rating
Pros
- AMAZINGLY Affordable
- Offers features that other more expensive suites just don’t and cannot handle.
- Very simple, friendly and intuitive interface
- A self-help site that actually works
- Offers automatic updates
- Offers easily accessible, right in your face freebies
- Offers a free trial software
- Compatible with PC and Mac
- Has true 64Bit Support, not WOW (Windows on Windows) support
Cons
- Poor CPU and GPU Acceleration Support
- Level of editing could be more precise.
The Pros are pretty obvious but I will describe a little more in depth the cons.
While this program does offer GPU Acceleration, it is not amazingly wide and does not even offer support for the latest Gen cards, though they were launched not too long ago. With the GPU support, it seems that they also lack CPU acceleration support, a basic feature that every program benefits. Usually when an audio or video encoding suite starts encoding the media, it will suck up every available core the CPU offers, using Filmora, not a single Core was maxed. I was told that this support would come with longer video clips, but I still did not see it. I will say though that it still goes relatively quick, though not accelerated.
I also mentioned “Level of editing could be more precise”, but I cannot take away a star for this, even half a star because of the price. Adobe charges as little as $19.99 a month for Premiere, which does a TON of things and offers more precise controls of your tools and after 2 months of Premiere you could have already bought Filmora and owned it, not rented it like you do with Premiere. Camtasia does a lot too, I don’t know if I can say it does more, but I feel like it offers very tight control of your timeline and effects but can be a bit problematic and is expensive at $299 but does not offer lighting effects and a few things Filmora does.
In all, I think Filmora is amazing and offers a ton of great features. The Poor CPU and GPU Acceleration would have alone removed an entire star if it were not for all the Pros and the most important Pro aside from the software working itself to me is the Price. They offer a 1 year license for $29.99 and then a Lifetime License for only $49.99, even a multi-user/multi-PC licenses but there are a few options on that one, might be best to visit their site to check for yourself.
I give Wondershare Filmora a 4.5 Stars out of 5, highly recommended, but I so wanted to give it 5 out of 5.

You can check out the software here, and even download a free trial http://filmora.wondershare.com/video-editor/
SPECIAL DISCOUNT for DRAGON BLOGGER FANS!
Our Link to Wondershare has it at a discount so you can get the lifetime license for only $49.99 instead of $69.9. You can get the PC or MAC version for that price for a limited time only!
And you can buy it here on Wondershares site
[P_REVIEW post_id=60299 visual=’full’]
We are influencers and brand affiliates. This post contains affiliate links, most which go to Amazon and are Geo-Affiliate links to nearest Amazon store.
I have spent many years in the PC boutique name space as Product Development Engineer for Alienware and later Dell through Alienware’s acquisition and finally Velocity Micro. During these years I spent my time developing new configurations, products and technologies with companies such as AMD, Asus, Intel, Microsoft, NVIDIA and more. The Arts, Gaming, New & Old technologies drive my interests and passion. Now as my day job, I am an IT Manager but doing reviews on my time and my dime.