
We are influencers and brand affiliates. This post contains affiliate links, most which go to Amazon and are Geo-Affiliate links to nearest Amazon store.
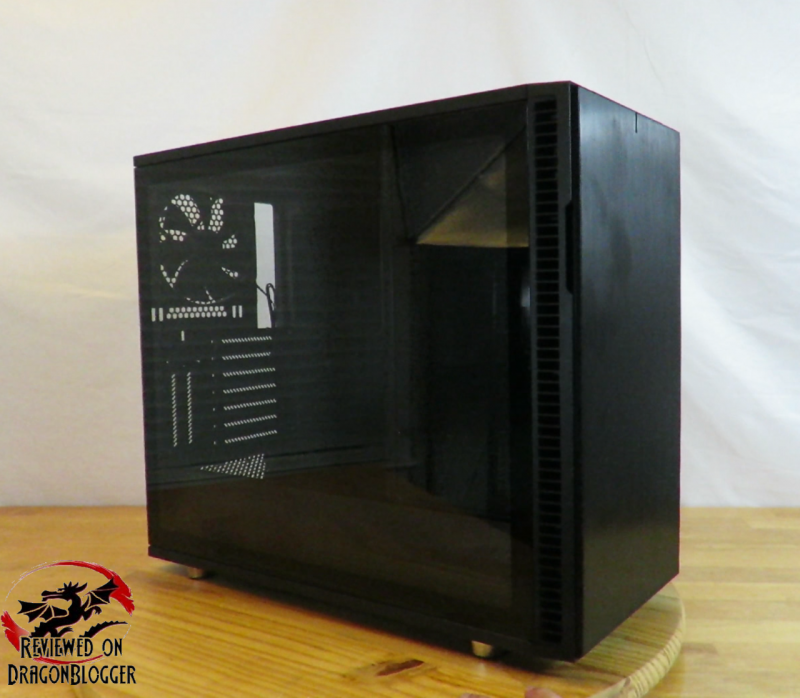
It seems like everyone is building a case these days, and there is nothing wrong with that because it makes companies try harder to make a better case. That being said, this review might be on that better case, it’s for you to decide, but I will give you my input. Today’s review is on the Fractal Design Define R6 Black TG (FD-CA-DEF-R6-BK-TG).
Let’s go over the features and specifications of this case before we get into the case itself.
- Motherboard Support: ATX, Micro ATX, Mini ITX and eATX (up to 285mm wide)
- Case Dimensions: Length: 543mm, Width: 233mm, Height: 465mm
- Single Windowed Side Panel (33% tinted tempered glass)
- Right Side Panel: Industrial sound-damped steel
- 7 Expansion Slots
- +2 Vertical Slots Compatible w/ Fractal Design Flex VRC-25 PCIE x16 Vertical GPU Riser Kit
- External Connections
- 2 x USB 3.0
- 2 x USB 2.0
- 1 x 3.5mm Headphone Jack
- 1 x 3.5mm Microphone Jack
- Drive Bays:
- 6 Universal 2.5”/3.5”
- 2 x 2.5” (on PSU Shroud)
- 2 x 2.5” (Behind motherboard Tray)
- 8 bays in total (PSU Shroud and Motherboard Tray placements are interchangeable)
- Modular Storage Plates (For 2.5” and/or 3.5”)
- Fan Mount Locations and Sizes
- Up to 9 Total Fan Mounts
- Front: 3 x 120mm or 2 x 140mm
- Includes 2 x Fractal Design Dynamic X2 GP-14 140mm
- Top: 3 x 120mm or 2 x 140 (Standard Layout)
- 3 x 120/mm or 3 x 140mm (Open Layout)
- Rear: 1 x 120mm or 140mm
- Includes 1 x Fractal Design Dynamic X2 GP-14
- Bottom: 2 x 120mm or 2 x 140mm
- Radiator Support
- Front:
- 120, 140, 240, 280, 360mm
- Top:
- Standard Layout
- 120, 240, 360mm (Max 35mm motherboard component height)
- Open Layout (
- 120, 140, 240, 360, 420mm (Max 35mm motherboard component height)
- Rear:
- 120mm
- Bottom:
- 120, 140, 240, 280mm
- High Airflow Nylon Easy Clean Filters
- Bottom Fan + PSU
- Front Fans
- Top Panel
- Max CPU Cooler Height: 185mm (6.89-inches)
- GPU Support: Up to 440mm open (18.31 inches), 300mm (11.81 inches) standard
- PSU: Standard ATX Length, includes PSU Shroud with available 2.5” drives
- Nexus+ Smart Integrated PWM Fan Hub: Controls 6 additional case fans and 3 extra PWM devices via motherboard.
- 3rd Generation ModuVent Technology (Sound proof steel cover or filtered multi-fan ventilation)
- Anodized Aluminum reversible front door
- High-Density Industrial noise dampening on the side, top and front panels
- Cable Routing Space: 23mm (1 inch between motherboard tray and side panel)
- Standard Layout
- Front:
Fractal left no stone unturned when they made this case but we will see later in the review what that really means for you.
Let’s check out the unboxing.
Let’s take a look at what comes inside the Fractal Design Define R6 Black TG box.
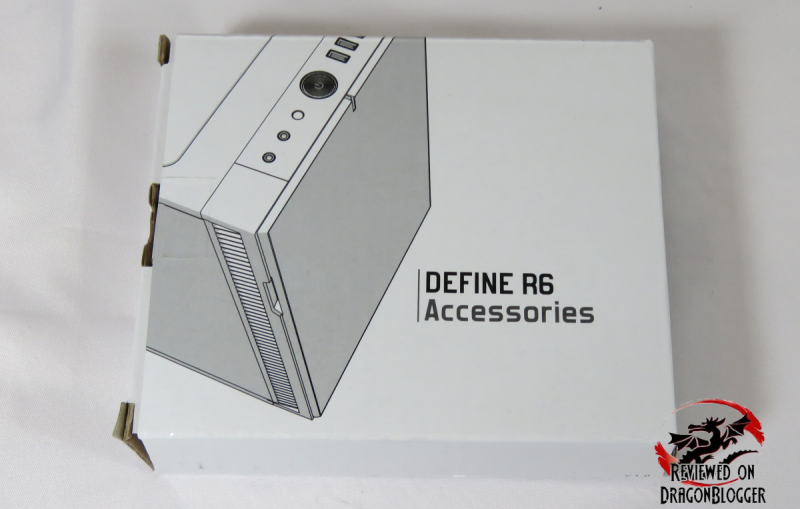
This was actually hidden from me during most of the unboxing, but inside the case on the lower drive bays was this little while box full of accessories.
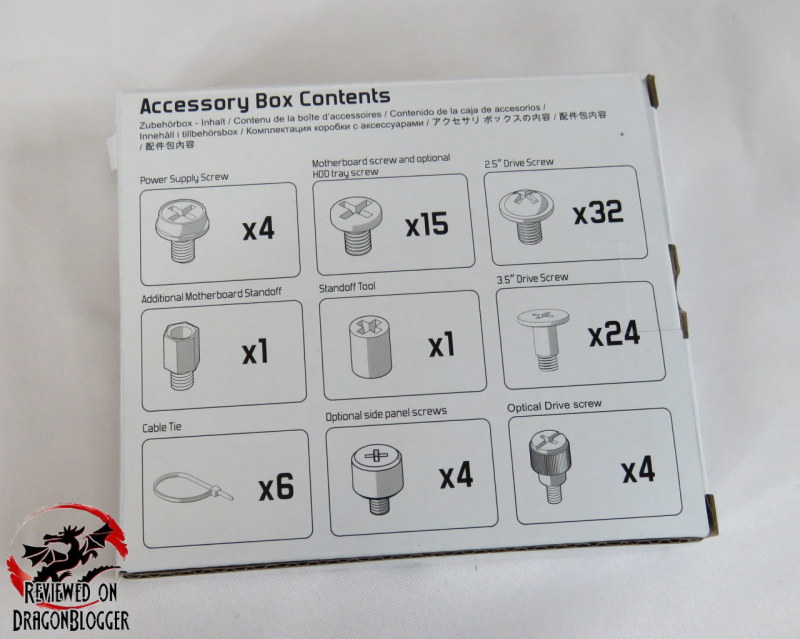
Turning this box over shows a legend of the contents of the box. Good job saving some paper there and it’s much easier loosing a little sheet of paper rather than losing this box. So let’s go over everything included here.
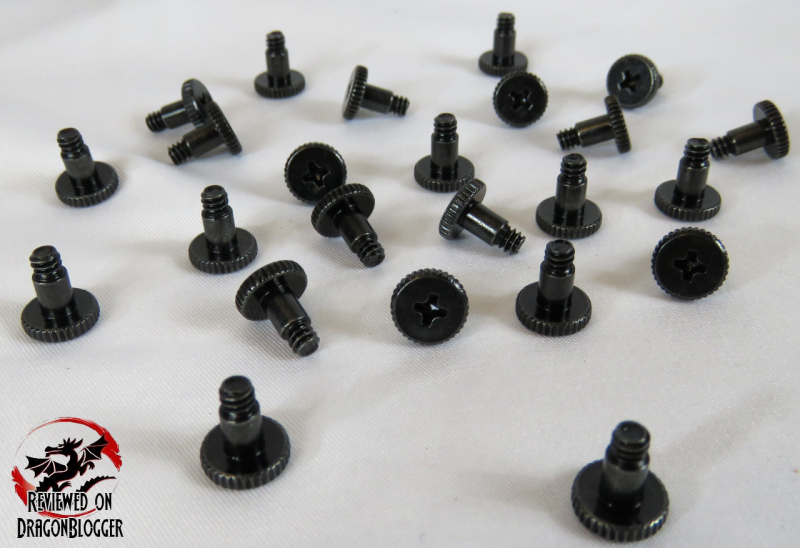
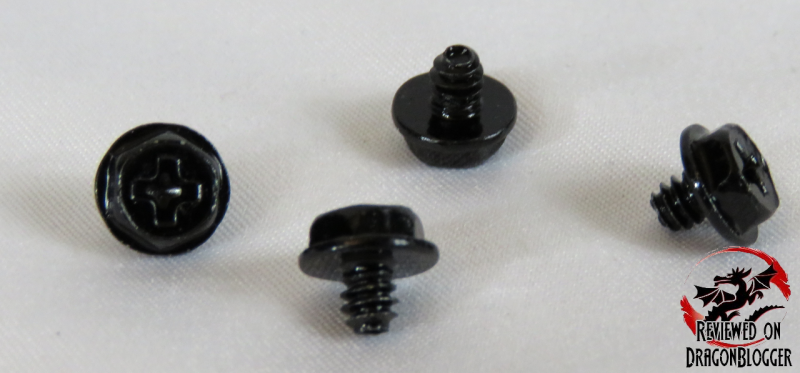
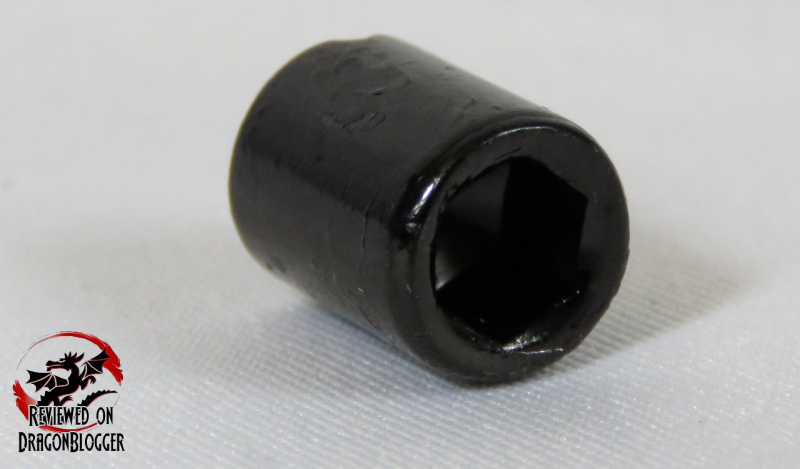
In case you still have them, they include 4 optical drive screws. During the unboxing, I thought they were case screws.
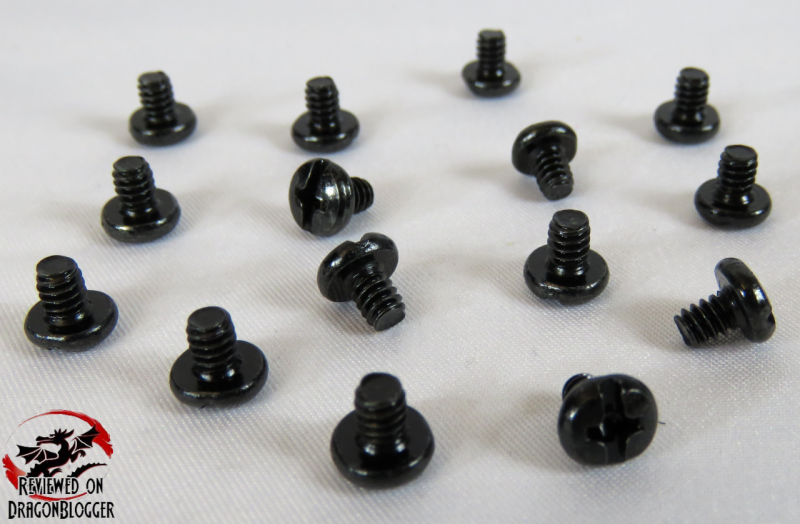
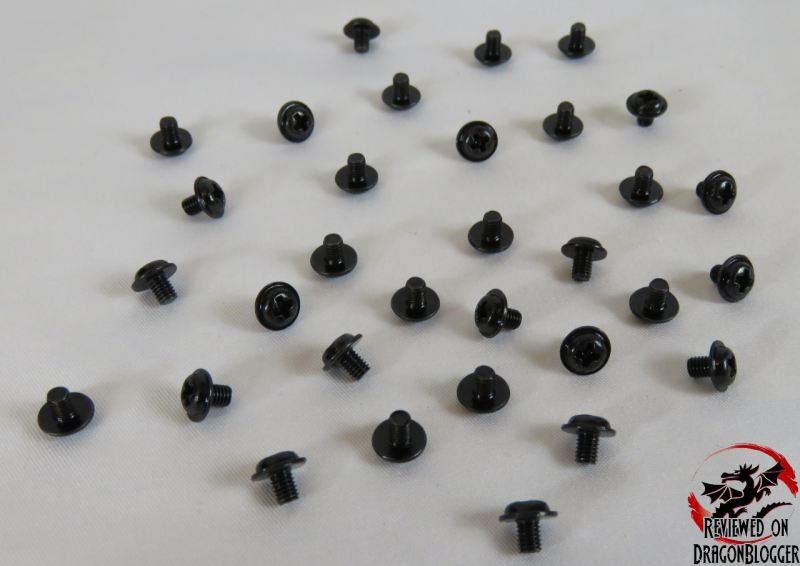
15 x motherboard screws, I don’t know of any motherboard that requires 15 screws, but who knows, you might lose one.
24 x 3.5” drive screws, that’s enough for up to 6 x 3.5” drives.

The case already comes pre-installed with 9 motherboard stand-offs but some ATX and and or eATX cases have the one extra stand-off opening, that’s what this is for.
To keep your power supply firmly attached to the case, they’ve included 4 power supply screws.
32 x 2.5” drive screws, yeah most definitely 32.

The kit also includes one of my favorite tools.
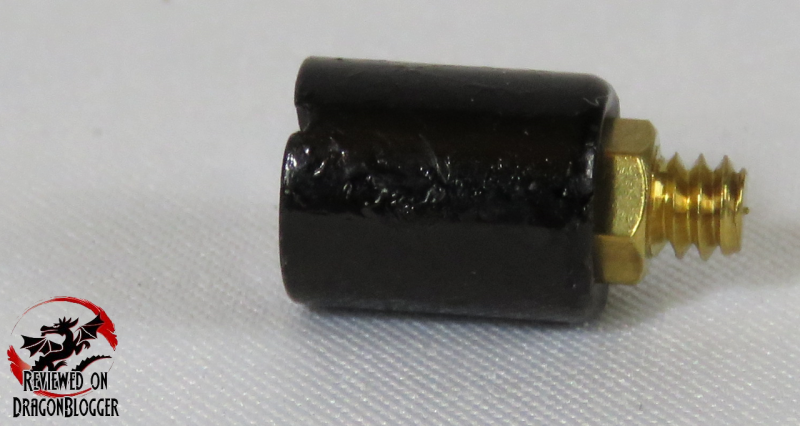
This seemingly insignificant tool helps you save time and a few hand cramps. This is what Fractal Design refers to as a “Standoff Tool”. It allows you insert a standoff and then using a standard Philips head screw driver, screw this into where you want to install a standoff.
Screwing in a standoff can be such a pain, either using a set of need nose pliers or one of the thin pieces of metal, looking like a pencil your hands get all cramped up and just feels so awkward. While Fractal Design did not create this… I thank them for including it.
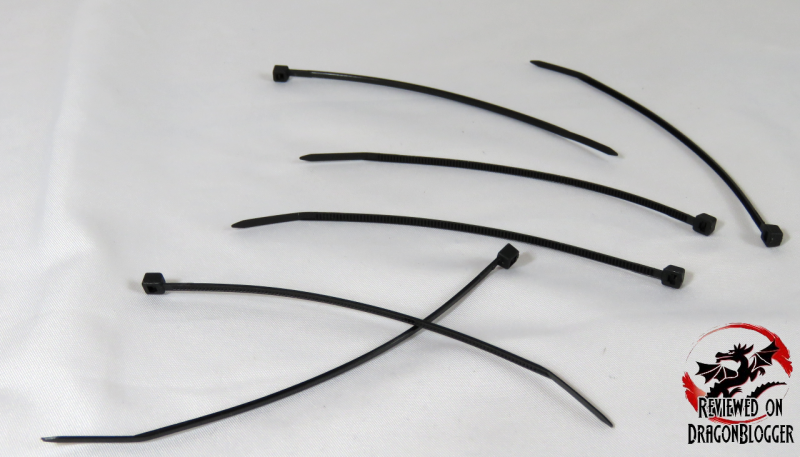
They’ve also included 6 small zip ties for some basic cable management. I prefer the larger zip ties myself, but these are still great to have. Aside from the zip ties, Fractal has also included another cable management feature of which we will go over a little later in the review.
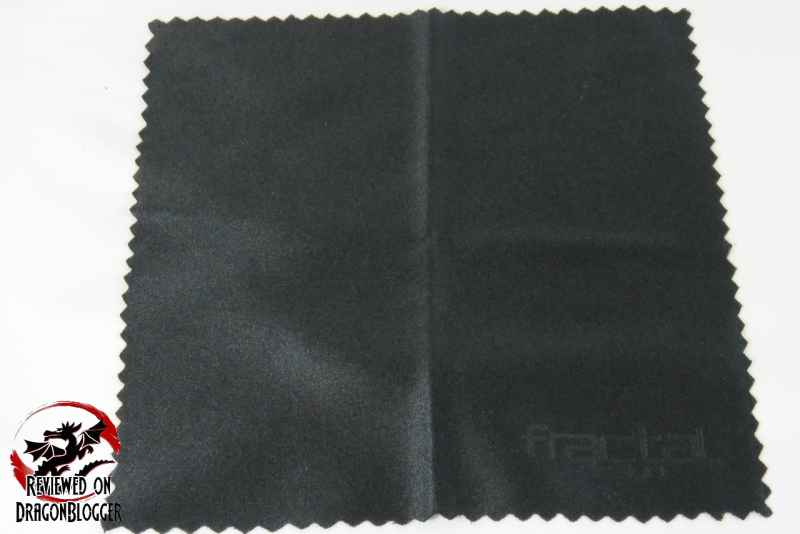
To put the final touches to this accessories box, they have also included this piece of cloth so that once you are done building and cabling your system, you can wipe all of the finger prints and such off of the case. It’s the little things sometimes that count.
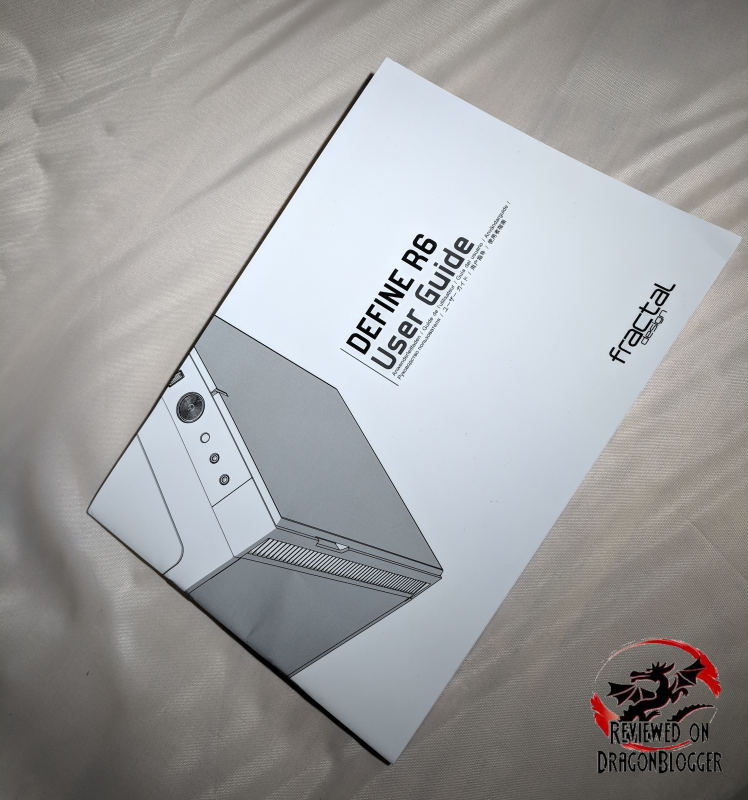
Also included is the Users Guide. One of the better written User Guides I have seen. They give you very detailed information about all aspects of the case, kind of like I do in this review. It seems like all details are one sentence descriptions since they are provided in many languages, so to not make the guide too thick. Sometimes when you read it, even though that one sentence in English is there, you might miss it because it seems a bit jumbled in there.

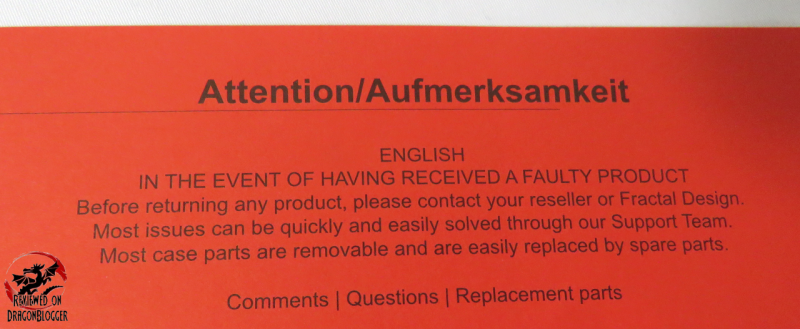
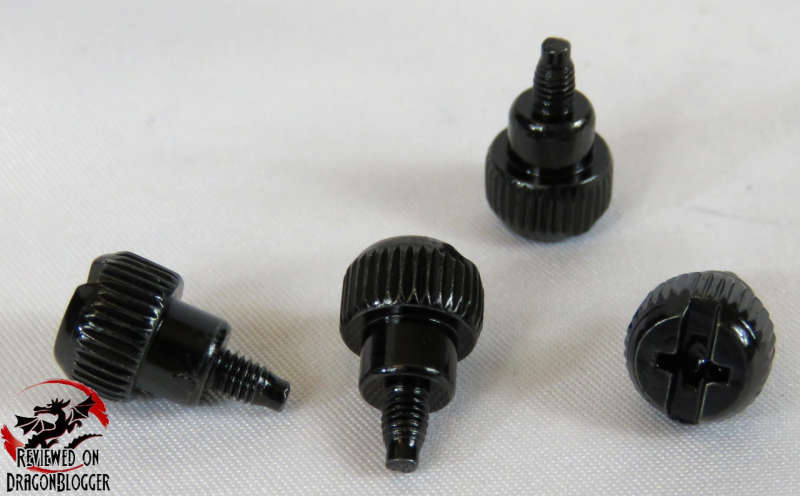
The last thing included is this little baggy with an orange sheet. The orange sheet give you information on what to do if you receive a faulty product.
So that is all the is included in the package… but of course we need to go over the case itself. In this next page Case Layout and Details, we will go over it all.
Continue to: Case Layout and Details
[nextpage title=”Case Layout and Details”]
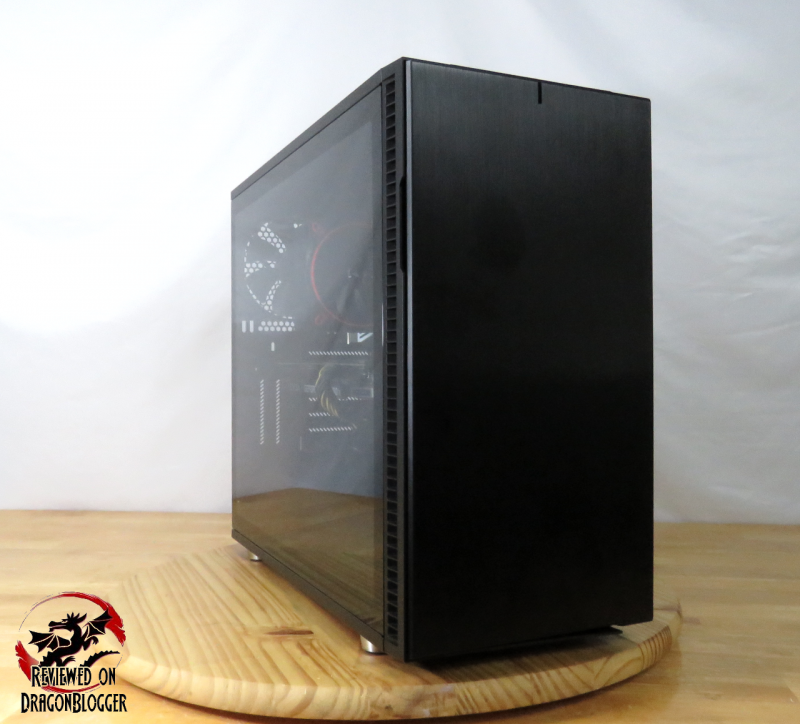
The front, is a slick smooth surface, made out of aluminum.

At the very top, we find an activity light for when your SSD or mechanical drive is being accessed. The front also acts as a door to the case. With that, we have a 3.5mm headphone jack as well as a 3.5mm microphone jack. To the right of that, we find the small reset button then the larger Power button. Finally, we also find 2 x USB 2.0 and 2 x USB 3.0 ports.
If you would like to, you can add a USB type-C connection if you purchase the Fractal Design Connect D1 USB 3.1 Gen 2 Type-C Upgrade Kit. Sadly, it does not come included.

Pull on the door to the right and you find there is a 5.25” drive bay as well as a filter keeping dust out of the case as well as 2 x Fractal Design Dynamic X2 GP-14 140mm case fans.

A closer look at the inside. I am not a huge fan of the looks here, but the door would mostly not be opened unless you are trying to access you DVD/Blu-Ray drive and even though you might have one, how often do you use it?

Removing the grill, we can see the 2 included Fractal Design Dynamic X2 GP-14 140mm case fans. You can also remove those if you like user 120mm case fans or pop in a 120, 140, 240, 280 or 360mm radiator for some liquid cooling.

The rear of the front panel is covered in this high-density industrial noise dampening material to help keep things nice and cool.
When I received the case, the door opened from right to left, making the front a little awkward. since you have the window facing you but why would the door open the other way? With most cases you are stuck with that, and maybe you have grown complacent with that but yet again, Fractal’s got you covered.

Removing these screws on the top and bottom of the door, allows us to remove the door.

This is with the front panel removed, the we can switch which way the door swings open.

This is what it looks like with the door opening from right to left. Some may prefer it this way, but I like it the other way. It is great that Fractal gives you that option.

One last thing about the front panel is that each side has these vents to pull cool air through.

Let’s pull open the side panel. First opening it, I thought the case was warped, or some how damaged during shipping but Fractal has a different method of keeping the side panels on.

The side panels have these letting pegs.

On both sides of the case, one on the top and one on the bottom where the pegs fit into locking them in place.

The pegs are great because in most cases when you unscrew the screws that hold the side panels in place, the side panels just fall off, so you better make sure you are holding on to them. In this case, you have to prey the doors off, its not very difficult to pull them off…. when you know they are there. When I did the unboxing I fought with it a little because I was not sure these were here.

Removing the tempered glass side panel, we have the inside of the case. Let’s get a little closer.

I removed the Fractal Design logo side panel covering the Modular Storage Plate where the drive trays latch on to. Here you can see 4 of the drive trays of which we will see when we get to the other side of the case. Below that there are 2 more trays, but you cannot see them here.
A few more things to take note on this picture is that here it shows the 5 rubber grommets that can be used for cable management. There is also the opening behind the motherboard tray so that you can easily install the rear panel for the CPU block if you are installing a liquid cooing unit, and even some air-cooled CPU. heatsinks. Not as noticeable, we can see the spots for the 2 rear 2,5” drive trays, but we will look into them more when we look at the other side of this case.

Panning the shot down a bit, we can see the top of the power supply shroud. It is vented, to aid in pushing some air through if you were to be utilizing a 120mm up to 140mm case fans or a 120, up to a 280mm liquid cooling radiator.
The PSU Shroud allows you to also move the 2.5” trays behind the motherboard on house the tray on top here. The bottom right rubber grommet opening and the rectangle opening on the power supply shroud on the left, unlike most other openings on power supply shrouds is close to the motherboard tray which is great in case your motherboard has a 90° angled connector. This also lets you sneak in front panel I/O cables to connect, hiding pesky cables out of sight.

Moving around towards the back of the case, ever thing looks pretty normal. We can see the case includes a rear Fractal Design Dynamic X2 GP-14 140mm case fan, you can change it to a 120mm if you like. You are also able to fit in there a 120mm radiator for liquid cooling. Have you seen it yet, if not, lets get a little closer.

To the left of the 7 expansion slots, we can see 2 vertical slots. Yes, 2 Vertical Slots Compatible w/ Fractal Design Flex VRC-25 PCIE x16 Vertical GPU Riser Kit. You need to buy the rise kit separately but you don’t need to modify your case if you want a vertical card.

The motherboard tray comes pre-installed with 9 motherboard standoffs. Make sure to remove extra standoffs if you don’t have an eATX or ATX motherboard.

On the center, to the right of the legend, Fractal includes this special standoff. This standoff, instead of having threading for you to insert a screw, if reversed so that it can stick out of your motherboard and help you place your motherboard in its correct spot. Fractal did not create this idea, but the case is full of great ideas so far.

Skipping the rear right now and moving to the other side of the case. I did not include the side panel because it is a solid panel, nothing amazing about it but there are sure a lot of things here.

Let’s start off here. These are the 2 removable 2.5” drive trays. You can place 2 x 2.5” drives here but removing them, you can move them over the power supply shroud as well.

To the left of the 2.5” trays we have this. Fractal includes these branded Velcro straps for some cable management because they know, the little things count. We have a few cables coming down into there, let’s see where those cables come from.

The cable came from the PWM Fan Hub that Fractal calls their Nexus+ Smart Integrated PWM Fan Hub.

You can connect 6 3-pin fans on the left-hand side and you can connect 3 x 4-Pin fans to the ones on the right. The 6 x 3-Pin fan headers will make each fan run at 100 percent and the PWN fan headers will let your motherboard regulate those speeds by your configuration in the BIOS. How does it know what the BIOS is saying and where does the power come from to power the fans?

Great question. Those 2 cables you saw that came from the Nexus+ Smart were the SATA power connection and the 4 Pin PWN fan header. With this, connecting a SATA power connection from your power supply will power the fans and the PWM regulation will come when you connect that fan header to one of the 4 PIN headers on your motherboard. Fractal recommends you connect it to the CPU_FAN header. Afterwards, how you regulate that fan header is up to you and how you configure your BIOS.

Here, we have 6 x removable 2.5”/3.5” drive bays.

4 on the upper portion of the case.

To the right of that, we are underneath the power supply shroud. You can fit up to a 300mm power supply here.

The ruler is 12 inches and you can see a little more space than 300mm (11.81 inches) but you need somewhere to put the cables.

These rubber pads help keep some space between the power supply fan on the bottom portion of the case then also help to reduce the noise a power supply fan would make. You can also see the filter

Moving to the bottom of the case, we can see the feet provide over half an inch of space between the bottom of the case and the surface of where you would place the system. The more space, the better so the power supply can breathe.

Looking underneath this case, we can see the bottom is covered almost completely with a removable filter.

Here is a picture of the filter being slid out, you can completely remove it as well. This not only comes in handy to clean the filter if there’s dust blocking the power supply but remember, you can also place a 120, 140, 240, or 280mm radiator there too.

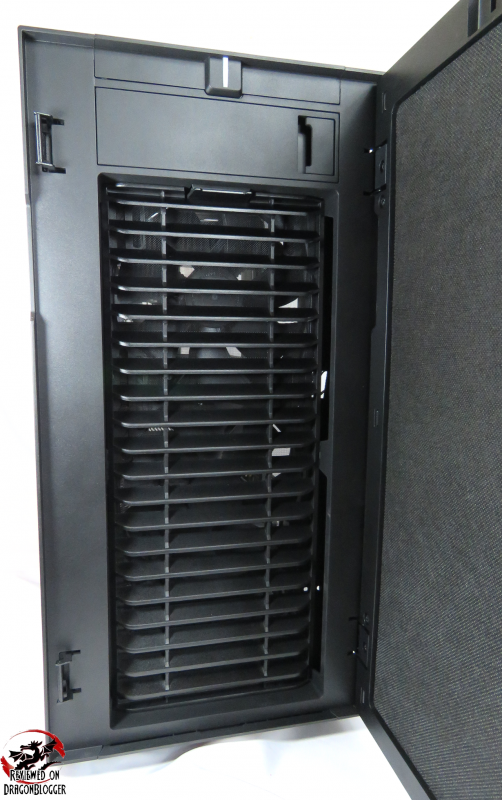
Jumping to the top of the case, we find the hidden 3rd Generation ModuVent panel.
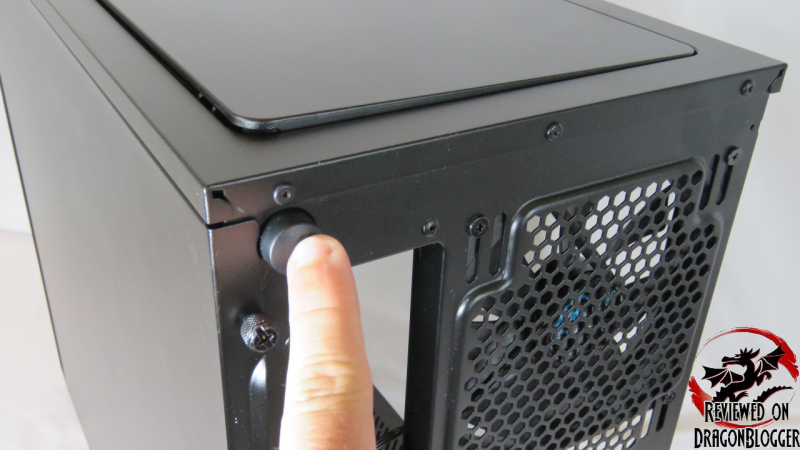
To open up the ModuVent, push this button and the top panel pops open.


This is what the ModuVent3 cover looks like removed. Like the other dust filters, this is a washable filter.

Up here you can fit radiators from 120mm up to 420mm with a Max 35mm motherboard component height. The circle is a fill port allowing you to fill your custom liquid cooling unit’s reservoir if you don’t have a sealed unit.

This photo, curtesy of Fractal Design shows you the case blown up with all of the pieces in this case.
With all that, we need to see how a computer fully built looks like. Let’s check it out in this next section How to build a PC inside of the Fractal Design Define R6 Black TG case and testing.
Continue to: How to build a PC inside of the Fractal Design Define R6 Black TG case and testing
[nextpage title=”How to build a PC inside of the Fractal Design Define R6 Black TG case and testing”]
In this section, I go over building a complete PC inside of the Fractal Design Define R6 TG case. I will list the parts going into the build.
- Fractal Design DEFINE R6 Blackout TG Case: https://geni.us/a0dMjB
- EVGA Z370 FTW Motherboard: https://geni.us/X9eVgAq
- ARCTIC Freezer 33 eSports Heatsink: https://geni.us/ciPnLI
- Intel Core i7 8700K Processor: https://geni.us/jD0s8D
- Patriot Viper 32Gig 2800MHz DDR4 PVE432G280C6KGY: https://geni.us/wPWP1EO
- EVGA GeForce GTX 1080 Ti FTW3 GAMING: https://geni.us/BMB4U
- Thermal Grizzly Kryonaut Thermal Paste: https://geni.us/xBKj
- Kingston A1000 PCIe NVMe M.2 SSD : https://geni.us/BhJAQM
- Samsung 850 Evo 500GB: https://geni.us/QTA2
- Patriot Ignite 480GB SSD: https://geni.us/CdEvu
- WD Blue 500GB SSD: https://geni.us/VdqB7
- Kingston 240GB SSDNOW UV500: https://geni.us/mvwOPN
- Cooler Master Silent Pro Gold 1200W PSU: https://geni.us/7hdBk
So let’s go into building it with all the components above.
In that video, I showed you from the ground up how to build a PC. From installing the CPU, all the way to installing the very last SSD. Now that the system is built though, we need to cable the system up.
In that video, I showed you guys the basics on cabling then panned away for a sec and showed you the build completed.

So let’s see what the system fully built, how the thermals are.

With the Intel Core i7 8700K stock and idle for 5 minutes on the Arctic Freezer eSports One, above are the temperatures. Core #2, #4 and #5 are the lowest currently at 31°C. Core #4 was at one point between start up and this screenshot the hottest at 47°C.

Here the Kingston A1000 NVMe PCIe SSD was at 41°C sitting idle.

And the EVGA Geforce GTX1080TI FTW3 is at a nice 55°C while idle. So let’s get a little stress on these components.

For the initial test, I rendered a 4-minute video using Wondershare Filmora.
Here we can see, the hottest core on the CPU was 64° which was Core #1. With Hyper threaded enabled, only CPU #7 and #11 reached 100% utilization.
The hottest the Kingston A1000 NVMe M.2 PCIe SSD reached was 51°C and the EVGA GeForce GTX 1080 Ti FTW3 GAMING was 55°C.
Now let’s do a little more specific testing on each of the 3 potentially hottest parts in a computer. Let’s first test with CINEBENCH.


Here we can see some interesting things the Arctic Freezer 33 eSports One can do in general. When the CPU is idle or is running minimal tasks, the CPU fan spins very slowly, just to get some air through those fins. Once the CPU hits a certain temperature, the fan will ramp up to what ever speed it needs to reduce the temperatures to a more acceptable temperature. You can set this temperature manually via the BIOS or use the automatic settings set by your motherboard manufacturer. This heatsink does an amazing job cooling the CPU and very quiet as well.
In the image above, you can see the highest temperature the 8700K processor hit was 81°C but its active highest temperature was 76°C. The profile here in the BIOS was not manually set, everything was on Auto. The highest RPM’s this fan can hit is 1,800 RPM’s but when not running CPU intensive applications, it will run at only 200 RPM’s.
During these tests Wondershare Filmora was running as well as Chrome (with 31 tabs open), Microsoft Word, HWMonitor and Paint.NET.
Let’s see how the EVGA GTX1080TI FTW3 reacts to some stressing.


Highest temperatures reached were 74°C and the average temperature was 53°C. This only had Chrome, HWMonitor, Word and Paint.NET running.
Let’s check when CrystalDiskMark reports stressing the Kingston A1000 PCIe NVMe SSD.

On my main review of the Kingston A1000 (Click here to see it), the scores were a bit lower and actually the temperature was higher as well. The score was not only a little lower on the previous review, but the temperature was also higher at 65°C but last time I did not have the thermal pad. Getting 60° during this test, let’s see what the performance and temperature is like without the thermal pad.


Without the thermal pad it did get hotter, 7° hotter without the thermal pad but it actually performed better too, though only slightly. It may have to do with the Modular Storage Plate in the case blocking some of the air flow…. well we can change that but maybe not in the way you are thinking.
Let’s check out this video to see how we handle fixing up the air flow.
With that out of the way, let’s see how hot that M.2 PCIe SSD gets.

Removing the drive cage dropped the temperature 2° lower than the previous tests.

This was also done without the thermal pad, so let’s put it back on and see what happens.

Wow, so along with the thermal pad, this allows the air to hit the thermal pad it seems cooling it down a bit more which in turn cools down the M.2 PCIe SSD. It cools it down 12° lower than the last test without the thermal pad on and 7° cooler than the original that had the thermal pad on but was constrained by the Modular Storage Plate.

Please know that the scores were provided to show you that it was tested, not to actually measure the performance of the drive since I was doing other things while the tests were running. Each time I was testing I had the same amount of chrome tabs open, running the same pass of Wodershare Filmora rendering the fixing the airflow video with word open and Paint.NET. I wanted to make sure everything was the same and nothing was thrown off by irregularities.

For a little better comparison, you can see here the thermal difference not only between with and without the thermal pad, but you can also compare the difference with and without the Modular Storage Plate.
Let’s see how this does for the CPU.


Here are the final results, let’s check out the comparison.

Comparing the 2 results, we can see the max value for all of the cores was anywhere between 2 and 5° lower.
The performance did slightly improve, but by a negligible amount.


Here we can see removing the Modular storage plate made no difference. In the first and second pass of 3 of the test the highest temperature was 73°C, so it was 1° off which is not enough to signify any real difference.
These tests confirm that while the Module Storage Plate is handy, if you don’t need the 6 additional drive trays, just get rid of it. Also, this does help for liquid cooling units. One thing that this will also help is since the trays are not in the way, this will lower the sound the case creates, but honestly, its not much. Let’s check it out.
That’s incredibly quiet right, there is a little noise at the beginning when the fans revs up but then afterwards its quiet again. So with all the said and done, let’s go ahead and see my Final Thoughts and Conclusion and see if you agree.
Continue to: Final Thoughts and Conclusion
[nextpage title=”Final Thoughts and Conclusion”]
Without ruining the Pros and cons section, this case is amazing. It has just about everything you need and want in a case.
Here’s a little show casing of the case and how it can morph for your needs.
Even though the case sounds like it’s perfect, there are some cons here. So let check all of it out.
Pros
- Relatively affordable
- Tempered Glass tinted side panel
- Includes 3 fans, 1 x Rear and 2 x front 140mm fans
- SUPER Quiet
- Up to 6 hidden Drives (6 x 3.5 + 2 x 2.5 or 8 x 2.5 or 2 x 2.5 and 2 x 3.5)
- Allows for many fans or Liquid cooling options
- Fits from ITX to eATX moterboards.
- TONS of space for cable management behind the motherboard trays
- Tons of space everywhere else on the rear as well
- Nexus+ Smart Integrated PWM Fan Hub is a great feature
- Reversable Front Panel
- Noise Dampening
- Still includes a 5.25” bay…. but its hidden, so it’s OK.
- Vertical GPU Mounting option built in
- PSU Shroud also allows for 2 x 2.5” drives
Cons
- Lack Storage options without Modular Storage Plate
- Not a biggy, but they should make the PSU Shroud easily removable
- Does not offer additional SSD Trays
- Does not off alternate side glass panel for purchase
Tons of Pros and only a few cons, 3 of the 4 are not really big deals but the other kills me. Let’s go over them.
There are a ton of storage options on this case with the Modular Storage Plate on, but without it you are severely limited. Without the plate, you can only use 2 x 2.5” drives and 2 x 3.5’ drives, and those 3.5” are not interchangeable with 2.5” drives. There are 2 options for drives on top of the PSU shroud… but for that you need to use the trays that are on the rear of the case. You also have no way to easily remove the PSU shroud if you wanted to.
It would have been great if you could on the rear of the plate, instead of only being able to use 3.5” drives being able to use both 2.5” or 3.5”. The drive trays themselves allow you to use either drive options, but only in the plate, without the plate the tray relies on the screw holes on the 3.5 drives. Another great option would have been to include or at least offer 2 x additional 2.5” drive trays with the build to that you could add more drives if you like.
Fractal is now on the 6th revision of this case and on every revision, they address different issues in the industry. They have done an AMAZING job with this case, every complaint (minus one) I had with other cases have been addressed by this case.
They might have listened to some of the things I complained about in the past (I mentioned a few things to them on this build) but most definitely they listened to you guys and worked on all they could, that means a lot when companies listen to their customers.
With all that said, I gladly award this case a 9.3 out of 10, and Editors Choice award. This case is so close to perfect it’s scary.

Great job Fractal, you are one of the few that listen to your customers.
If you are interested in it, check it out here on Amazon: https://geni.us/a0dMjB
Return to: Intro
[P_REVIEW post_id=1077067 visual=’full’]
We are influencers and brand affiliates. This post contains affiliate links, most which go to Amazon and are Geo-Affiliate links to nearest Amazon store.
I have spent many years in the PC boutique name space as Product Development Engineer for Alienware and later Dell through Alienware’s acquisition and finally Velocity Micro. During these years I spent my time developing new configurations, products and technologies with companies such as AMD, Asus, Intel, Microsoft, NVIDIA and more. The Arts, Gaming, New & Old technologies drive my interests and passion. Now as my day job, I am an IT Manager but doing reviews on my time and my dime.