
We are influencers and brand affiliates. This post contains affiliate links, most which go to Amazon and are Geo-Affiliate links to nearest Amazon store.
There is always an upgrade to improve the performance of your PC, be it an SSD, RAM or Video card and this review is about one of them. Kind of an SSD, the Kingston A1000 is an SSD, but it is an NVMe M.2 PCIe SSD, the kind of SSD that you want to have. Is this drive particular though the one you want?
My review of the Kingston A1000 480GB PCIe NVMe M.2 will help you decide if this is the M.2 SSD that you want, so without further ado, let’s jump into it.

No, no, no, it’s not a stick of RAM, but the container is of the same type. That’s Kingston saving some money, saving us some money.
Unlike your typical SSD, this does not go connected to a SATA port, this actually connects into a PCI-e slot of sorts, but we will go through installing this drive a little later in this review. Before we do, lets go over the features and specifications.
- Capacity: 480GB
- Model Number: SA1000M8/480G
- Interface: PCIe NVMe Gen3 x 2 Lanes
- Form Factor: M.2 2280
- Firmware: E8FK11.G
- Controller: Phison E8
- Flash Memory Type: 3D TLC NAND
- Sequential read: up to 1,500 MB/s
- Sequential Write: up to 900MB/s
- Random Read IOP’s: up to 100K
- Random Write IOP’s: up to 120K
- Meantime to Failure (MTBF): 1 Million hours
- Endurance Rating 300TBW (Terabytes written)
- 5 Year limited warranty
Short but sweet, so let’s check out the unboxing.
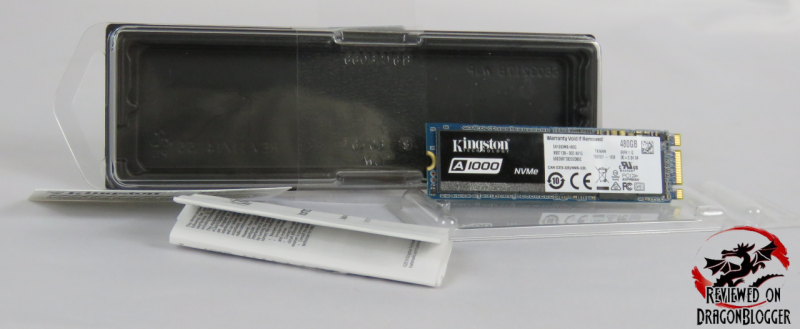
Simple packaging, I like that because it usually ends up in the trash can but this packaging is reusable for another M.2 SSD’s or many some old RAM.
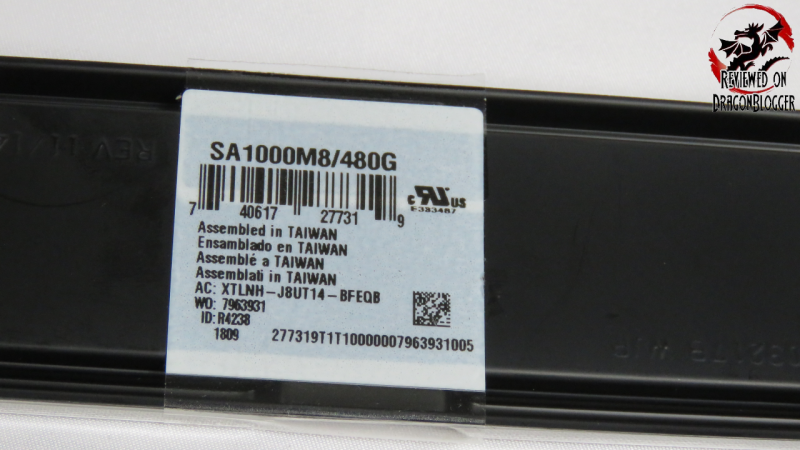
The back of the packaging has the model number, UPC code, where it was assembled and a few other things, not many if any will pay attention to this.

To start off with they were able to get this “Getting Started Guide” to fit into this tiny shell. It looks tiny, but unravels to reveal a huge document, in many different languages.
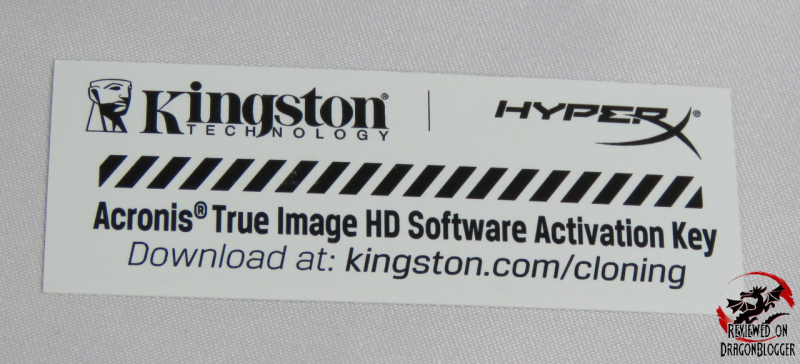
Behind that, they also include a link to download your own copy of Acronis True Image HD. The activation key for this software is on the back.
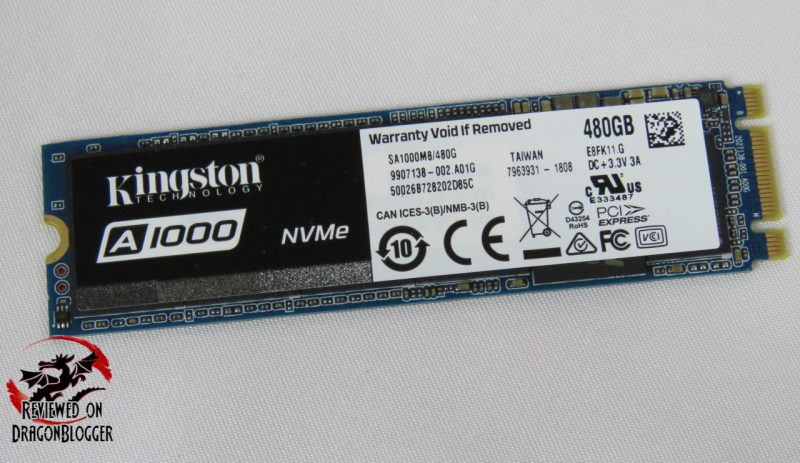
This tiny little piece of PCB is the Kingston A1000 itself, this tiny little thing. It doesn’t matter on the size though, it’s all in how you use it… that’s what I have always heard.
In this review, we will not only show you how to install the Kingston A1000 into your motherboard, but we will also go into how to configure your BIOS to take advantage of this drive then also installing Windows 10 onto it. Aside from that, we will also test it to see what kind of performance we get out of it but also compare it to another PCI-e SSD and even a standard SSD.
Before we do all that though, let’s get a little close and personal with the Kingston A1000 480GB PCIe NVMe M.2 SSD.
Continue to Page 2: Kingston A1000 480GB PCIe NVME M.2 SSD Close Up
[nextpage title=”Kingston A1000 480GB PCIe NVME M.2 SSD Close Up”]
Here again we have the Kingston A1000 M.2 SSD. On the label, we can see the capacity of the drive, 480GB which is great for an OS drive and really to install most of the programs and games you would like to use. Typically, I try to keep the OS and a few programs on the C drive, the rest on another drive. The complete model name of this drive is sa1000mb/480G, also listed on the label as well as certificates, QR code and a few other markings.
The label covers up the entire drive, being that this is a single sided drive, we will need to unsheathe her to see a little more. Kid’s cover your eyes.
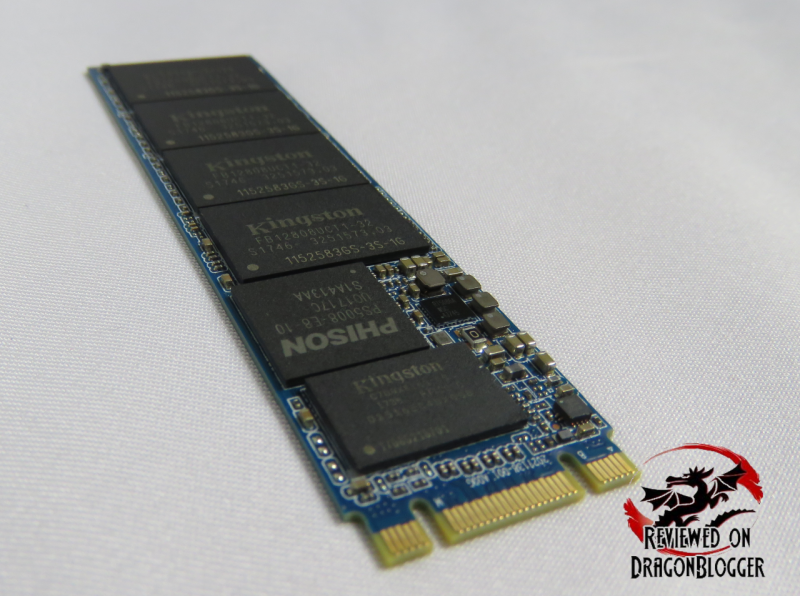
So sleek and slender, she takes care of herself. Let’s take a close look and what kind of chips are on that sexy PCB.
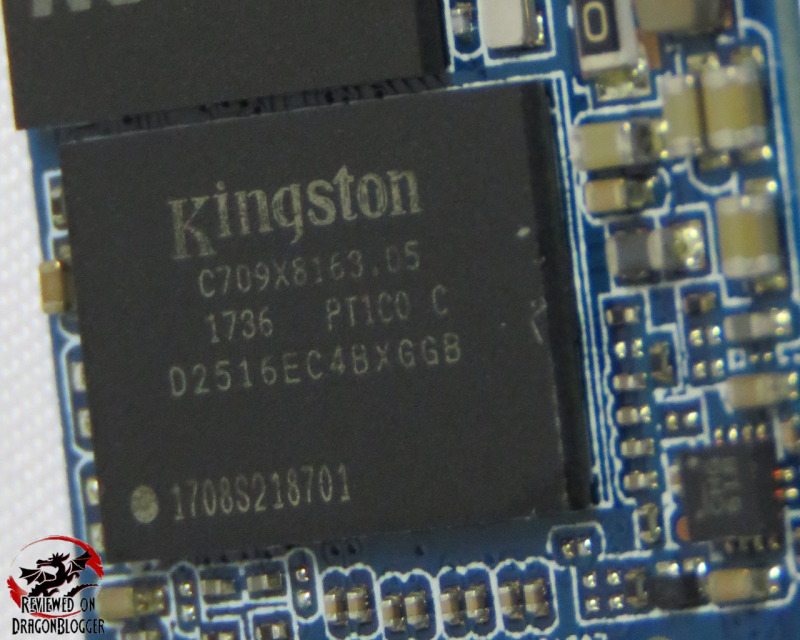
First up, the D2516EC4BXGGB chip, this is a 1600Mhz DDR3 4GB module.
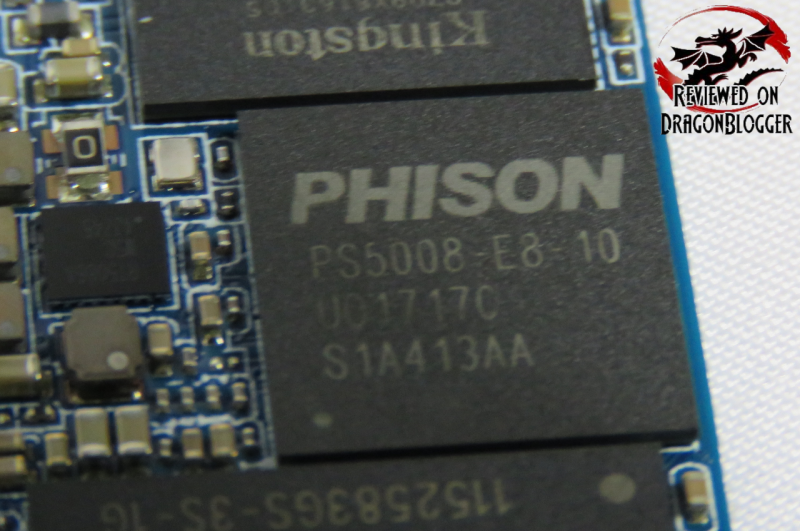
This is the Phison PS5008-E8 M.2 2280 E3 4-Channel controller. This controller provides capacities of up to 1TB, read speeds of up to 1600MB/s and write speeds of up to 1300MB/s. Currently Kingston provides capacities of up to 960GB instead of 1TB, the rest consumed for over-provisioning. This controller is based off of Toshiba’s BiCS2 Toggle TLC flash with 512MB of DDR3L cache. The drive comes in 240GB, 480GB and 960GB capacities.
This controller has an interesting way to take care of you in the event of bad blocks occurring, invalid bits of the drive. If a Bad block occurs, the Phison controller implements an efficient bad block management algorithm to detect the factory produced bad blocks and manages any bad blocks that appear with use. This helps prevent data being stored and lost in these bad blocks, improving data reliability. Not that they are saying it will go bad, but it is good to know they got your back in the event something does occur.
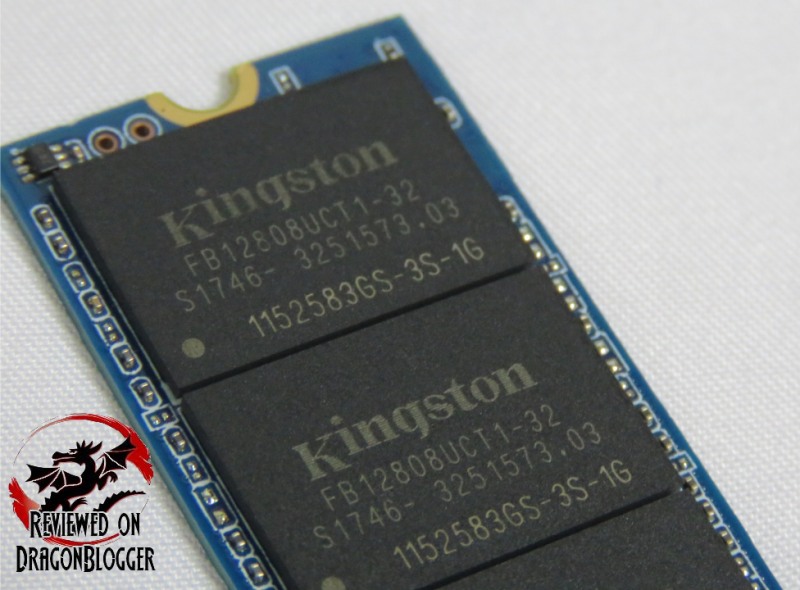
Working our way up the drive, there are 4 of these chips lined up in a row. These are 4 x 120GB 3D TLC NAND flash modules.
Manufacturers, even memory manufacturers many times will outsource their chips for their own drives, SSD, HDD’s, RAM and even PCI-e M.2 SSD’s to keep cost down, but of course keeping their performance and reliability. In this case, Kingston seems to have kept the modules in house, at least for this particular build. Don’t be surprised if you get one of these to see another manufacturer label on the modules but just know it does not mean the performance or longevity will be affected or shouldn’t at least.
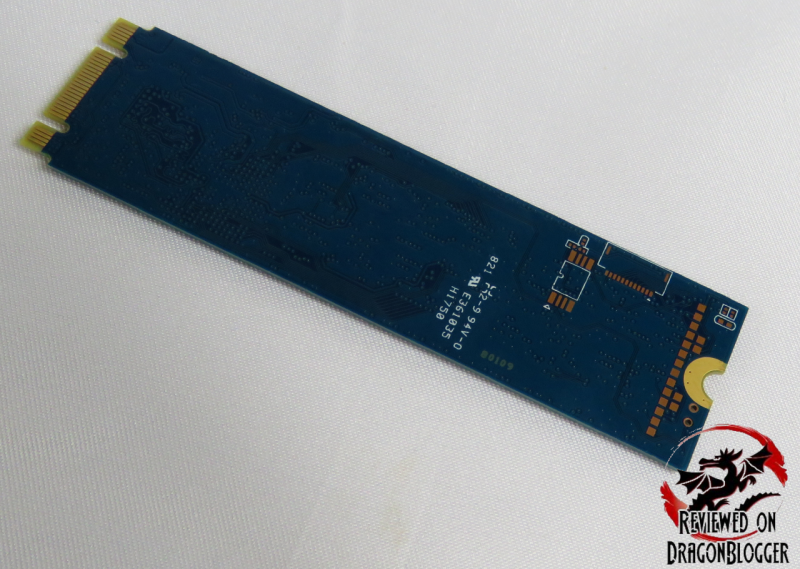
The back, as I mentioned is completely bare, well not completely.
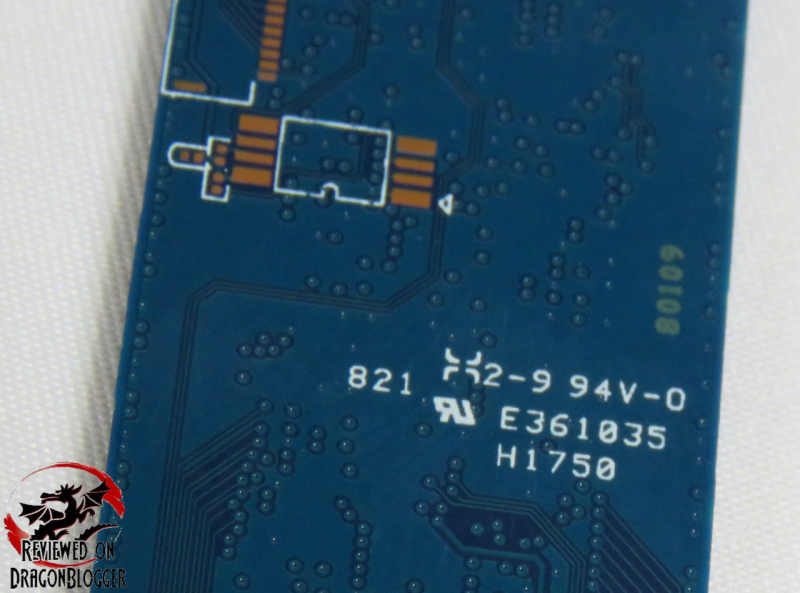
Aside from all the traces, it has these silkscreened on.
OK, sorry to bore you will all of these details, let’s get this moving and let’s move on to installing the drive and Windows 10 onto it.
Continue to Page 3: How to install and configure the Kingston A1000 480GB PCIe NVME M.2
[nextpage title=”How to install and configure the Kingston A1000 480GB PCIe NVME M.2″]
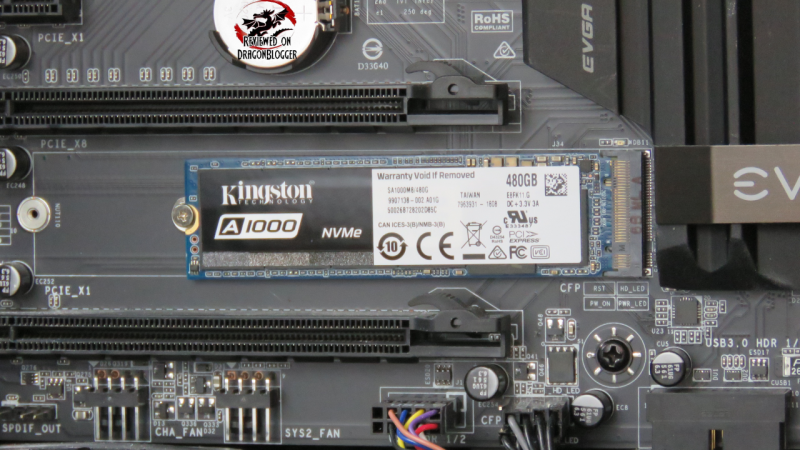
Installing this drive is incredibly easy, but if you have never done it before you might be a little nervous, and I totally get it. In this next video I will show you how to install the Kingston A1000 480GB PCIe NVMe M.2 SA1000M8/480G onto your motherboard.
A lot easier than you thought right?
You can use this as your primary drive or as your secondary drive, totally up to you but I will help you with both. In this next video, I will show you how to configure your BIOS to support this new drive and how to install Windows 10. Please note, not all motherboards have the same type of BIOS layout, yours might look different and if it does, you can check out your motherboard manual and it should be able to help you configure it.
Install in under 10 minutes, not bad.
So if you are not installing this drive as a C drive, for your operating system, you can also set it as a secondary drive to install and run your games or store videos or anything really. I will run you down how to do that in Windows 10.

First, right click on the Start button on the bottom left hand corner and click “Disk Management”.
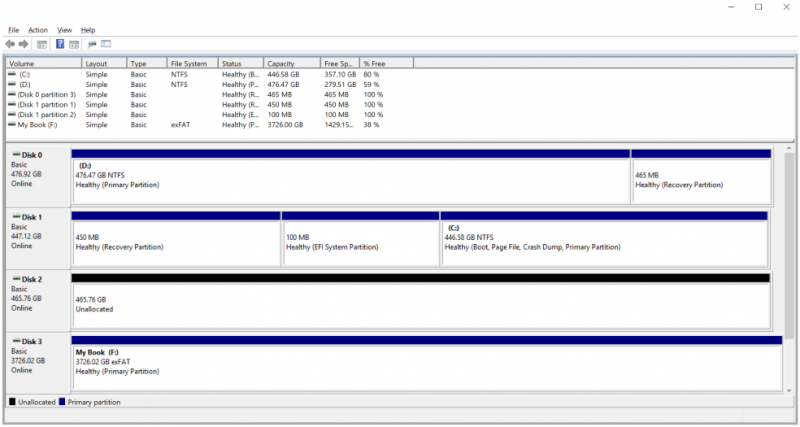
I have a few drives, but towards the bottom you will see Disk 0, Disk 1, Disk 2 and Disk 3. Notice that Disk 0, 1 and 3 all state that have information on them, and also state that they have some partition, to make it easy also they are lined in blue.
![]()
The legend on the bottom left hand corner also provides that information.

The 3rd drive, Disk 2 has a black line over it and reads “Unallocated” which means there are no partitions and no data written on it. Let’s fix that.
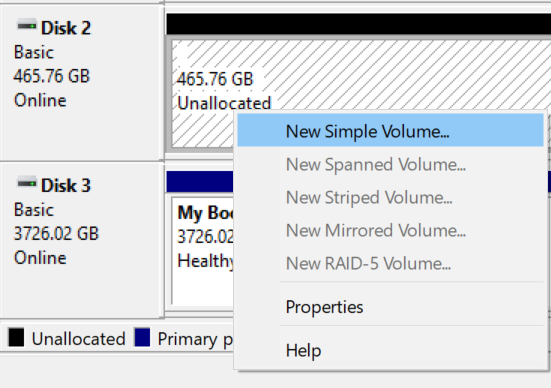
Right click on the “Unallocated” space and you will see a drop down as shown above, click “New Simple Volume”
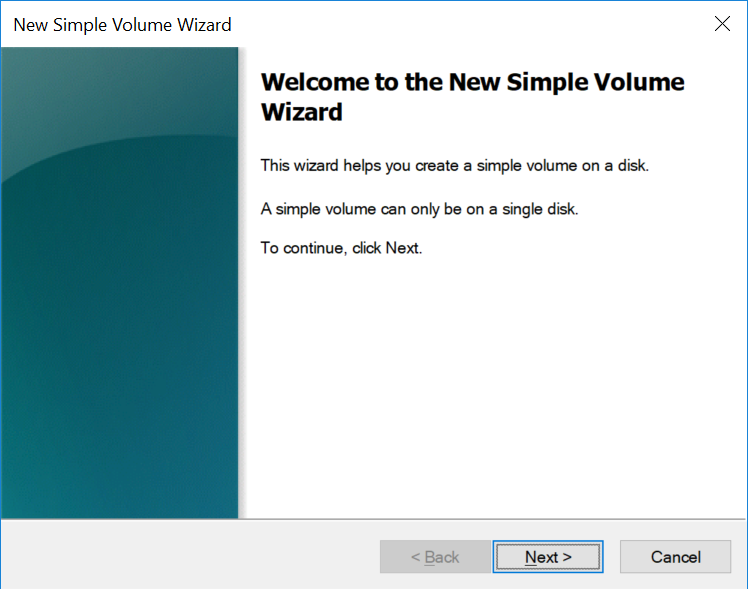
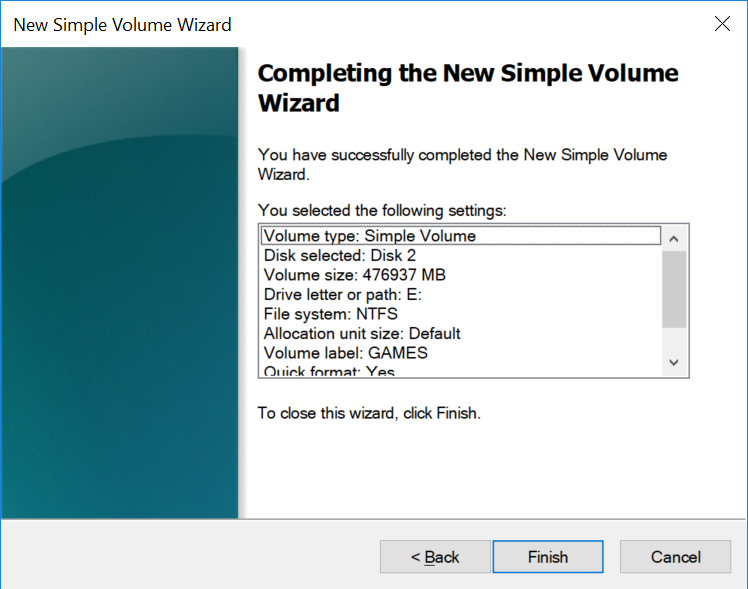
Once you do, you will start the “New Simple Volume Wizard”, just click “Next” here.
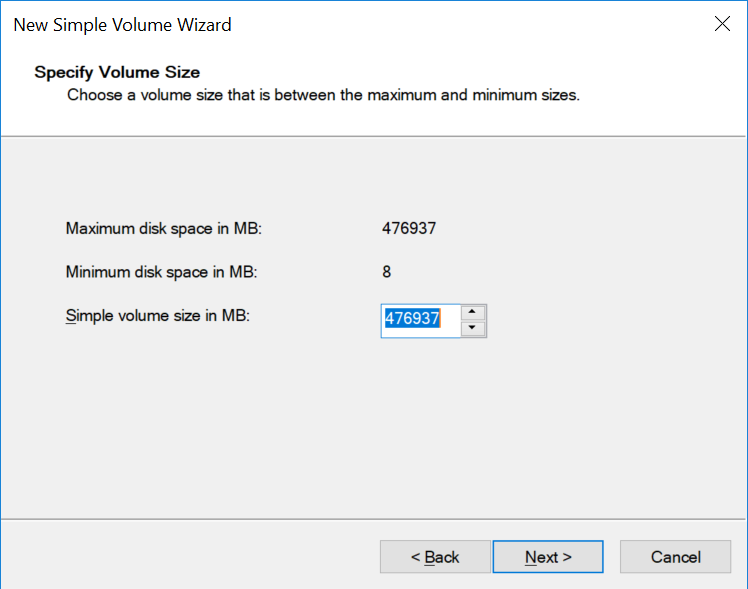
On this second screen, if you want to make multiple partitions, you will want to change the size you are making this partition (size of the drive) but if want to use the entire drive as one partition, just click “Next”
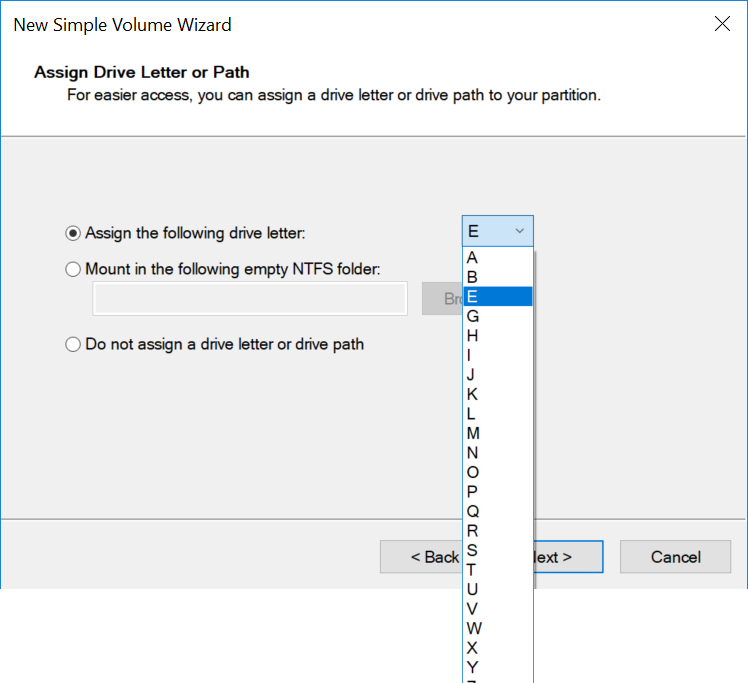
Here you can choose the drive letter you would like this partition to become, then click “Next”

On this screen, you can choose the partitions, Allocation unit size, Volume label, if you would like to quick format it and/or enable file and folder compression.
For Windows, you are mostly going to want to be using NTFS as the file system. Allocation unit size, it is probably safe to keep the default size unless you want to get down to specifics with the block sizes and tweaking performance to a grain of salt. Volume Label is the name of the drive, in this example I will name it “GAMES”.
Perform a quick format will take seconds to format the drive to appear as a blank drive so you can fill it up, if you uncheck it, you will be waiting for hours for this drive to get formatted/cleared.
“Enable file and folder compression” is a horrible trade off option. In essence, you will save space (not sure exactly how much) by having your data compressed all of the time and when the data is needed, it will need to decompressed before it can become fully utilizable. Because of the speed of todays CPU’s, the time is little to nothing, you may not notice it but still, I never touch this option.
When you are done reading all of this, you can click “Next”
Once you click “Next” the process begins formatting/clearing your drive getting it ready for use. This takes only a few seconds but while this is occurring, you can click “Finish”.
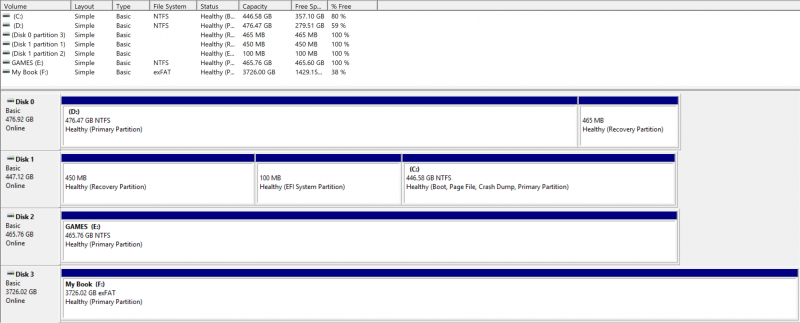
When you are done, your “Disk Management” screen will look something like this, with all blue stripes.
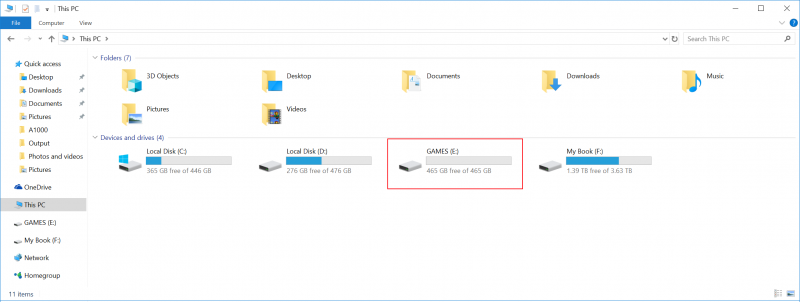
Now if you open up “Computer”, you will find your newly formatted drive. I circled it above, remember I named it “GAMES”. She’s all yours but now let’s move on to the performance.
I am going to put all the performance all together for all 3 drives, to save you some time reading it instead of the way I used to do it. With that said, let’s move onto Benchmarking and comparing the Kingston A1000 480GB PCIe NVME M.2.
Continue to Page 4: Benchmarking and comparing the Kingston A1000 480GB PCIe NVMe M.2
[nextpage title=”Benchmarking and comparing the Kingston A1000 480GB PCIe NVMe M.2″]
Performance ratings are great, but it helps to have some to compare it to so here, we will be recording scores from 3 different drives. The WD Black 512GB PCIe NVMe M.2 SSD, WD Blue 500GB SSD and of course the Kingston A1000 480GB PCIe NVMe M.2 SSD.
I will pin up the results next to each other so that you can see them, though they might be a bit small but I will also have a graph where I compile all the numbers to make it much easier to view and compare.
Before I do that, here are my system specification so that you can compare with your own.
- Enermax Equilence chassis: https://geni.us/6NAIJBN?2r4s
- Intel Core i7 7700K Processor: https://geni.us/6NAIJBN?8vdm
- EVGA Z270 FTW K Motherboard: https://geni.us/6NAIJBN?3nbv
- Arctic Freezer 33 eSports One: https://geni.us/6NAIJBN?tblg
- Thermal Grizzly Kryonaut Thermal Paste: https://geni.us/6NAIJBN?aokd
- Patriot Viper 32Gig 2800MHz DDR4 PVE432G280C6KGY: https://geni.us/6NAIJBN?57lc
- EVGA Geforce GTX 1080 Ti FTW3 Gaming Edition 11GB: https://geni.us/6NAIJBN?wau6
- Kingston A1000 480GB PCIe M.2 SSD: https://geni.us/6NAIJBN?5etp
- Western Digital WD Blue 500GB: https://geni.us/6NAIJBN?2s70
- WD Black 512GB M.2 2280 PCIe NVMe SSD WDS512G1X0C: https://geni.us/6NAIJBN?gjpp
- Cooler Master Silent Pro Gold 1200W Power Supply: https://geni.us/6NAIJBN?Umwm
- Creative Sound Blaster X Pro-Gaming H7 Tournament Edition Headphones: https://geni.us/6NAIJBN?g201
For testing, we will be using 4 pieces of software, ATTO Disk Benchmark, Boot Racer and Crystal Disk Mark. Let’s start off with ATTO Disk Benchmark.

ATTO Disk Benchmark is used to help measure storage system performance.
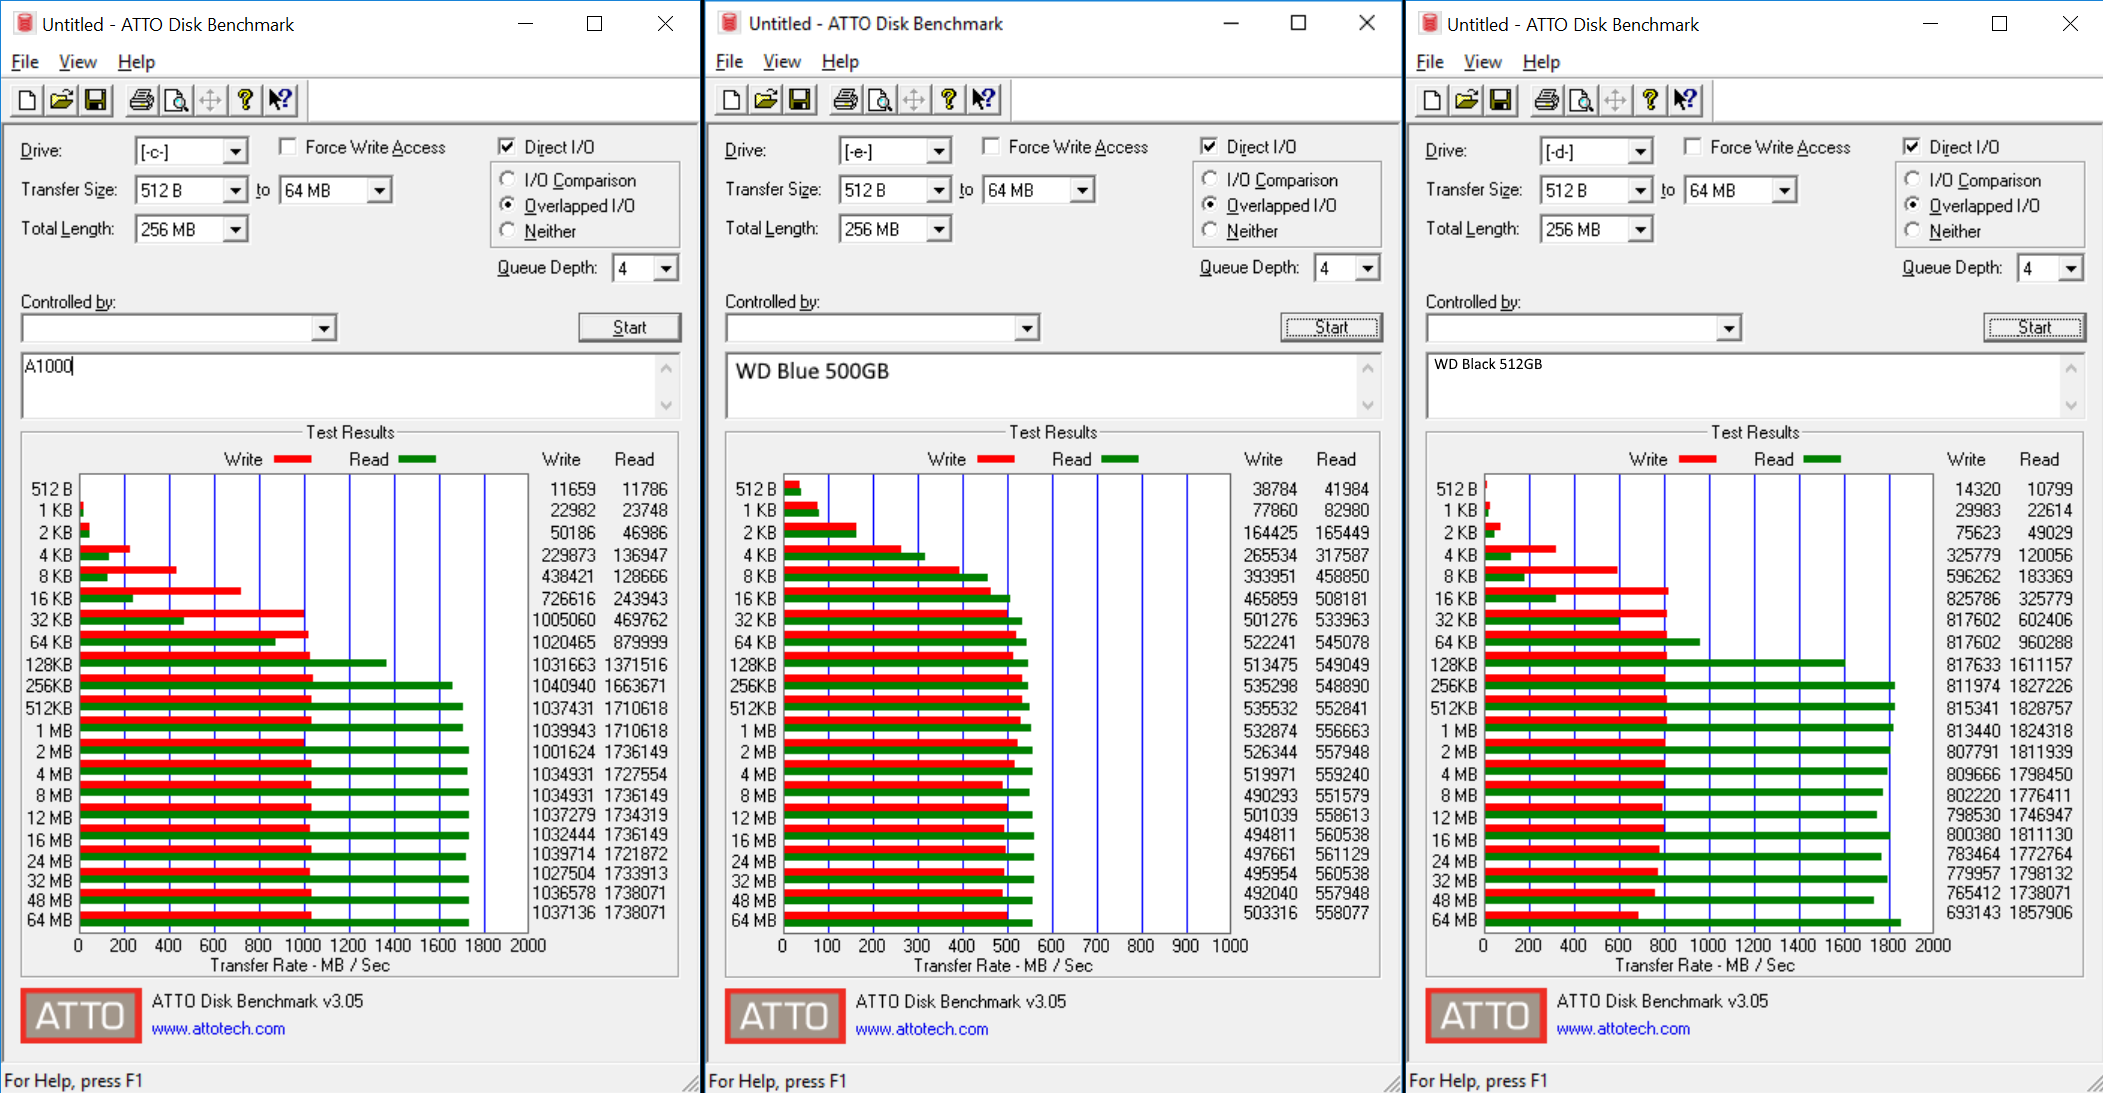
You can click on the image to zoom in and get a better view but the graphs below have the same information much easier to read.

Interesting results, the Kingston A1000 wins all of the Write speed tests across the board. The Read is won by the WD Black, but on the 48MB Read, they went down to the performance of the A1000.
The 256KB Write was 24.71% faster in favor of the Kingston A1000 drive, read was 9.37% fast in favor of the WD Black. 512KB Read was 6.57% fast in favor of the WD Black and Write was 23.97% faster in favor of the Kingston A1000. There is no comparison on the 48MB Read, since both drives performed the same, but the write favored the Kingston A1000 by 30.10%. The 64MB Read favored the WD Black by 6.66% and write favored the A1000 by 39.76%.

I put all 3 benches side by side, cutting out parts that were not needed to make it a little easier to see.
If you notice on the right, the WD Black 512GB on write starts off at 809,666 but just gradually degrades in performance, while both the A1000 and WD Blue maintain speeds, even improve.
I won’t mention why this occurs right now, but I will a little later in the review mention why this occurs, I want to make sure the other results match with these findings.
I also do not discuss the SATA drive much, because you can see the performance on the M.2 PCI-e SSD’s is doubled, sometimes even tripled to that of the SATA drives. It’s on there as a point of reference.
ATTO provided results pointing to the A1000 being the leader of the pack in terms of write performance
Let’s now move over to CrystalDiskMark.

Crystal disk mark uses Microsoft’s DiskSpd test to calculate its results. DiskSpd is a load storage generator and performance test tool from the Windows Server and Cloud Server infrastructure Engineering teams.
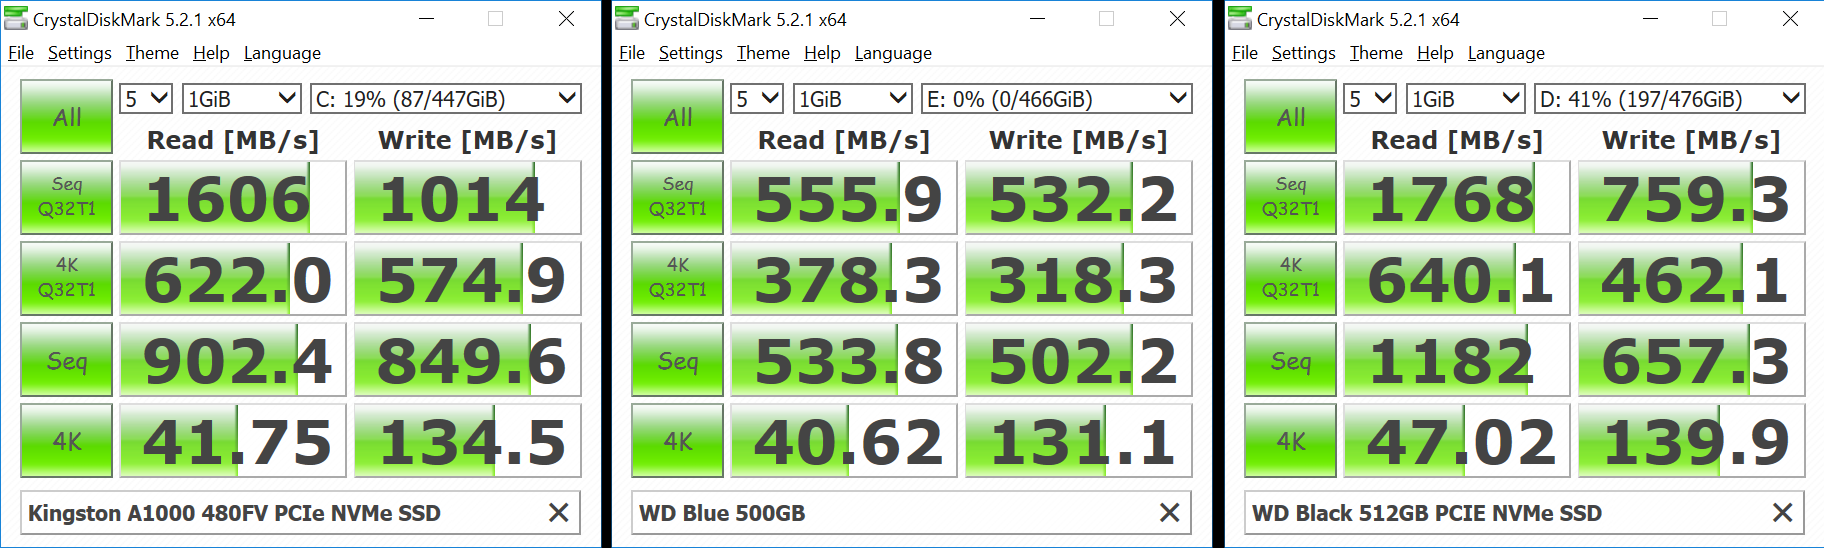
The performance here, seems align somewhat to the performance of ATTO. We can see the Sequential Read of Q32TI (multi Queues & Threads), the WD Black came in at a lead of 9.60% but then the A1000 took the lead in write at 28.73%. In Seq (Single threaded Reads/Writes), the WD Black took lead over the A1000 by 26.83%, but then again on the write side, the A1000 took the lead over the WD Black by 25.52%.
Jumping to the 4K side, under 4K Q32TI (multi Queues & Threads) Radom 4KiB Read/Write with multi Queues & Threads) we find the WD Black again takes the lead over the A1000 by a 2.87% and the A1000 in write takes the lead by 21.76%. At 4K, it seems that the WD Black took the lead on both read and write by 11.87% and 3.94%. This is the first one though that the WD Blue actually stayed close to, 3.94% is not a lot but it still is ahead.
Disk access is of course incredibly important, the ability to transfer files to and from drives, write files, copy files and all but how does a PCI-e M.2 SSD affect performance during boot times? Well we are going to be using Boot racer to find out just how much it is affected.

This is an example of the run performed for the Kingston A1000.

To break it down for you, it took 6 seconds from POST (Power On Self Test) to boot into Windows and 14 seconds after getting in Windows for the OS to be perfectly clear with all startup programs loaded. Let’s see how the other drives compared.

Wow, so double the time to get into Windows from a standard SSD then from an PCI-e M.2 SSD, down from 13 seconds to 7 or 6 seconds. The time to desktop though are relatively similar between the 3 from 14 seconds on the A1000, 13 seconds on the WD Black and 15 Seconds on the WD Blue. Overall boot result was about 8.8 seconds longer on the standard SSD, the WD Blue.
The trade off between the Kingston A1000 and WD Black is fierce. The A1000 took 1 second less time to boot into Windows than the WD Black, but the WD Black took 1 second less booting to the desktop than the Kingston A1000. If it were up to those 2 alone, it would be a stand-off, but with the overall boot result, the Kinston A1000 took the lead, completing the entire boot process in .079 seconds less time than the WD Black.
With all this testing, the results can be a little confusing because there is no 100% clear winner between the WD Black and the Kingston A1000 depending on your task. The WD Blue was not a real contender, added to the comparison mainly to show you the performance difference between the 2 different technologies.
During my testing, I tested the drives (M.2 Drives) on the M.2 socket to generate heat to see which drive got the hottest. After performing all my testing on each drive, I went back and tested each driving passing it quickly through each test and checking the final temperatures. Here are my findings.

Using HWMonitor to test these, again I ran ATTO and once that finished, I quickly ran CrystalDiskMark, both of which quickly heat up the drives I recorded these numbers. The drives begin to throttle at 70°C and then this is where you begin to see the drop in performance.
As the temperature increases, it will throttle more but during the peak the Kinston A1000 hit was 71°C and the peak the WD Black hit was 82°C. Both drives do not come fitted with a heatsink, they are bare drives with labels placed over the IC’s so they will rely heavily on any air you can have pass over them. I also tested this same method on the second PCI-e M.2 socket towards the bottom of the motherboard, away from the video card. Here are my results on the same tests.

The 2 tests above are not from the same pass of course, I took screenshots and copy and pasted the images here so that you have a complete and easy to view picture. Now the temperatures for all 3 of these drives did not immediately ramp up, it got to these temperatures after at least 15 minutes of testing and the temps do drop relatively quickly once the strain on them has dropped.
This explains why the drop in performance in the WD drive noticed in ATTO that significantly affected its performance. The ability these drives have to throttle is great and helps to increase its longevity as it lowers its access time which will aid in cooling itself down but of course this does mean the performance will decrease temporarily until it can regain temperatures to safety operate. The degradation of performance is only temporary.
The Kingston A1000 being single sided helps retain its cooler temperatures since there is only one side to cool. The WD Black 512GB drive is double sided, it may cool the upper portion well, but the lower portion being so close to the motherboard does not allow for air to pass as well over the modules. This can cause the modules to heat up then radiating the heat across to the entire PCB and other modules on the top side.
Aside from the drives performance, the package brought a key for Acronis True Image HD, so let’s check that out. This is a brief overview of the Acronis software included.

After downloading this 421MB package from Kingston.com/cloning, we start the install which is basically just click install, then Start the application.

Once you have agreed to the EULA, you enter the serial number on the back of the card, then click Activate.

The software opens up under the Tools section, but let’s start from the top at Backup. Here we can select to back up the entire PC or another destination.

The Archive, Dashboard and Sync sections are not available in this version of the software.
In the tools section, we can Clone the Disk (this is available in this version), a Rescue Media Builder (this is available in this version), Acronis Universal Restore that allows a restore on dissimilar hardware (Not available in this version). “More Tools” opens up a Windows Explorer window with shortcuts to more programs.

- Acronis System Report
- Creates a system report to provide more information on your system.

- Activate Acronis Startup Recovery Manager
- Is not available in this product edition
- Add New Disk

- Like Disk Manager, this allows you to add drives that you have just introduced into your system.
- Bootable Rescue Media Builder
- Just like the Rescue Media Builder allows you to create a Windows or a WinPE media to create bootable rescue media.
- Clone Disk
- Just like the previous “Clone Disk” allows you to clone your drives.
- Drive Cleanser
- Allows you to wipe a drive, this is not like Disk Cleanup, careful with it.
- Manage Acronis Secure Zone
- Is not available in this product edition.
- System Clean-up
- Is not available in this product edition
- Try&Decide
- Is not available in this product edition

- Account
- The account tab provides information like the Serial number use, build version and an upgrade button so that you can upgrade from within the software.

- Help
- Allows you to open the help memory, generate a system report and select/change the Interface language.
The software is basically included with most name brand SSD’s and while not full featured, the features it does include are handy.
With all of this out of the way, let’s jump onto the last portion of this review, Final Thoughts and Conclusions.
Continue: Final Thoughts and Conclusions
[nextpage title=”Final Thoughts and Conclusions”]
Kingston has been at this for a while, and it shows. While they did do a great job, the drive is not perfect, and here’s why I feel that way, the goods and the bads.
Pros
- No additional drivers or software needed to operate
- Very fast
- Meets and in many tests exceed reported speed specifications
- Price is on par with the competition
- Includes Acronis True Image, even though it’s not the full version, it has nice features
- Nice warranty, 5 years
- Keeps relatively cool
Cons
- While it has not gotten too hot, it might keep much cooler with a heatsink, but it would raise the price.
- Depending on your motherboard, you will need to disable 2 x Physical SATA ports to enable this M.2 port. This is not a con I can blame on the drive though as it is due to the technology and would occur with any M.2 drive.
A bunch of pros and one con, but the con if implemented would raise the price and being that it keeps relatively cool without it, might not been needed. I was trying hard to find a con on this one, but it does everything it is supposed to do and it does it well.
Sadly, when installing this, as shown in the video you will need to enable the function, which does (at least on this board) disable 2 physical SATA ports. Those 2 ports could have been used to RAID 2 drives together in RAID0 achieving the same speeds or higher and this drive is supposed to have but then you have to string together SATA Data and Power cables. You would also need to purchase 2 separate drives, which would come out more than this single drive.
One other thing I do have to mention, you may purchase this drive and actually get better performance from it, it all depends on your setup on how you configure/optimize it. There have been no tweaks made on this drive for this review, these are all with default windows settings, on a fresh install of Windows 10 Professional with all of the Windows updates applied and drivers installed.
I tried hard to not give this drive a 5 Star Editors choice award… but there is nothing I can find. With that,… I proudly give the Kingston A1000 480GB PCIe NVMe M.2 SSD SA1000M8/480G a Dragonblogger 5 Star Editor’s choice award.

Great job Kingston.
What do you guys think, was there a Con I missed or a Pro? I would love to hear back from you.
Click here to read my previous review of the WD Black 512GB PCIE SSD: https://www.dragonblogger.com/wd-black-512gb-pcie-nvme-ssd-review/
We are influencers and brand affiliates. This post contains affiliate links, most which go to Amazon and are Geo-Affiliate links to nearest Amazon store.
I have spent many years in the PC boutique name space as Product Development Engineer for Alienware and later Dell through Alienware’s acquisition and finally Velocity Micro. During these years I spent my time developing new configurations, products and technologies with companies such as AMD, Asus, Intel, Microsoft, NVIDIA and more. The Arts, Gaming, New & Old technologies drive my interests and passion. Now as my day job, I am an IT Manager but doing reviews on my time and my dime.