
We are influencers and brand affiliates. This post contains affiliate links, most which go to Amazon and are Geo-Affiliate links to nearest Amazon store.
ASRock Fatal1ty Z370 Gaming K6 Closer Look:
Now that you’ve witnessed what the ASRock Z370 Gaming K6 motherboard has to offer in the unboxing video, let’s have a closer look at the features of the motherboard. Feel free to skip this section if you’ve gotten a grasp of the features that this motherboard has to offer from the unboxing video.


So let’s start with the full shots of the front and back of the motherboard. From the front, you can quickly catch the arrowhead theme of the motherboard with those grey-ish strips. Especially the PCH heatsink that features an Arrowhead design. Most of the features of this motherboard are visible in the full shot, but let’s have a closer look at the tiny details in the next pictures.

Here we have the heatsink over PCH or Platform Controller Hub. Once again, features an arrowhead design. And both ASRock and Fatal1ty branding are also there. The heatsink itself doesn’t feature any embed RGB LEDs, rather it has some beneath it.

There’s a bunch of headers present at the bottom right corner. So let’s start with the rightmost one. First of all, we have the front panel and speaker header. Then we have a 4pin Fan/pump header. The two headers above aren’t mentioned in the manual so I’m not sure what those are, but they do have BIOS and BIOS_TEST1 printed on the PCB besides them. Then the first header with the frame around it is the COM port. And above it, we have Dr. Debug LED indicator. This something I like to see in every motherboard because it is really easy to troubleshoot the system problem with it. Followed by the COM port, we have 3 front panel USB 2.0 header.

Once again, let’s begin from the rightmost corner. So first, we have the TPM header, then there’s a 4pin fan header. Then we also have a Thunderbolt AIC connector on this board. The white 4pin header is for RGB LED strip. Then we have an XMP on/off switch along with a 2pin clear CMOS header. And finally, we have the front panel audio header.
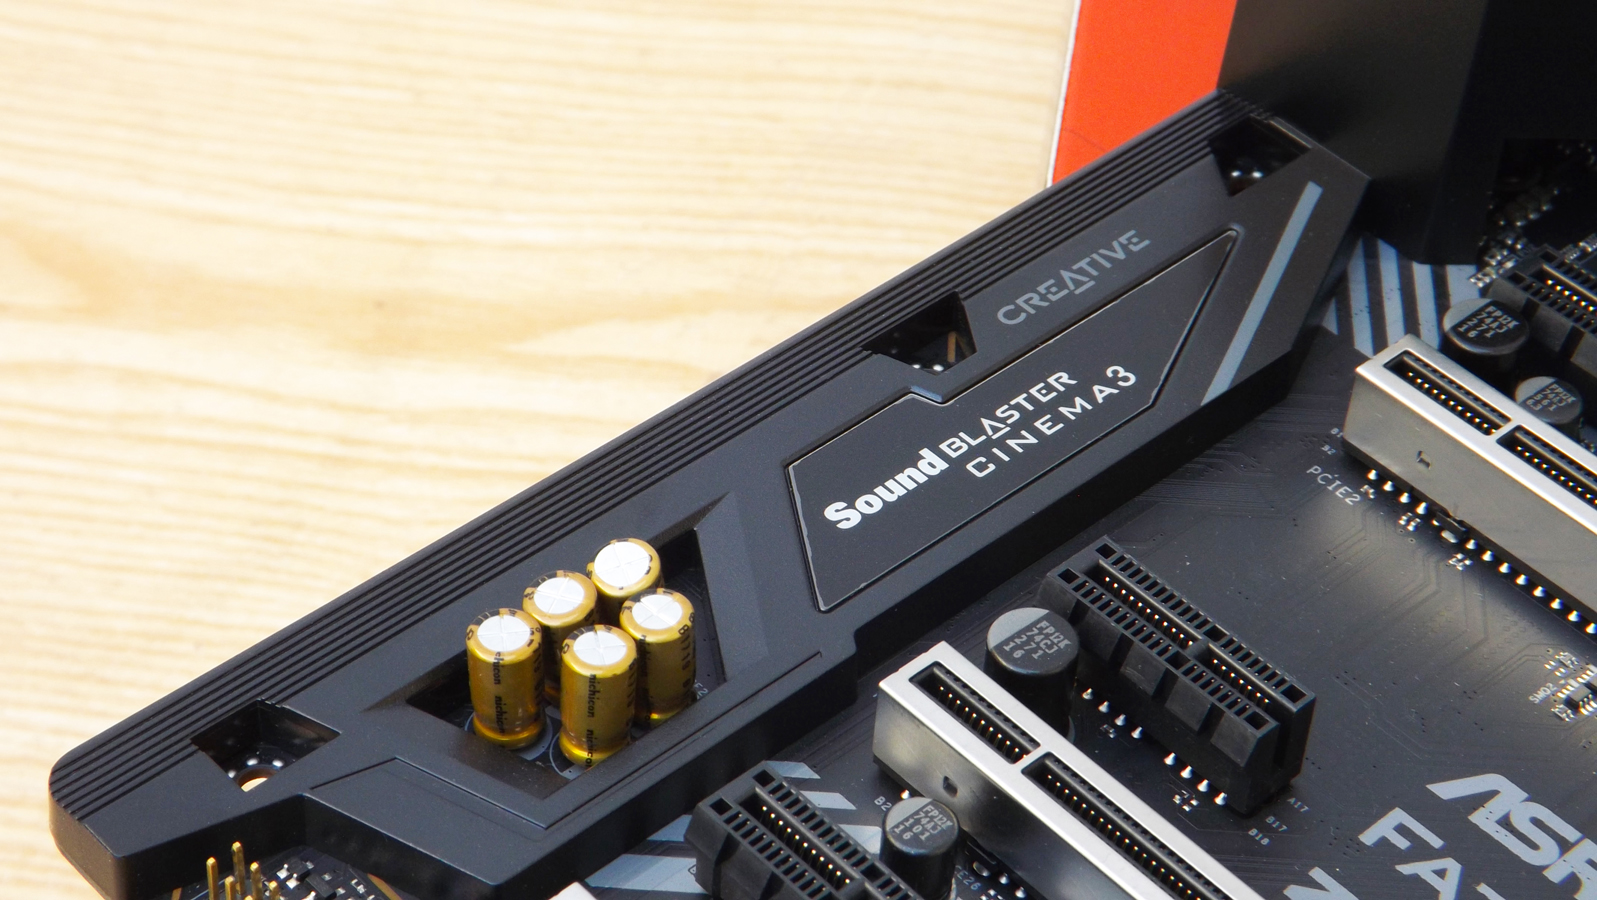
On the left portion of the motherboard, we have 5x gold audio capacitors. This portion is also has a cover which is an extension of the rear I/O port shield. We have Sound Blaster Cinema3 and Creative written on the cover. The text in white has some RGB LEDs underneath it. Also, beneath the cover, we have the Realtek ALC1220 audio codec.

On the ASRock Z370 Gaming K6, we have three x1 and three x16 slots. All three PCIe x16 slots are stainless steel armored. The first slot here runs at x16, second at x8, and third at x4. But since the slots share PCIe lanes, so the top two x16 slots run at x8 if you’re running dual SLI/Crossfire. As for the x1 slots, they are flexible PCIe slots which means you can insert even PCIe x16 cards into the slot but their bandwidth will be limited to x1.

Just above the first PCIe slot, we have a 4pin fan header. It’s a bit blurred but you get the idea.


We do have 2 Ultra M.2 Gen3 x4 slots on this motherboard. The first one is present below the PCH heatsink and the second one above the first PCIe x16 slot. The bottom connector supports M.2 SSDs up to 22110 while the top one only up to 2280 in length. Due to the limited number of PCIe lanes, the M.2 slots also shared lanes with SATA ports.
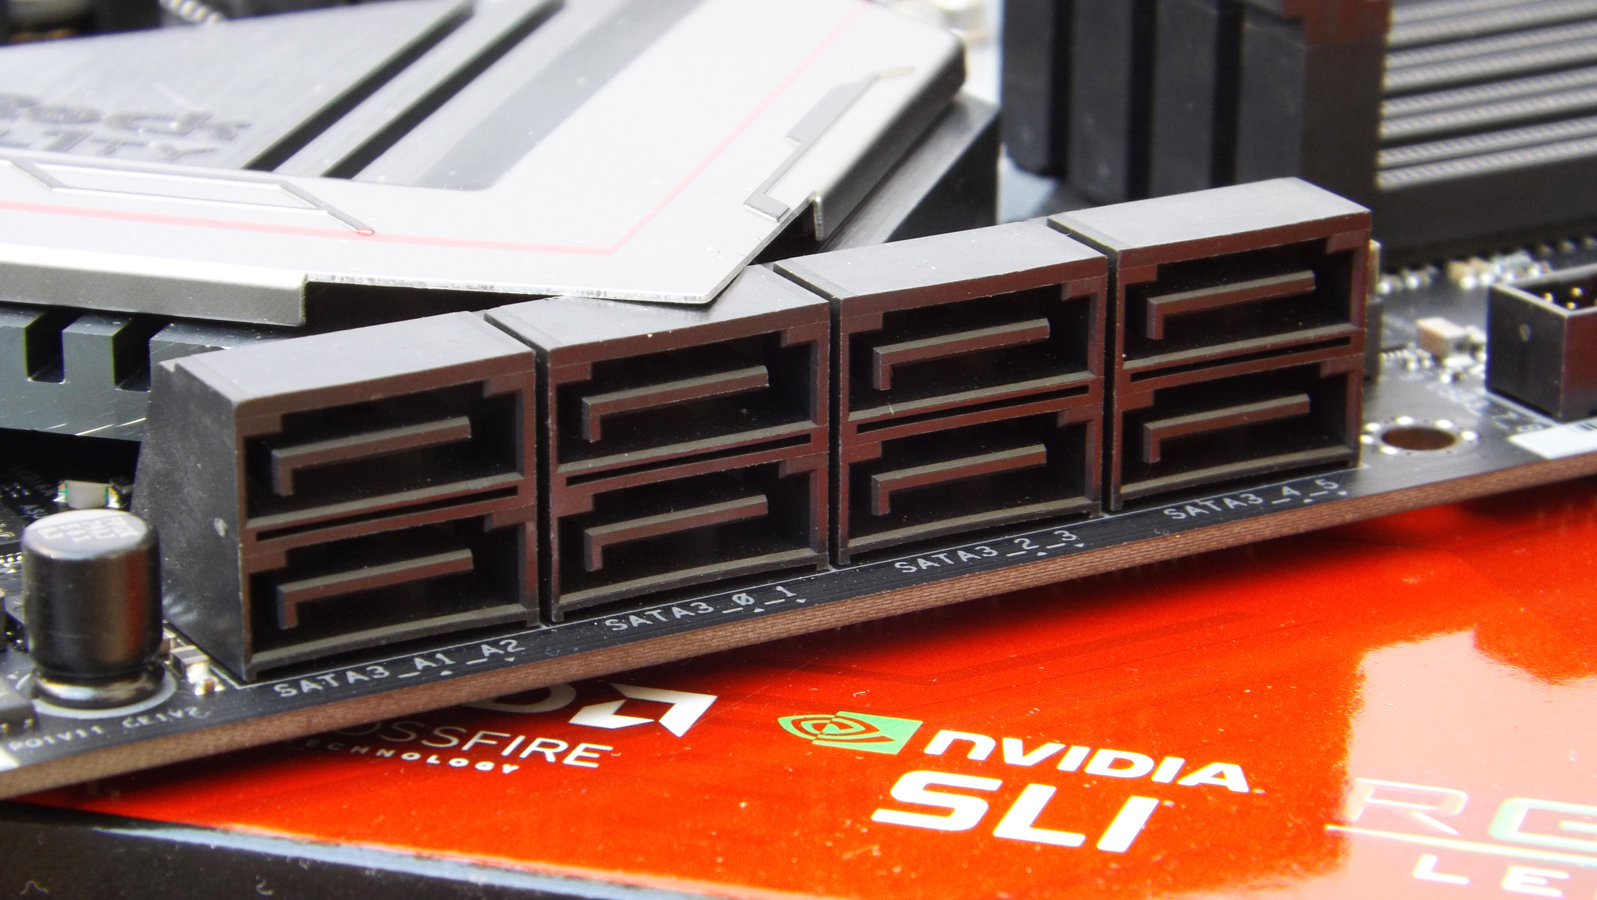
So we have 8x SATA 6Gb/s ports on this motherboard. But the SATA 0 and 1 (2nd two from left) shares lane with the M2_1 connecter (M.2 slot above first PCIe slot) while the SATA 4 and 5 (first two from right) shares lane with the M2_2 connector (M.2 slot below PCH heatsink). So in case, either of them is in use, the other one gets disabled. So if you were to use both the M.2 connectors, you will still have 4x SATA ports to use.

On the right portion of the motherboard, you’ll find 2x front panel USB 3.1 Gen1 headers and 1x front panel USB 3.1 Type C Gen1 header and the standard 24 pin ATX power connector.

This is an interesting addition to the motherboard by ASRock. We have both the reset and power buttons on onboard which comes really handy when you have your system in an open frame chassis or not in a chassis at all and testing various products. So you don’t have to reach the power button all the way to the front or top of the chassis or do a short on the power pins. I personally very much like the design of these buttons, they have Fatality logo on it and they also feature Red LEDs. So I would really like to see these being implanted on more and more motherboards.


Next up, let’s have a look at the center and the MOSFET heatsink. So we have the CPU socket in the standard place, with the plastic cover protecting the pings. On the top left, we have a total of 14 chokes and 14 Nichicon 12K black capacitors. This equates to a 12+2 power phase design. The heatsink on the top features a matte grayish finish. I can’t define it in words but the finish quality looks and feel premium. Also, there are some cuts on the heatsink and a Z370 engraving. The left one also features the same finish and both heatsinks are connected via a heat pipe to circulate all the heat generated by the MOSFETs. Also, the rear I/O ports shield is covering most of the left heatsink. And one more thing about the I/O cover is that it has a few RGB LEDs embedded into it.
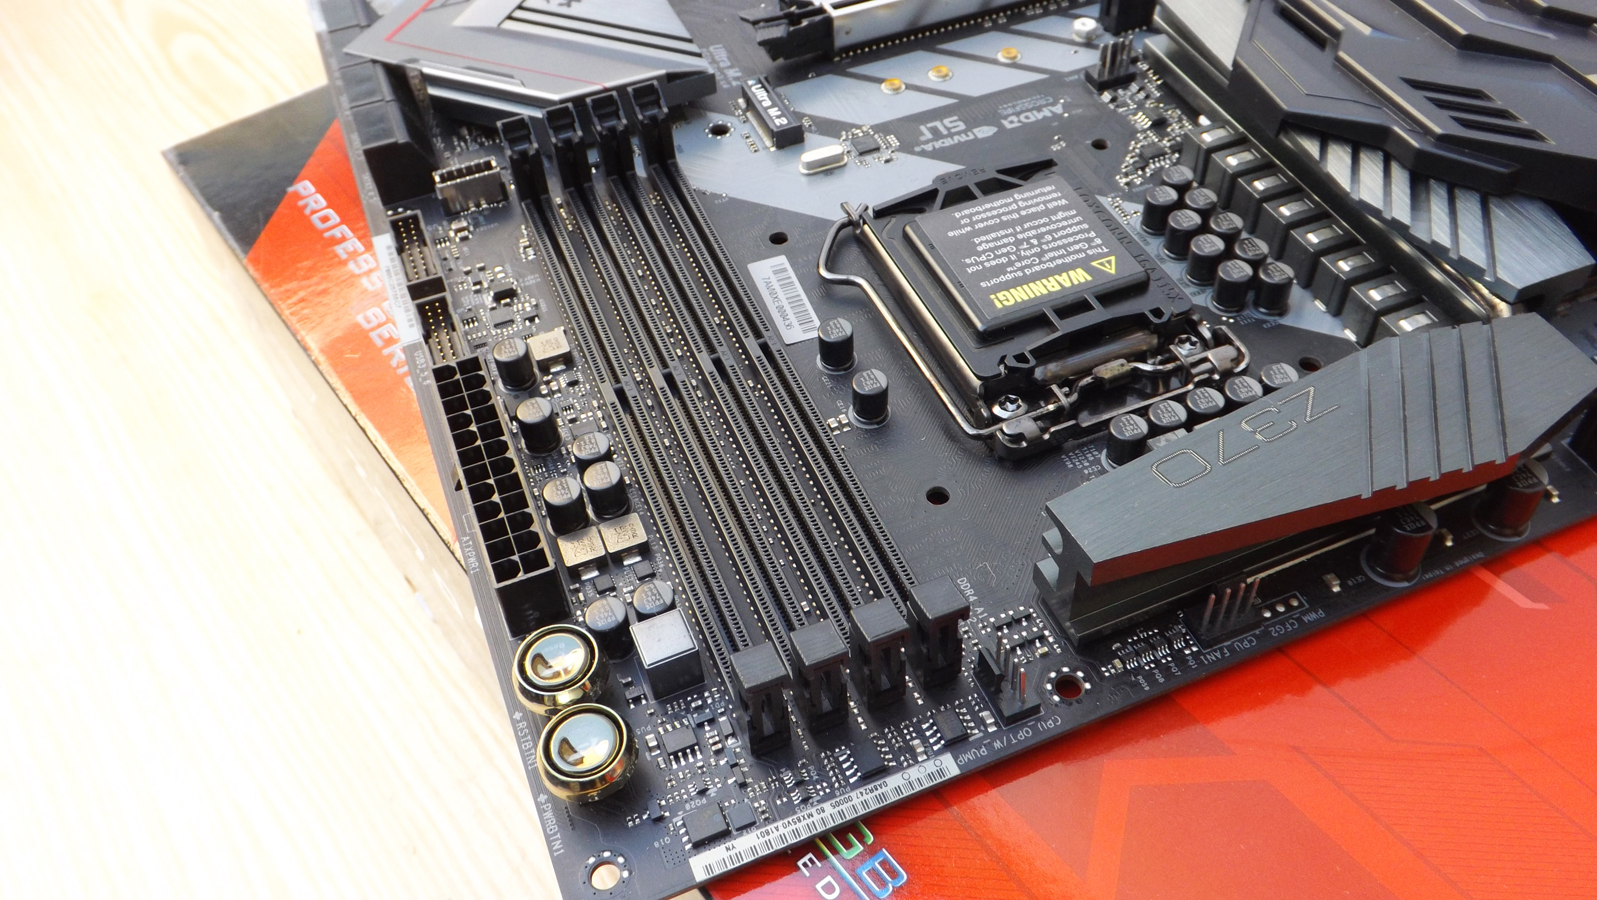
The ASRock Z370 Gaming K6 motherboard has 4x DDR4 DRAM slots and supports Intel XMP 2.0. In regards to capacity, It supports a max of 64GB DDR4 RAM up to 4333MHz in speed. And It also supports ECC UDIMMs but they operate in non-ECC mode.

And right above the leftmost DRAM slot, we have the CPU_OPT/pumpt header. And above the heatsink we have a fan header. The header above the heatsink is a little bit difficult to approach as it’s almost touching the heatsink and the top of the heatsink shroud is covering a little bit of the fan header. Also the 4 pin header above the RAM has one bent pin. I received this board as is from ASRock so it seems like it either got damaged during shipment or someone at ASRock didn’t check the board properly. Either cases can be true. It still works, but if you receive a board with multiple bent pins, call your retailer straight away for a replacement.
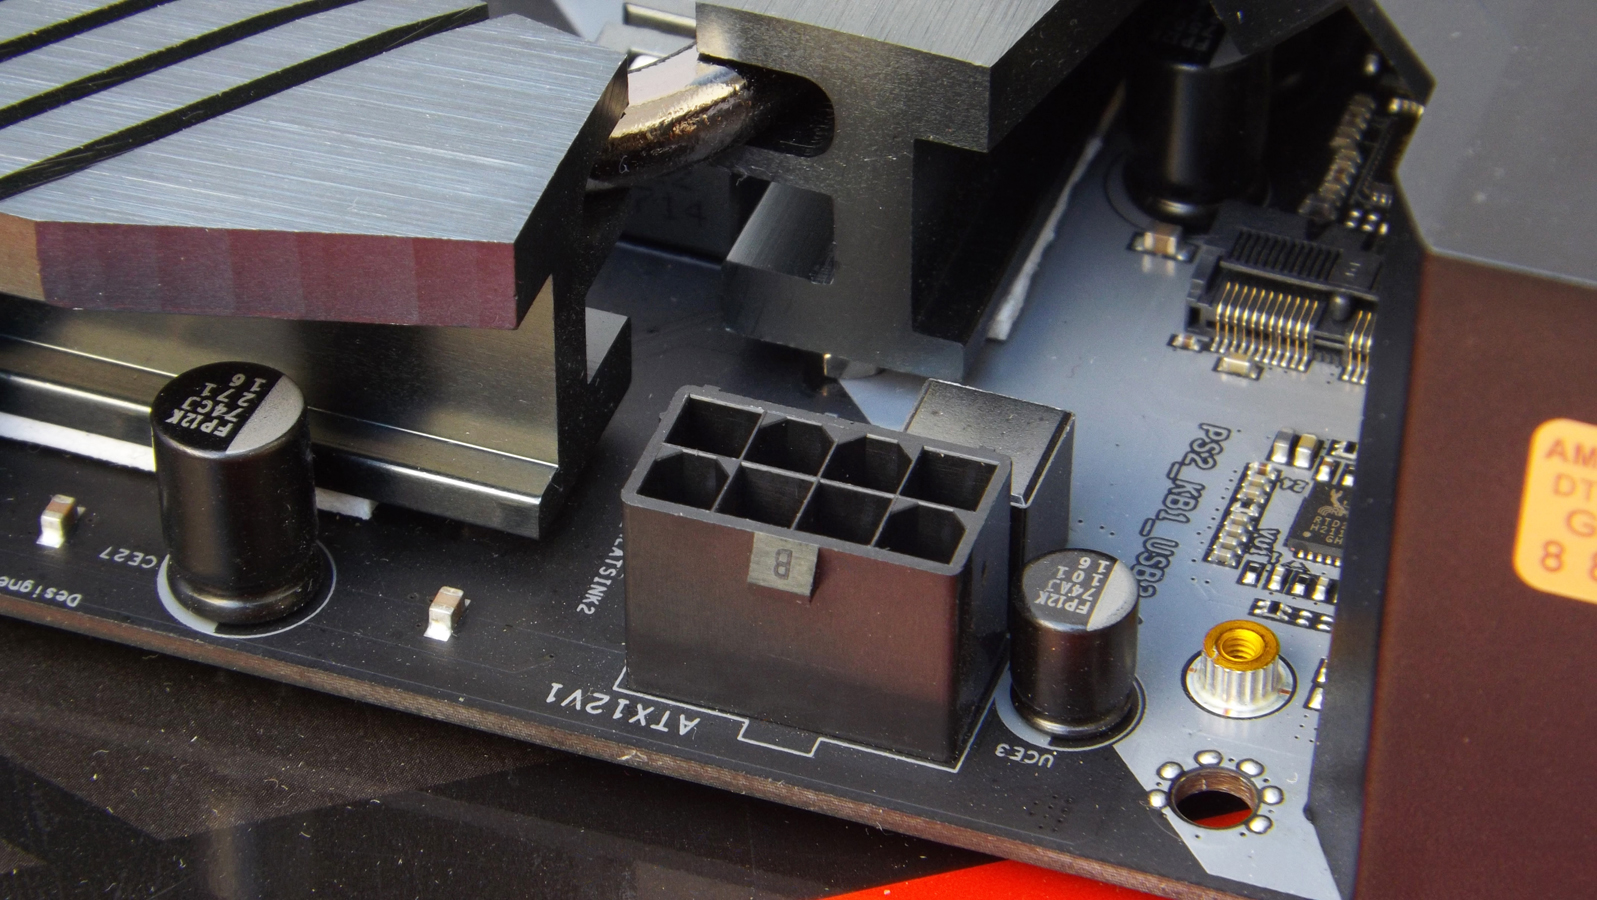
In the top right corner, you’ll find the 8pin EPS connector.

And it’s finally time to check out the rear I/O ports. So starting from the left, we have a metal casing with 2 holes in it. I would guess that these are probably for WiFi antenna connectors that ASRock decided not to include for some reason in the final design. Anyways, moving on, we have a PS/2 Mouse/Keyboard port, beneath which we have 2x USB 3.1 Gen1 ports. Then for display, we have a D-Sub, DVI-D and HDMI port. Then we have dual LAN ports. Below the first LAN port, we have a USB 3.1 Gen2 and USB 3.1 Type-C Gen2 port. While the USB ports below the next LAN port are USB 3.1 Gen1. And finally, we have the 5 port audio and optical SPDIF port.
So that pretty much covers most of the physical features of the ASRock Fatal1ty Z370 Gaming K6 motherboard, now it’s time to have a look at the BIOS and some performance benchmarks.
We are influencers and brand affiliates. This post contains affiliate links, most which go to Amazon and are Geo-Affiliate links to nearest Amazon store.
Hi, I’m Ahmed Kazim and I’ve been a gaming freak since like 7-8. I’m also a geek-o-nerd who keeps looking around for latest development in hardware/tech/gadget industries so expect some quick news from me. I’m also interested in anime (Japanese animation) and can’t stand a day without music and gaming.