
We are influencers and brand affiliates. This post contains affiliate links, most which go to Amazon and are Geo-Affiliate links to nearest Amazon store.
One thing every computer needs is a case, well if you want it to look nice and function properly with airflow. A good case has good cooling, enough space and compartments to suit everyone’s needs. Everyone now a days makes a case but it seems that many don’t learn from their mistakes and keep building upon their prior mistakes without taking note on what the community, their customers say.
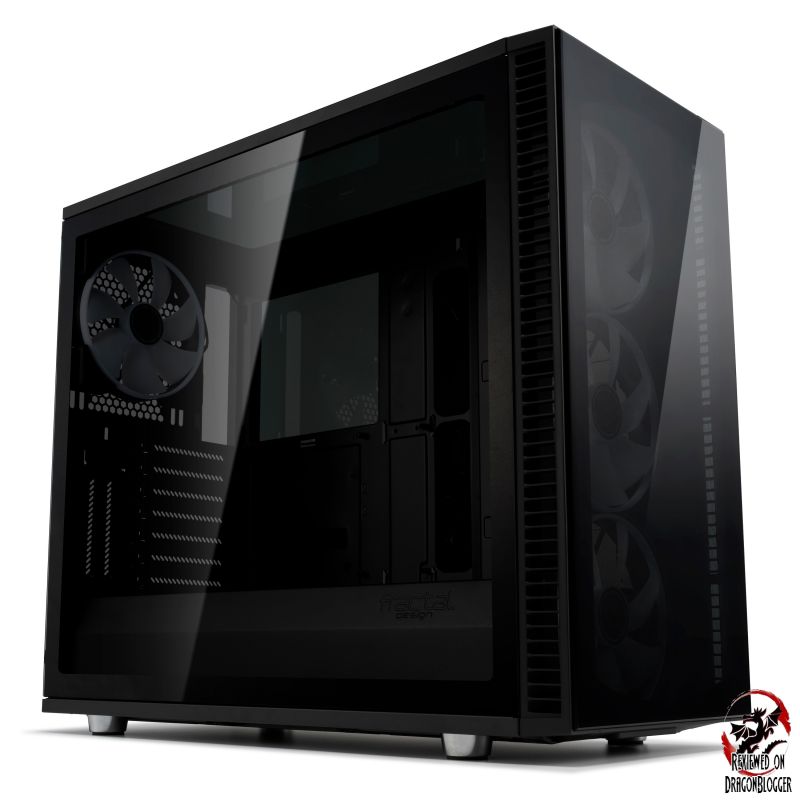
Today we will be taking a look at Fractal’s Designs Define S2 Vision RGB. This company touts working with the community, but do they really? Do they really listen to what we have to say about their products? We will find out here in my review of the Fractal Design Define S2 Vision RGB FD-CA-DEF-S2V-RGB-BKO-TGD.
Let’s go over the features and specifications first, then we can take a look at the case and dive deep into it.
Features and Specifications
- Motherboard Support: ATX, Micro ATX, Mini ITX and eATX (up to 285mm wide)
- Case Dimensions: Length: 543mm, Width: 233mm, Height: 465mm
- Dark Tinted Tempered Glass Left, right, Top and Front Panel
- Top converts between TG Cover and Filtered ventilation
- 7 Expansion Slots
- +2 Vertical Slots (Support for Flex VRC-25 sold Separately)
- Front Connections
- 1 x USB 3.1 Gen 2 Type-C
- 2 x USB 3.0
- 2 x USB 2.0
- 1 x 3.5mm Headphone Jack
- 1 x 3.5mm Microphone Jack
- Drive Bays:
- 3 x Universal 3.5”/2.5 drive mounts
- 2 x 2.5” (Behind motherboard Tray)
- Includes 2 Velcro Strips
- Cable Routing Grommets
- 23mm of cable routing space
Fan Mount Locations and Sizes
- Up to 9 Total Fan Mounts
- Front: 3 x 120mm or 140mm
- Includes 3 x Fractal Design Prisma AL-14 ARGB PWM Fans
- Top: 3 x 120mm or 3 x 140
- Rear: 1 x 120mm or 140mm (140mm Fractal Design Prisma AL-14 ARGB PWM Fan included)
- Bottom: 2 x 120mm or 140mm
- Includes Four Prisma AL-14 PWM Addressable RGB Fans
- Includes Prisma AR-4020 ARGB magnetic LED strips
- Adjustable R1 RGB controller included compatible with Asus Aura, gigabyte Fusion, MSI Mystic Light and Asrock Polychrome
Radiator Support
- Front: 120, 140, 240, 280, 360mm
- Top: 120, 140, 240, 280mm, 360mm max 35mm MB Component height
- Rear: 120mm
- Bottom: 120, 140, 240, 280mm
- Nylon Mesh Easy Clean Filters with 2 times the airflow vs plastic filters
-
- Bottom Filter with full PSU coverage
- Convenient Front Filter Access
- Top Panel (if you chose the Filtered vs TG cover)
-
- Max CPU Cooler Height: 185mm (6.89-inches)
- GPU Support: Up to 440mm
- PSU max Length: 300mm
- Nexus 9P fan hub controls up to nine PWM devices
- Dedicated Fill Port
- Adjustable pump/reservoir brackets
- Ventilated PSU shroud with removable front cover and additional pump/reservoir/SSD mounting positions
- 33 x Vibration damped 3.5 HDD mounts
- Included 3way SATA power extension cables
- High-Density Industrial noise dampening on the side, top and front panels
- Cable Routing Space: 23mm (1 inch between motherboard tray and side panel)
Wow, a ton of features and options here, but how does it look?
Let’s check out the unboxing.
With that out of the way, let’s take a look at what comes in the box of the Fractal Design Define S2 Vision RGB.
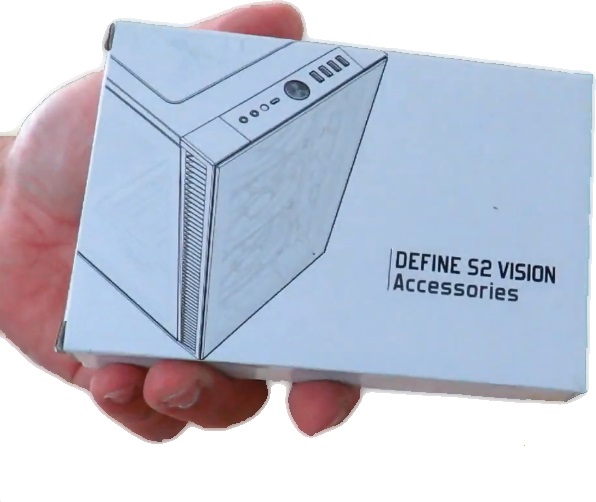
Inside of the top panel box, is this little white box that contains a bunch of accessories, let’s go through them.
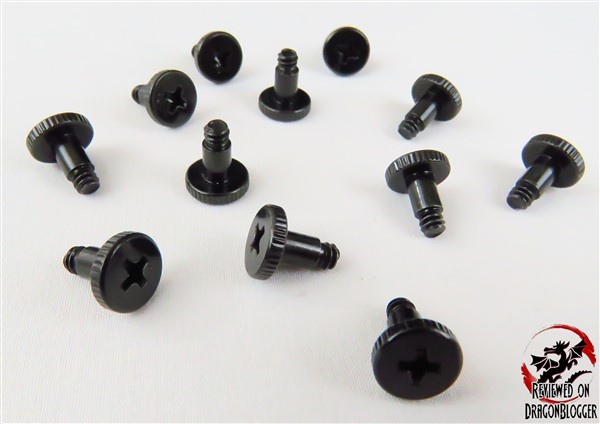
Here is what we will be going over since black and white images don’t tell the entire story:

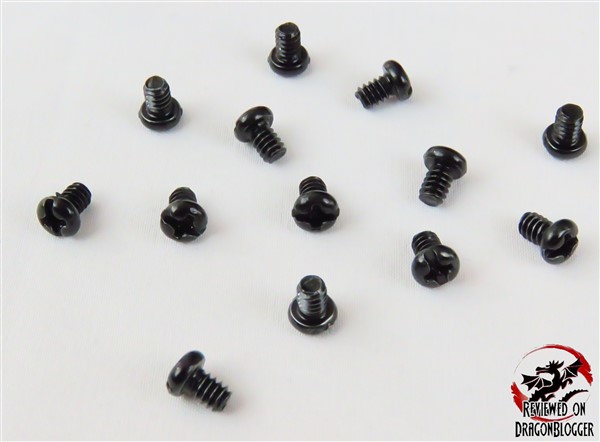
13 x Motherboard screws and reservoir screws.
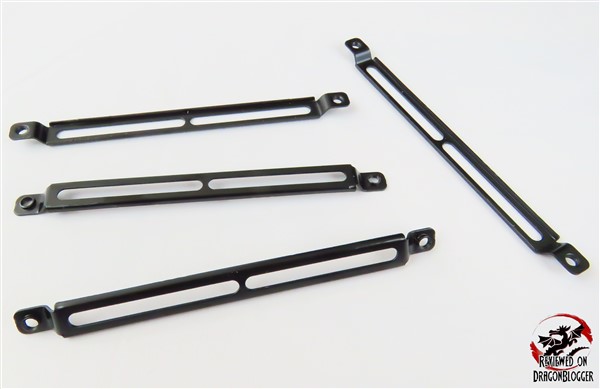
4 x reservoir brackets.
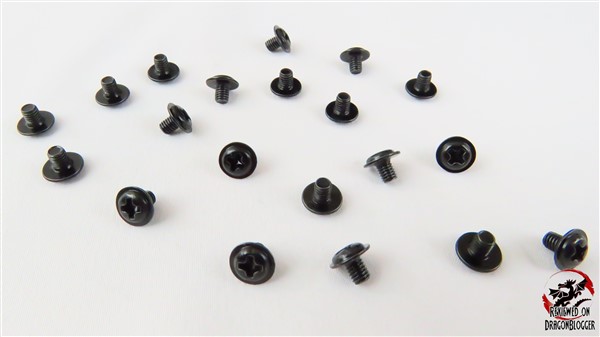
20 x HDD Screws.
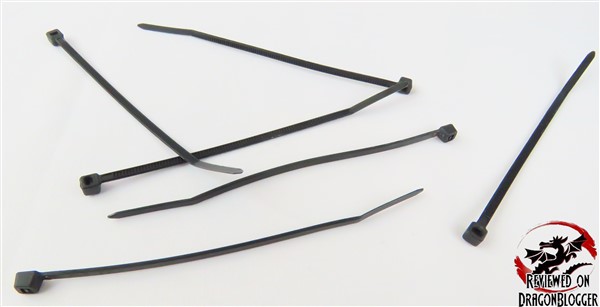
4 x zip ties, they call them cable ties. These are the thinner ones
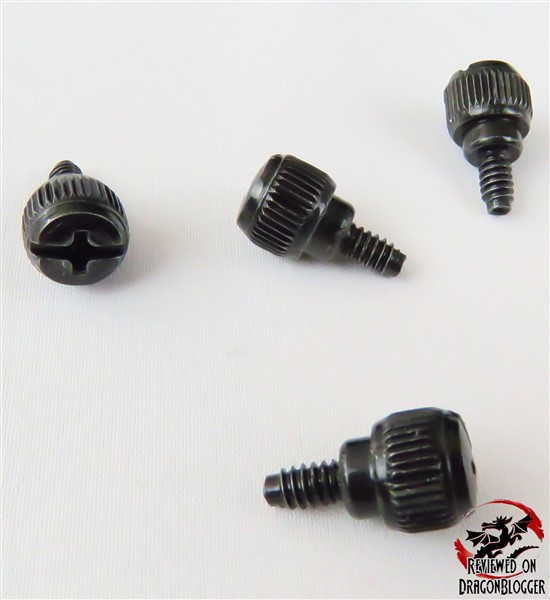
4 x side panel screws or thumb screws, but you don’t need them and we will get into this in a bit.
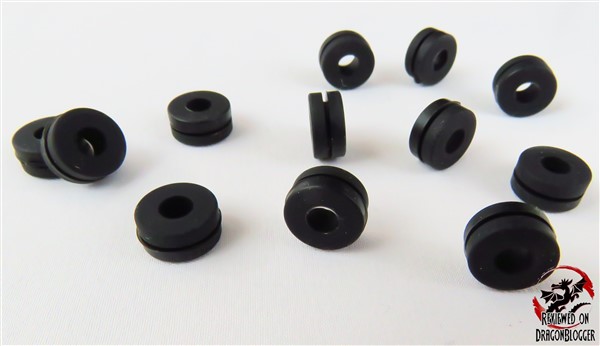
12 x HDD dampeners, because if you have or had hard drives, the mechanical ones, you know they can get loud.
12 x SSD screws.
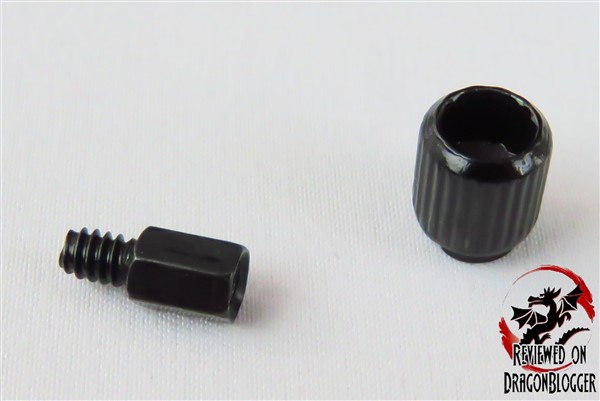
A match made in heaven here too, a motherboard stand-off on the left and on the right and a stand-off tool. The stand-off tool, while not new, is one of the best tools to have. It comes in very handy and I use it in the build video you will see a little later in the review. It is used to help screw in the stand-off onto your motherboard tray.
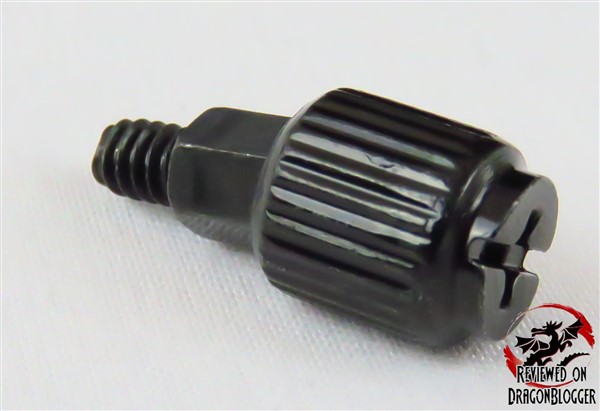
Just a pic of the stand off screw in the stand-off tool. You can see on the other side that it is fitted for a Philips head screw driver.
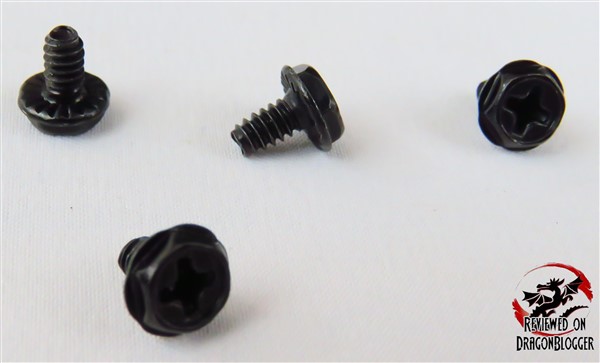
4 x power supply screws.
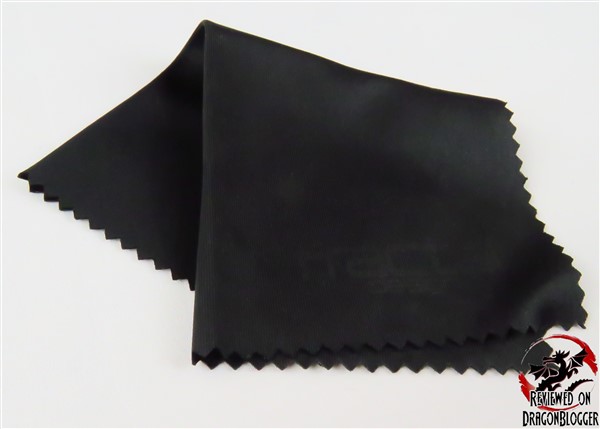
A Fractal Design branded cloth to wipe down your case to make it look nice and pretty after a build. It’s sexy I know and it will help keep your case nice and sexy too.
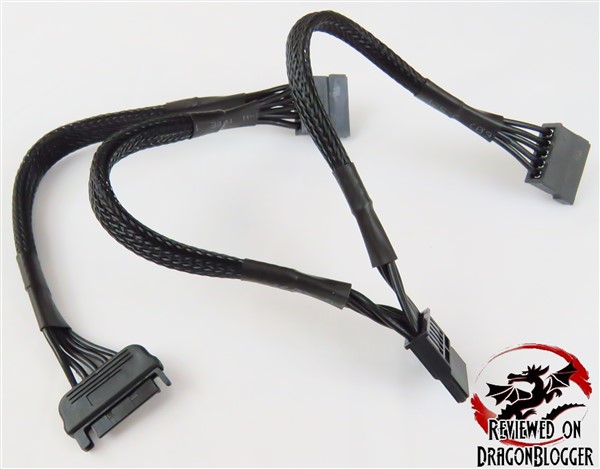
SATA cable extenders, of which they call just plain SATA cables. These come in handy for many things.
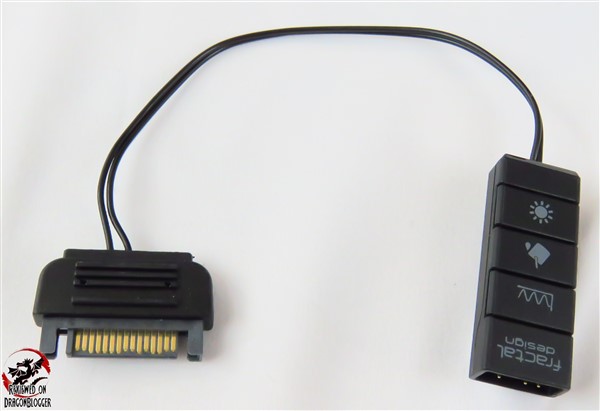
They call this little guy, an Adjust R1 and this is great. I will get into this a little later on in the review.
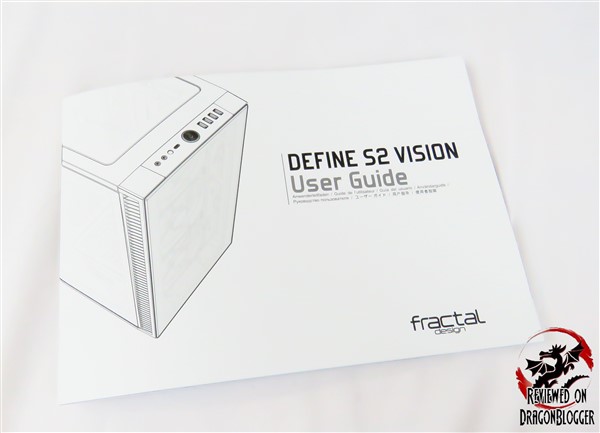
A Define S2 Vision Users Guide, but everything inside of it we will cover here, so I got you covered.
Last but not least, the Attention sheet that discusses what you should do in the event that there is an issue with something in the box.
So that is all that is included, though I know it’s a lot of things, now we need to go over the case itself. Let’s do that now in my next chapter Case Layout and Details.
Continue to: Case Layout and Details
[nextpage title=”Case Layout and Details”]
This is the front of the case, you can make out the 3 white fans there. We can also make out some vents along the side.

Removing the front panel, we can see the fans are Prisma AL-14 PWM Addressable RGB fans.

We can also see the filter pulled out a bit. In order to remove the front panel, we have to slide the bottom filter out a little. It is also necessary to remove the front panel to remove the film covering the glass on the inside. It is a bit of a needless pain I would say to have that film on the inside, since removing the panel is not incredibly easy, though it is in the build video in case you are curious.

The side vents to let air in are almost an inch wide, which is great to let some air in. The vents are on both sides.

Since the side panels do no t need to be unscrewed to be removed, you can pull on these 2 handles circled in red, to remove the side panel. If you chose to, Fractal Design included extra screws if you preferred to screw them in, but since it clamps shut, it is not required for a stationary machine. It might be a good idea though to screw them in if you have kids, just in case.

The push-to-Local latching system has the peg circled on the bottom of the pic that snaps into the latching mechanism circled at the top of this image for a bolt free design. There are 2 of these pegs on each of the side panels on both sides as well as the latching mechanism.

Removing the scratch resistant tempered glass side panel, we have the inside of the case. Let’s get a better look at what it has to offer.

Along the front of the case, we can see the rear side of the 3 x Prisma AL-14 PWM Addressable RGB fans. The motherboard side has what looks to be vents, but actually those are the spots for the reservoir brackets as well as the rear side of the drive cages. We will get into the drive cages later in this review.
We can also make out 2 rubber grommets on the motherboard tray, one over the power supply shroud and one on that little square just in front of the bottom fan.

Along the bottom, we can see another location for a reservoir, but there are also more vents on this panel. The panel has a grommet and 2 circular cut outs. This panel can be removed or left on, we go over this in the build video.

You can also see towards the front of the case, Fractal Design etched their logo onto the power supply shroud.

Just next to that reservoir square on the bottom, we see the rubber grommet again as well as the one on the motherboard tray.

Along the rear of the case, we can see there are 7 PCI expansion slots, as well as 2 vertical slots. Here we can make out 4 rubber grommets, as well a hole on the bottom left hand side, which also comes in handy. We can also see another Prisma AL-14 PWM Addressable RGB fan.

On the motherboard tray, we can find the legend to what all the holes are where our motherboards would go screwed into. The motherboard tray comes pre-fitted with 8 stand-offs already and one special stand-off.
The very center stand-off is a reverse stand-off used to help you fit your board in perfectly, without the need for a pilot screw to be screwed in. This will save you time and frustration, especially if you build your PC standing up like I do. As per the legend, this stand-off is necessary for ATX, Micro-ATI and Mini-ITX boards. Since this case also does support E-ATX motherboards, you would be using the ATX layout for E-ATX boards.

On the rear, I am a bit surprised coming from the R6, though it seems to be very similar to the S2 with a few slight changes.

At the very bottom right-hand corner, we can see the power supply shroud. You can fit up to a 300mm power supply. It comes complete with rubber pads to absorb vibration from the power supply, helping to keep the system nice and quiet.

Just above that, we find 2 x Removable SSD trays.

These trays can be fitted either on the rear of the case as you see here, or on the power supply shroud itself in any combination you would prefer.

Here we can see how the power supply shroud is not just a solid piece, it is vented. Here is also a little preview of the build coming up. Stay tuned for it.

Making a return with a few enhancements, we find the Nexus 9P PWM Fan Hub. Previously the Nexus+Smart Hub would only allow for six case fans and only 3 x PWM controller PWM fans, this Nexus has all 9 controlled by PWM. We can see that it requires SATA power, and the 4 x Pin PWM header to be connected to a fan header on the motherboard.
In the picture above, we can also see they included their signature Velcro straps.

A little closer look, shows all 9 of the fan headers on the Nexus 9P. They even went as far as labeling them FAN1~9 to make it easier for you to know which fan is connected where.

Along the front of the rear of the case, we can see 3 of the 3.5” HDD enclosures.

These not only can be used for 3.5” mechanical drives or 3.5 SSDs, if they still make them, but these can also be used for 2.5’ mechanical drives or SSD’s. This was already possible on the S2, but was not on the R6.

The top of the case comes fitted with the glass panel you see on the right but can be changed with the vent you see in the middle.

A view of the top with the glass panel.

Looking up from the inside of the case, we can not only see the other side of the glass panel, but we can see the RGB strip as well. We will go more into this a bit later.

The panels can be popped up with a simple push of this button, but I will go over it in the build video as well.
The vent can be used as is, if you do not have additional fans or you can add fans or a liquid cooling unit, but you will have to change the inner top panel with the liquid cooling bracket as you see on the left.
That liquid cooling bracket also comes with a fill hole in case you chose not to go with an All-In-One unit (AIO) and go with a custom unit. I will go over in the video on how to build with a liquid cooling unit.

The top of the unit can be fit with a 120, 140, 240, 280 and 360mm liquid cooling unit as can the front. The bottom can support a 120, 140 and 240mm liquid cooling unit. The rear supports a 120mm liquid cooling unit.
Along the same lines, you can fit 3 x 120mm or 140mm fans in the front of the case as well as the top. The rear supports a 120mm or a 140mm fan, though it already includes 1 fan.

- Front: 3 x 120mm or 140mm
- Includes 2 x Fractal Design Dynamic X2 GP-14 140mm
- Top: 3 x 120mm or 3 x 140
- Rear: 1 x 120mm or 140mm (140mm included)
- Bottom: 2 x 120mm or 140mm

Important for those of you that want to put fans along the bottom, this is about .70 inches from the ground with these feet. Not a bad height.

Along the top front of the case, you can find a 3.5mm headphone jack and microphone jack. Next to that, we can find a reset button, USB Type-C connection and a power button. To the right, we can find 2 x USB 2.0 ports along with 2 x USB 3.0 ports. This is fully loaded.

This shot shows you all of the different parts that you can utilize in your build.
With all that, I am sure you are going crazy to see the build, so let’s jump into the next chapter, How to build a PC inside of the Fractal Design DEFINE S2 Vision RGB and testing.
Continue to: How to build a PC inside of the Fractal Design DEFINE S2 Vision RGB and testing
[nextpage title=”How to build a PC inside of the Fractal Design DEFINE S2 Vision RGB and testing”]
In this section, we go over building a complete gaming machine inside of the Fractal Design DEFINE S2 Vision RGB. These videos will help you get a better feel for the case and help you in case you get stuck on a certain part in your own build. Let me know what you think.
Before I get into though, here are the list of parts I am using in this system.
- Viotek G35DR 35″: http://geni.us/6LrGJIntel
- Core i9 9900K Processor: https://geni.us/0PrCbaYArctic
- Fractal Design DEFINE S2 Vision RGB: https://geni.us/t6xXT
- Fractal Design Celsius S36 360mm Liquid Cooling Unit: https://geni.us/m6LvD
- EVGA Z390 Dark Motherboard: https://geni.us/UmV6t
- EVGA Geforce RTX 2080 XC Ultra Video Card: https://geni.us/SwBEU6
- WD Black SN750 1TB: https://geni.us/8sqXFs
- Patriot Viper Gaming RGB DDR4 DRAM 3200MHz 16GB Kit: https://geni.us/URlI8
- Patriot Scorch 256GB NVMe M.2 PCIe M.2 SSD: https://geni.us/fPk1BA
- Samsung 850 EVO 500GB SSD: https://geni.us/QTA2
- WD Black PCI-e NVMe 512GB SSD: https://geni.us/mMNLde
- beQuiet! 1000Watt Power Supply: https://geni.us/jEYLM79
Alright, with that out of the way, let’s get into building your dream machine.
In that video, I go over the hardware side of building the machine. There you saw, when I replaced the glass on the top of the unit, I had to remove the frame that was holding the RGB strip, but its OK. While it was glued, it is also magnetic so I can attach it to anywhere within the case. Problem is you need to find where you can plug it into if the other RGB cables are too far since they are daisy chained.
From the ground up I build a PC, but now it needs cables to make it all work, so let’s jump to the cabling.
The cabling video, we just go over connecting all of the cables, but I also show you how to connect the RGB cables. The system includes the Adjust R1 cable/adapter for those of us that do not have an RGB header. The EVGA Z390 Dark motherboard does not, so this came in incredibly handy. Also, since this motherboard does have a USB-C header, I was able to connect the USB-C front panel to the motherboard.
Another great thing about this setup was the liquid cooling unit, the Celsius S36. Since it has the controller onboard, I could connect all of the fans to that one header. The header plugs into itself for power and the pump itself gets its power form the CPU Fan header, which powers the entire unit, a great idea.
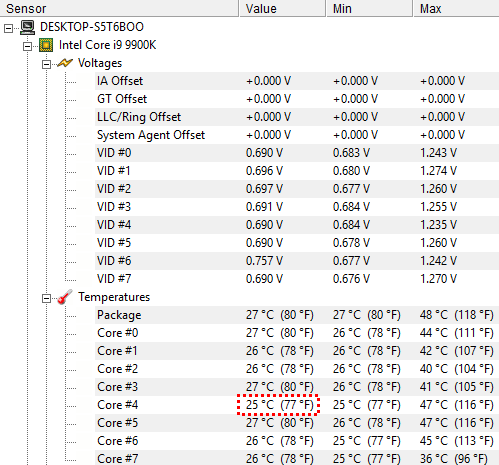
We can see the Intel Core i9 9900K is sitting idle at 27° which is great for this processor as it is known to get incredibly hot. The coolest core here is 25°C, the hottest core during start and the time I took this screenshot was 47° on core #4 and #5. I did not count the package itself but the package did go up to 48°C.
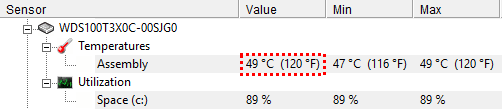
Here, the WD Black SN750 1TB M.2 PCI-e SSD which sits directly underneath the video card is at a cool 49°C.
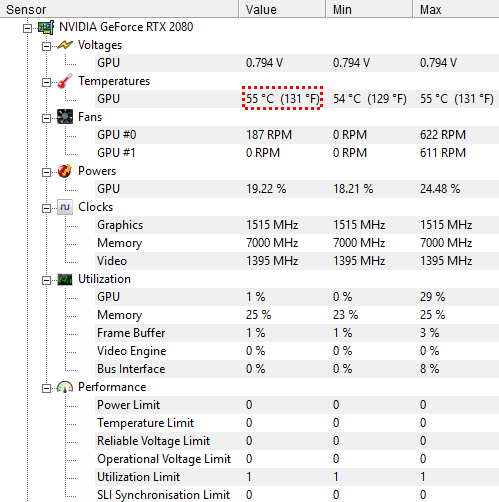
Here we can see the EVGA Geforce RTX 2080 XC Ultra Gaming card is running at 55°C on idle as well.
So that’s idle, let’s stress the system a little and see how well she performs in in this case.
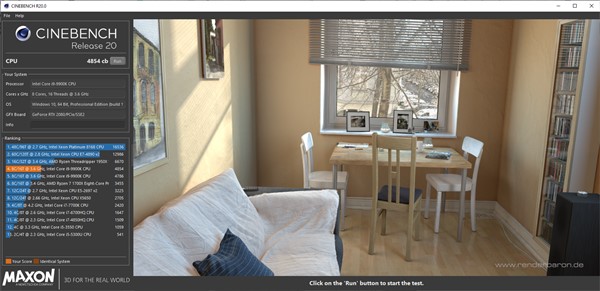
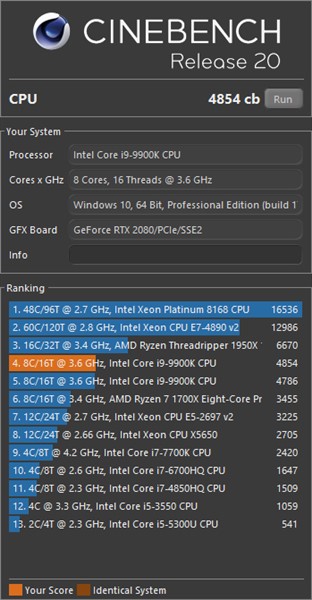
This is using the latest version of CINEBENCH, Release 20. We get a CB score of 4854.
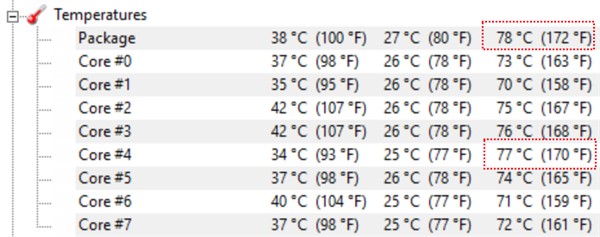
The Core i9 9900K burns up even stock, but we can see here the hottest temperature the package reach was 78°C and an individual core hit 77°C. Not too bad. These are all stock/auto settings, nothing has been overclocked.
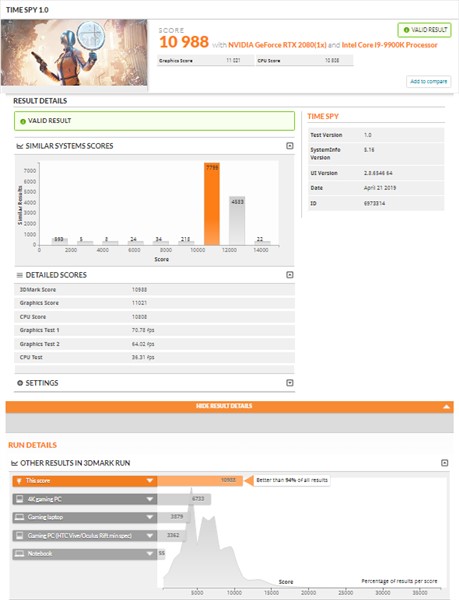
Running a pass of UL Benchmarks 3DMark Time Spy we reached 10,988. Actually, a great score here, I usually get in the upper 9’s but it broke 10K.

Aside from the score, we can see the hottest the GPU got was 70°C, not bad. The case seems to be doing a good job in these hotter spring days keeping everything nice and cool. I did not have the S2 case to compare it too, but I did come up from the R6 and I can see the differences in cooling, I however did not benchmark against it but you can find the original review here: https://www.dragonblogger.com/fractal-design-define-r6-blackout-tg-review
Another very important thing to check is the M.2 PCi-e drives.
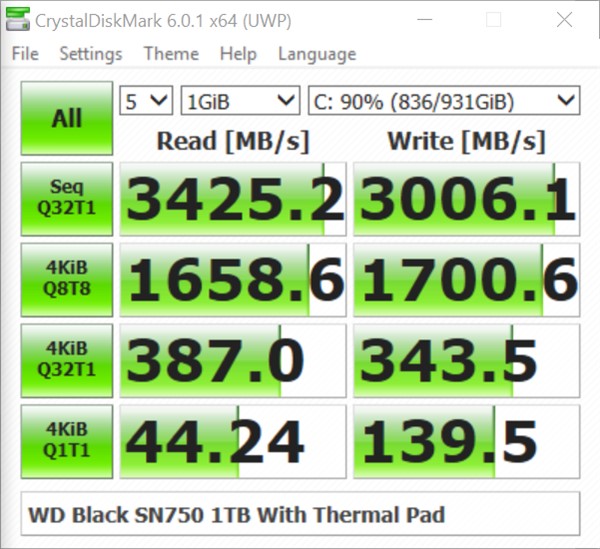
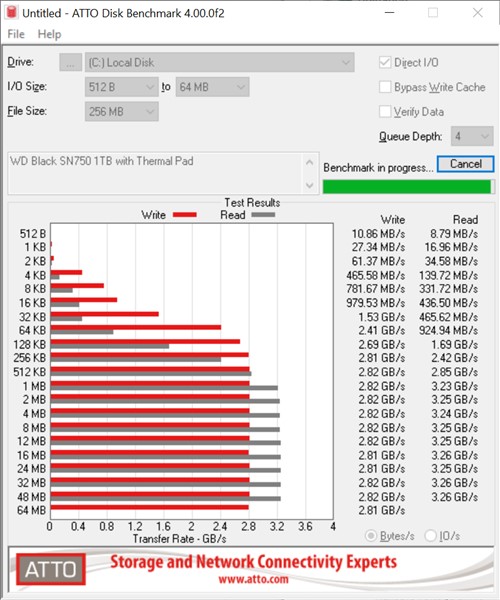
Benching the WD Black SN750, it gets some nice scores, one of the fastest drives I have seen. I ran both to get them heated up a bit so that you can see its temperature.

Testing here with the thermal pads EVGA proves on their EVGA Z390 Dark board, we can see the temps are 69°C which is very good. Not everyone though will have this board with these thermal pads so being that the drive is directly under the video card, I think its best to test it as well without the thermal pads.

Without the Thermal pad it did heat up a bit more, actually more than when I first reviewed this drive. The temperature this drive throttles at is 83°C which is a bit concerning, I will have to get back to this. A bit concerning not because the drove will fail, based on the NVMe Spec 1.3 this drive has, it will throttle to protect itself, much like a CPU, so it’s only concerning for speed sake. While this drive did get a bit hotter than my previous tests, this is the version without the heatsink, they sell one with a heatsink as well.
With these tests done, no let’s see how loud the case is. This is a bit subjective since the case does not come with a power supply, liquid cooling unit or CPU fan or a video card but still, it gives you an idea and a first glimpse of the case in action.
Alright, so there I show you all of the RGB and their effects as well as how to use the Adjustable R1 RGB controller even if you don’t have an RGB header on your board, you won’t be left out in the cold.
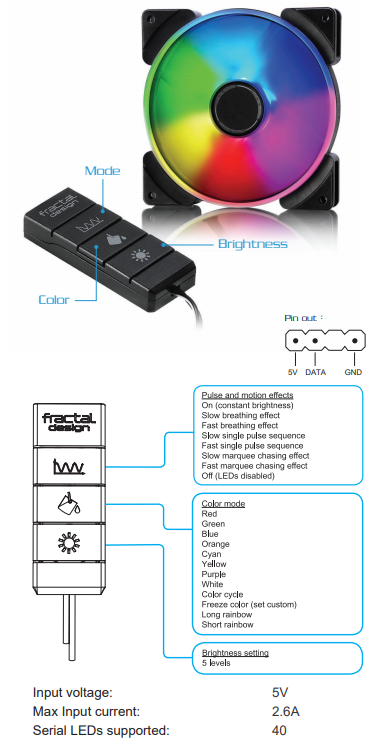
This controller is very handy and I have attached a diagram to show you how the buttons and effects work.
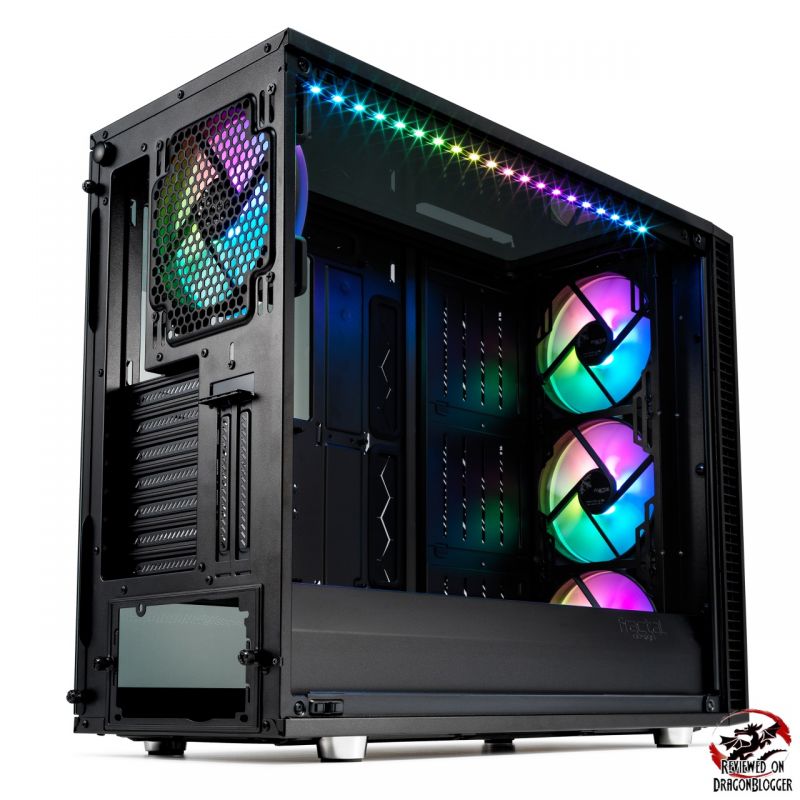 This is how the case itself would look like on the full RGB spectrum, but I think it might be best to show you it in action.
Lastly, though for many it would come first is how loud the case is and how it looks. The day I recorded this, was a little louder than usual, I had to wait about 30 minutes and rush the recording till after my neighbors finished mowing their lawns and the planes stopped flying over header. There are some ambient sounds, but is it ever dead quiet in your house, probably not. Oh yeah, and for those 30 minutes, my neighbors dog was not barking… he might have been sick, not sure.
So check this video out.
The Fractal Design Celsius S36 liquid cooling unit does rev up a few times during boot but it idles down and sounds very quiet. Please remember, this is cooling a Intel Core i9 9900K and it gets HOT.
So with all that said, let’s jump to my Final Thoughts and Conclusion.
Continue to: Final Thoughts and Conclusion
[nextpage title=”Final Thoughts and Conclusion”]
I think Fractal Actually does listen to their customers you can tell from case to case they release. One case is great, but a few people complain about one aspect, then on the next release those complains have been taken care of but since you can’t please everyone, new complaints emerge and the evolution continues.
Pros
- Relatively affordable (Compared to the R6, but adding 4 RGB fans)
- Tempered Glass tinted side, top and front panels
- Includes 4 fans, 1 x Rear and 3 x front 140mm fans
- SUPER Quiet
- Up to 5 hidden Drives (3 x 3.5’+ 2 x 2.5’ or 6 x 2.5)
- Allows for many fans or Liquid cooling options
- Fits from ITX to eATX moterboards.
- TONS of space for cable management behind the motherboard trays
- Tons of space everywhere else on the rear as well
- Nexus9P Fan hub
- Multiple Case top options, from Glass, Filters, Liquid cooling units
- Noise Dampening
- Vertical GPU Mounting option built in
- PSU Shroud also allows for 2 x 2.5” drives
- Vented PSU Shroud
- Adjustable R1 RGB controller is a great idea
Cons
- Not a biggy, but they should make the PSU Shroud easily removable
- Does not offer additional SSD Trays
- While 6 drives is nice, since they have 2 options on top of the PSU shroud, should provide more trays for more options
- Does not offer alternate side glass panel for purchase
- eATX is offered and works, like on all cases, it feels like an afterthought
Being that I have to review many different types of components, I feel like this case offers the best options out of any of their prior cases. eATX support while it is there, suffers a bit. The rubber grommets are great, but when you have a full eATX board, there’s not much you can fit through there as you saw in my build video.
The placement for the rubber grommets does not work for the ATX, EPS cables and PCI-e cables, so they have to be routed differently. While the alternate routing works, it will impede airflow a bit and just doesn’t look as nice. This is not a Fractal Design flaw alone, most if not all cases from all manufacturers that support eATX boards suffer the identical flaw. Just a thought for Fractal Design though, on their next rev.
Aside from that, the case layout is ideal for any situation, although for minimalists, it might be too much. Up to 5 SSD’s or 3 x 3.5in drives and 2 x 2.5in drives, making sure you never run out of space.
R1 RGB controller is great idea, keeping those of us that do not have RGB header capable boards happy. Honestly, before I reviewed this case, I was not caught up in the RGB craze, but I think I get it now… a bit late but better than never.
For those of you that would like a video overview of this review, you can check out this video covering everything you have seen here,… well minus the build of course.
[P_REVIEW post_id=1084671 visual=’full’]
The best of the S2 series and the R6 brought into one, great job Fractal Design.
Thank you Fractal Design as usual for creating top notch cases. I give you 9.9 Stars out of 10 for an Editors Choice Award.
Congratulations Fractal Design.
Back to: Intro
We are influencers and brand affiliates. This post contains affiliate links, most which go to Amazon and are Geo-Affiliate links to nearest Amazon store.
I have spent many years in the PC boutique name space as Product Development Engineer for Alienware and later Dell through Alienware’s acquisition and finally Velocity Micro. During these years I spent my time developing new configurations, products and technologies with companies such as AMD, Asus, Intel, Microsoft, NVIDIA and more. The Arts, Gaming, New & Old technologies drive my interests and passion. Now as my day job, I am an IT Manager but doing reviews on my time and my dime.